How to Prepare Your Pool for Winter


Your pool is much more than a luxury, it’s a major investment that you’ve likely put a lot of money into maintaining. So when the weather starts to shift from the balmy summer to the brisk fall, you need to act quickly to get it ready for the freezing winter ahead. Insufficient preparation can wreak havoc on your pool. By the time spring comes, you’ll have burst pipes, ruined filters, and an algae-ridden body of water to deal with.

We’ll discuss the most essential things you can do to prepare your pool for winter so when next spring comes, you can open it with no problem.

When is the Best Time to Close a Pool?

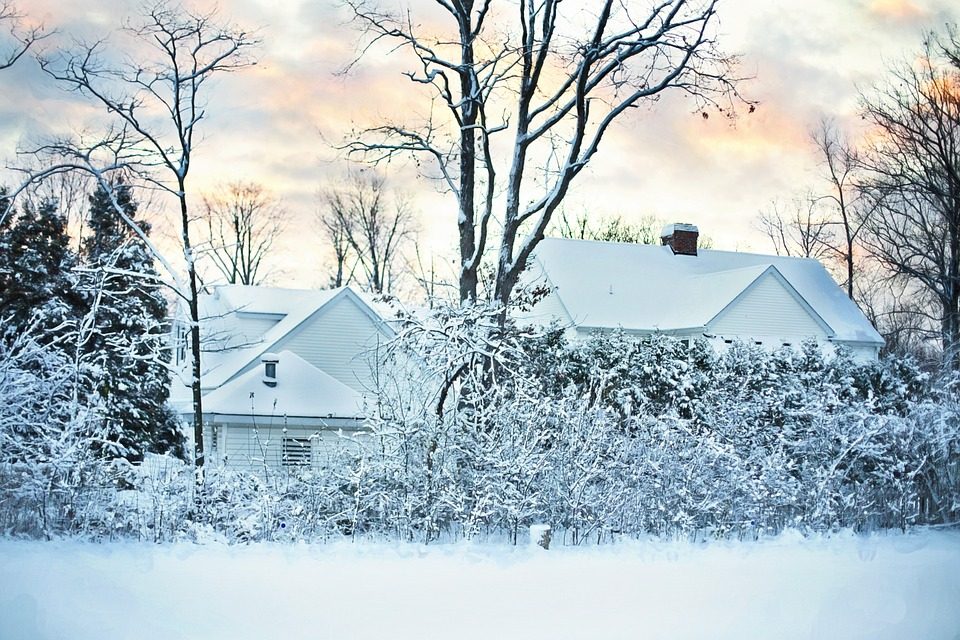
Depending on where you live, the time to change your pool is different. If you live on the west coast, for example, you likely never have to worry about closing your pool. For people on the east coast and throughout the midwest, however, it’s often best to close your pool towards the end of September.

The time to close your pool depends on the temperature. It’s important to fully close your pool before it gets too cold out, or a number of issues may occur. The temperature will also depend on your location, but once the fall chill does start to creep in, it’s time to put the swimsuit and beach towels away.

How to Properly Prepare Your Pool


1.   Clean the Pool

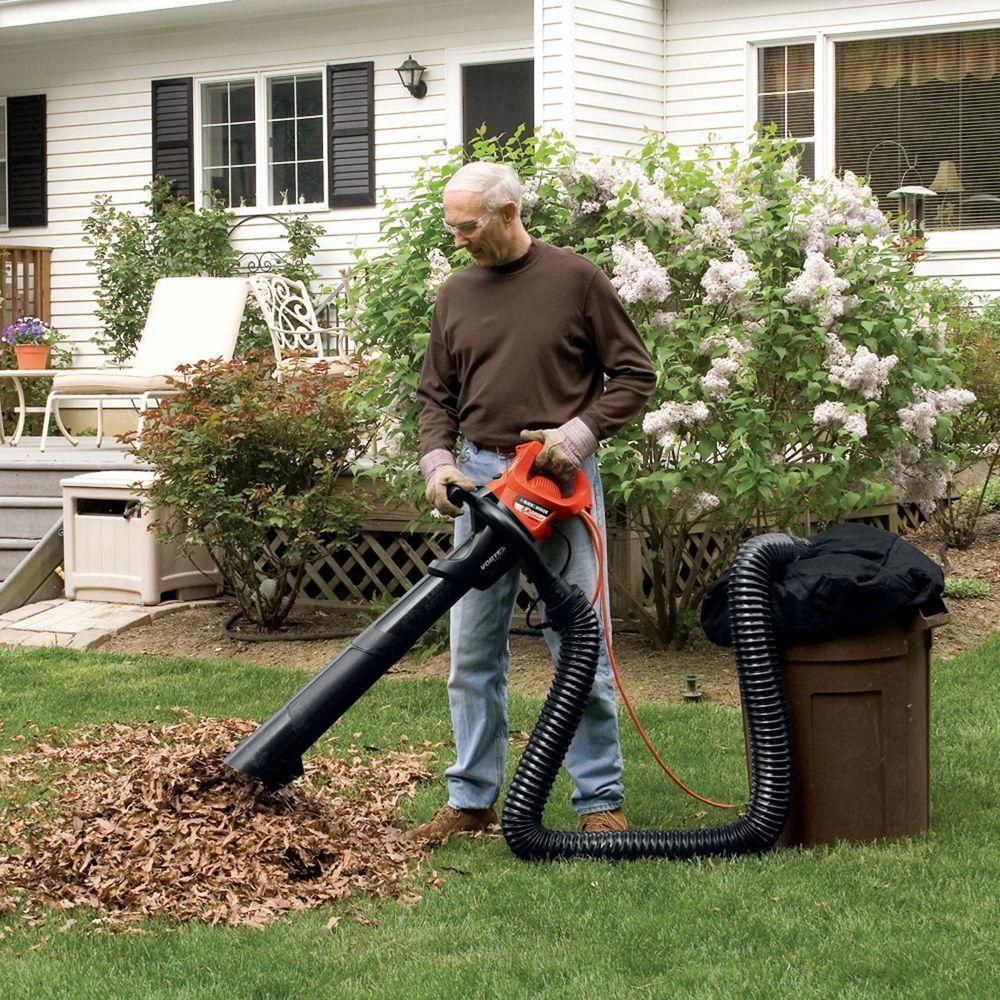
Before you think about throwing your pool cover on and forgetting about your pool until next spring, it’s important to clean it. Scrub the walls and floor of the pool as best as possible, vacuum any leftover dirt, and clean all debris from your filters. This will prevent excess algae from building up over the next few months, preserving the integrity of your pool as a whole until next year.

2.   Test the Levels

Although you won’t be swimming in your pool until the weather gets warmer, you should test the water’s levels to make sure the pH, and minerals are balanced. Once you’ve balanced everything, add winter chemicals to prevent algae from infesting the water.

Algaecide and pool enzymes can provide sufficient protection and ensure the water remains clear until you open it again. Shocking the pool one last time and adding chlorine tablets can also help.

3.   Lower Water Level

It’s important to lower the water level before covering the pool. There are a number of types of pool covers, so make sure you understand the requirements based on your type of color. You can find this information by searching the brand or calling the manufacturer.

Blowing out your pool’s lines is essential before the winter weather comes in. If you don’t, your pipes will likely freeze, burst, and force you to spend a lot of money replacing them. It’s best to hire a professional for this as it can be tricky. Antifreeze can also be used to further prevent any burst pipes. If you’re concerned, you can call your local plumber.

4.   Cover Pool

Before you can finally put the cover on your pool, be sure to remove any ladders, rails, and other accessories from the water. Leaving them in the water throughout the winter could cause them to rust, especially if you have a saltwater pool.

Now that all preparations have been taken care of, you can put your pool cover on and set up your pool pump if necessary. Some pool covers are made to withstand all weather, but there are types that take a little more care. You may have to help keep the cover in good standing, such as removing snow. Keep in mind there other steps and hacks when dealing with an above ground pool.

After properly preparing your pool, when you’ll be able to reopen your pool in the spring with little to no issue.


Gas or Electric Leaf Vacuum Blowers: Which is Better?

Gas or Electric Leaf Vacuum Blowers

The fall season brings with it a steady collection of leaves accumulating on the grass and sidewalks. Unless you are a glutton for punishment, utilizing a rake just isn’t a good option for time management or your back. Leaf vacuum blowers are a much better solution for quickly gathering those leaves together which maintains good curb appeal. Leaf blowers come in two different varieties; gasoline-powered, and electric power.

How do you know which one is right for you?

Depending upon a few factors, one option might be better for you than another. You’ll need to consider a few factors in your decision; the size of your property, your budget, and how much weight you’re comfortably able to carry around. Once you decide the answers to these questions, selecting the right leaf blower will be a breeze.

How Large is Your Property?

An important aspect of selecting a leaf blower is determining what’s best for the size of your lot. While both gas and electric blowers perform well, if your property is larger than an acre in size, the battery of the electric unit may not last long enough to get the job done. While an electric model can handle a smaller yard easily, you may want to consider a gas model if you have a bigger job. Gasoline leaf blowers can operate for well over an hour and then immediately refuel and continue operation.

Electric battery models operate for only as long as the battery has a charge and then must be plugged into an outlet for an extended period to recharge. Electric corded leaf blowers can continue operation as long as necessary. However, to complete the job, you must have a long enough extension cord to allow you access to your entire property.

What is Your Budget?

Both gas and electric vacuum leaf blowers come in at many price points. Typically, the electric models are less costly and the gasoline units more expensive. If you have a small to medium-sized property, either option would be a good choice. Although, if you are looking to save money you might consider the electric model.

Gasoline leaf blowers, on the other hand, are usually more powerful than electric units. This extra power can come in handy when the leaves start clinging to the grass or become weighed down by moisture. The gasoline model can blast through those piles of stubborn leaves and help get the job done faster.

Gasoline Models Weigh More

One advantage the electric leaf blower has over the gasoline model is the weight. The electric motor is lighter and even with a battery pack attached doesn’t equal the weight of a gasoline-powered motor. Carrying a gasoline-powered leaf blower around can become tiresome. There are options for straps that go over the shoulder for additional carrying support. However, if you have a large area to cover you might find yourself constantly switching arms while holding the leaf vacuum blower.

The Right Question: Which One is Better for You?

Consider the previous points made regarding the size of your lawn, your budget, and the weight of the unit itself. Both gasoline and electric vacuum leaf blowers have positives and negatives. Either type of leaf blower will help you get the job done. But one model might serve you better than another. Take the time to consider which model will help you tackle fall with ease and keep your property looking its best.


5 Ways to Enjoy Your Backyard in Winter


Many of us regard winter as the most wonderful time of the year. With Thanksgiving and Christmas to look forward to, spending time with our loved ones is key for keeping spirits up, especially in 2020. However, far too many homeowners neglect their backyard in the winter months, claiming that it is too dark or too cold to enjoy the outdoors. Whether you want to spend more time outdoors, or you’re thinking of selling your property, here are five ways to get your backyard ready for winter.

5 Ways to Enjoy Your Backyard in Winter

Add Lighting

As the winter months roll in, it starts to get darker earlier. If you enjoy being outdoors but don’t want to go inside when the sun goes down, adding lighting in your backyard is the way to go. Whether you opt for LED lights or solar, scattering them around will illuminate your outdoor space. Regardless of where you live in the country, it’s a good idea to purchase waterproof and rechargeable lights that will work in all weather conditions.

Add Color

When temperatures begin to fall and the colder weather sets in, many people notice a decline in their mental health as a result. Adding color to your backyard can make all the difference and help you enjoy your outdoor space. There are lots of winter plantings you can put in your backyard that will not only add a pop of color but help you think more positively. Although winter is notoriously known for its dull and drab weather, you will be surprised at the health benefits you can gain from adding a splash of color to your backyard.

Install Heating

If you’re hosting Christmas this year and having your family over to celebrate the festive season, spending time outdoors under the moon and stars with your loved ones can serve as the perfect backdrop for making everlasting memories. To keep warm and cozy once the sun goes down, having a patio heater near your seating area will help warm up cold guests. If you have enough space, adding a fire can be the perfect spot to gather around, drink hot beverages, and roast marshmallows.

Purchase Weatherproof Furniture

The last thing you want is to head out into your backyard to find your furniture ruined by the colder weather. With many parts of the US prone to severe storms, floods, and hurricanes, you need to invest in weatherproof furniture that will stand the test of time. Make sure you buy outdoor furniture that’s made from materials such as teak, steel, or polyresin wicker.

Add a Hot Tub

What better way to enjoy the festive season than by relaxing in your hot tub with your loved ones? It’s easy to see why hot tubs are so popular. Not only do they help you feel warmer and more relaxed throughout the winter, but there are numerous health benefits you can receive too, including relief from lower back pain and symptoms of arthritis.

If you have plenty of outdoor space, there are lots of ways you can transform your backyard, giving you more room to spend time with your loved ones. Executing any of the ideas listed above will help you make the most of your outdoor living space, regardless of the season.


Top Tips to Help Prep Your Home for Winter Storm Season


While they are words that most people don’t want to hear, the fact of the matter is, winter is coming. In just a matter of months much of the country will be into the winter season and with it comes the strong and rather harsh winter storms. Everyone is well aware of how much damage a strong summer storm can do, but the reality is that winter storms can be just as fierce, bringing with them high winds, ice, snow, hail, and plummeting temperatures that can do a real number on the exterior of your home. This is exactly why it’s important to prepare in advance.

Top Tips to Help Prep Your Home for Winter Storm Season

So, let’s dive right in and look at the steps you can take now in order to prepare your home for winter storm season.

Repair Any Existing Damage

A great place to start is by repairing any existing damage. Perhaps the exterior suffered damage during the summer storm season, such as roof damage, issues with the gutters, a cracked window, siding damage and so forth. As Advantage Construction points out, these damaged areas no longer have the same strength and integrity, which means they are going to have a real hard time standing up to the winter.

Fixing these sorts of problems will help prevent water leaks in the home, heat loss, and prevent a small issue from getting bigger and therefore more expensive to repair.

Secure Loose Items Outdoors

You’ll also want to do a walk around the perimeter of the house and the yard looking for any loose items that could potentially be tossed around in the wind. This can include things like outdoor furniture, toys, planters, and so forth. These items should either be secured, tied down or stored indoors until spring.

Trim Branches that Overhang the House

Again, it’s all about looking for potential issues and any large branches that are overhanging the house, or even close to the house can pose a potential problem. It’s best to trim them back now and eliminate the risk completely. At the same time, any dead branches should also be trimmed so that they don’t fall off and cause damage.

Clean Out the Gutters

Making sure water is able to flow and drain away from the home and the foundation will be another important step in prepping your home. This is the time to inspect the gutters, clean out any debris or build-up, and make sure the water can flow freely.

Make Sure Windows and Doors Are Weather-Sealed

Your windows and doors can act as a huge heat loss in the winter, allowing for drafts and the warm interior air to escape. The good news is that there’s an easy solution, and that’s to caulk and weather-strip the windows and doors. This will provide a tight seal and thereby eliminate that energy loss.

Your Home is Ready for Winter Storm Season

Using these tips will help you to prepare your home for winter storm season no matter how cold and fierce it gets.


A Simple Guide to Maintaining Your Septic System


You need to maintain your septic system to safeguard your property against disaster, like sewage leaks or the septic tank becoming blocked and creating a nasty odor. For those who aren’t sure what a septic system is, it is essentially your own sewage treatment facility for your property. They hold your wastewater long enough to separate waste products so they can be effectively drained away and are most common in rural areas where there are no centralized sewer systems. If you have recently had a septic tank installed and are wondering how to go about its maintenance, then read this article. It serves as a simple guide, breaking down the process in digestible pieces for you.

Monitor Water Consumption

One of the most common mistakes people make with their septic tanks is overloading them with too much water. A large amount of discharge could cause a backup which naturally has some undesirable consequences for your sewage system. To avoid doing this, we recommend monitoring your usage and conserving water wherever you can. For example, don’t take multiple baths in a row, or run your washing machine several times in one day.

Regularly Service

It’s important to service your septic system on a regular basis to make sure nothing has gone awry and could lead to bigger issues further down the line. There are plenty of contractors out there who can do this for you, such as Hall’s Septic Services who specialize in the cleaning, repairing and inspections of septic tanks. They also pump your system, which is essential for breaking down waste products and preventing them from clogging the drains. Also, regular servicing means your septic tank will last for longer.

Carefully Deposit Waste

Most people dump all sorts down the drain, which can lead to the system becoming clogged with waste products that don’t decompose. Eventually, this will cause major problems for your septic tank. As such, you should deposit most of your waste into the bins. It’s especially important to avoid putting things like coffee grounds, baby nappies, face wipes, sanitary products, solid foods and other non-decompostable materials into the drains. Where you can, buy biodegradable products. For instance, high-quality toilet paper breaks down a lot more easily than low-grade toilet paper, preventing septic systems from clogging.

Avoid Oil, Fat and Grease

Septic systems are much like our arteries in that they can become blocked from a build-up of fat over time. Therefore, you should never pour cooking oils, grease and fatty fluids down the drain when cleaning up after cooking. Eventually, these will create a horrible berg of fatty waste products which are a nightmare to clean away. To avoid this, we recommend wiping any oily pans and dishes with kitchen roll before washing them in the sink and depositing excess fat into the bins.

These are our top tips for maintaining your septic system. They’re simple and easy to do, protecting your tank from breaking down or blocking in the future.


Self-Inspection: 10 Key Parts of Your Property That Attract Pests


Are you tired of attracting unwelcomed guests to your home in the form of pests? Pests are a nuisance; if your home attracts them, you need to figure out why and you can only do that through an inspection.

Most homeowners end up calling an exterminator the moment they notice pests. However, you can save some money and inspect your home yourself to determine the reason why pests are attracted to it. You can start with the following 10 parts of your property that are likely to attract pests.

The Garden

The garden is an ideal spot for pests to not just survive but thrive. The soil and plants give most pests plenty of food and space to hide. The plants in your garden are one of the biggest attractions for pests in your home especially if they are unhealthy and not either treated or removed. Homes with an unkempt garden will definitely end up being pest infected.

The most common pests found in gardens are aphids, spider mites, and powdery mildew. If these are not dealt with swiftly, chances are they will make their way into your home.

Houseplants

Similar to your garden, the plants you keep inside can attract small pests. Inside the home, plants usually lack sunlight which makes them vulnerable to aphids, which in turn produce honeydew. Ants are attracted to honeydew and are pretty common in homes with house plants. At the same time, the soil of the plant attracts springtails, especially when overwatered.

To determine whether your houseplants attract pests, make sure to examine them properly now and then to see if there is a trail of ants around them. Also, keep a regular watering schedule and don’t overwater your plants to avoid excessive moisture in their space.

The Trash Area

It is common knowledge that trash attracts pests such as cockroaches and rats. You need to dispose of trash properly and ensure that when you store it in your yard, you conceal it. Leaving trash out in the open until pickup day will attract pests.

You won’t just attract pests by leaving trash out in the open, if there are coyotes in your area, you are likely to attract them also. Make sure all your trash is properly concealed in the trash can until it is time for you to take it out for pickup.

The Closet

On a daily basis, you probably only spend a few minutes in your closet. The rest of the time, it is dark space with plenty of hiding spots for pests such as silverfish, cricket, and carpet beetles. These pests survive on fabrics so the closet is like a buffet reserved all for them.

The Sink and Drains

Sinks and drains around the house present pests such as rats, cockroaches, spiders, and silverfish a way in. It is common to find silverfish in bathroom sinks and shower drains because the pest enjoys products that contain cellulose such as shampoo and shaving foams. Rats have no trouble navigating water as they can swim and cockroaches also see drains as a safe passage into homes.

The Furniture

The furniture in your home is vulnerable to pests when ignored. One of the most common pests found in furniture is the bed bug and that is the one most homeowners look out for. Other pests such as the carpet beetles and silverfish can also be found in the furniture around your home. These pests survive on both animal fiber and synthetic fabrics. So, make sure to regularly maintain and clean all the furniture you have at home.

If you notice bed bugs and other smaller pests, chances are you won’t be able to get rid of them on your own. Call the most reputable bed bug exterminator and they can rid your house of any pest.

The Car

Have you noticed pests such as mice and rats coming from your garage? Inspecting the garage would probably be your first instinct but, don’t just stop there. You’ll need to inspect your car as well because the pests can easily get under the hood or into the trunk. This is especially important if you have a second car that sits in the garage.

Along with rats; spiders, cockroaches, and fleas are some pests that are commonly found nesting in cars.

The Crawl Space

Most homes have a crawl space, this is the area that lies between the bottom of your home and the ground. This space is typically not well maintained, damp, and dark, a perfect shelter for pests. It is common for homeowners to find spiders, termites, and rodents in the crawl space of their home and if they aren’t dealt with, they can and will make their way into your home.

Pets

Pets such as cats and dogs can bring pests such as ticks and fleas into your home. Their waste is also a huge attraction for other critters if not disposed of properly. How well you take care of your pets will determine whether they attract pests or not.

Properly grooming, disposing of their waste, and clean up after their feeding can greatly reduce the chances of attracting unwanted visitors.

Untended Gutter

Clogged gutters, one of the breeding grounds for pests. It’s easily filled with leaves and other debris that if left unchecked can create a perfect shelter for birds, wasps, rodents and ants.

For example, if left untended, wasp nests can become a big problem. Once the nest is big enough for a colony, they can start acting defensively and attack anyone nearby.

Make sure to inspect your gutters and have them cleaned out once every few months to avoid situations like these.

Conclusion

Inspecting your home for pests is just the first step. If you notice any signs that would indicate you can potentially attract pests, you need to address them immediately.

For those that are already dealing with pests, rather than trying to eliminate them on your own, you need to seek help from experts such as the reputable pest control company. Not only are they able to exterminate the pests but also identify the root cause of your pest problem and help you rectify it.


About the author:

With more than 20 years of experience as a pest control technician Luqman Butter has decided to start sharing his knowledge about solving pest and wildlife problems. Luqman currently works for https://www.pestend.ca and believes all pest related problems can be solved through eco-friendly and humane methods.


What You Should Know About Wood Primer and How To Use It


Wood primer is a type of preparatory undercoat coating applied to wood, especially before applying paint to it. Wood primers are designed to increase the durability and longevity of a paint job and ensures improved adhesion of paints to a surface. It also protects the wood surfaces that you plan to paint over.

Primer is one of the important parts of the painting process. It also adds beauty and visual appeal to paint jobs by providing a polished, uniform, and smooth look to structures. Primer also ensures you use a lot less paint during the painting process.

When Should You Be Using Wood Primer?

This depends on the type of wood you plan to paint. If you are painting an unstained new wood, it is best to use a high-quality oil-based primer or a latex primer. If the wood is stained or painted, it is better to go for a stain-blocking primer. More weathered or old wood requires a high-quality oil-based or latex primer.

Why Does Wood Need A Primer?

Primers contain a blend of chemicals that dissolve onto the surface in order to hide any imperfections. Primers are also designed to ensure the wood receives the paint better in the way of improving and enhancing the existing surface. Primers have adhesive characteristics that ensure the paint absorbs and adheres well. A wood primer also assists with hiding small holes present in the wood and it helps to make knots and stains less visible. A primer will ensure that your paint looks better and lasts longer than it would without the primer.

Tips On How To Apply Primer To A Wood Surface

Before you get started, make sure to choose best wood primer which is well combined, and that you are using the correct technique to apply the primer. You can use either a spray, a roller, or a brush to apply a high-quality primer to your wooden surfaces. If you are looking for the easiest way to apply primer, choose one of the spray primers. With a spray primer, you will need to apply a number of coats to achieve good coverage. Brushing does take more effort and time, but the layers will be more even, consistent and thinner.

Every primer comes with its own set of instructions on how best to use and apply the product. However, here are the general steps on how to prepare and apply primer to a wooden surface:

– Clean the surface, ensuring there is no grease, dust, or grime on the wood.

– After thinning the primer properly, apply the product to the wood using a brush, roller, or spray.

– Allow the product to dry for at least 6 to 8 hours before you apply a polishing paste.

– Use a 180 sandpaper grit to sand over the putty. From here you can apply another primer coat.

Experts recommend using a fine-grit sandpaper to achieve an even surface between each coat.

From here your wood surface is now prepared and ready for a paint application.


How to Landscape around Trees


landscaping 2
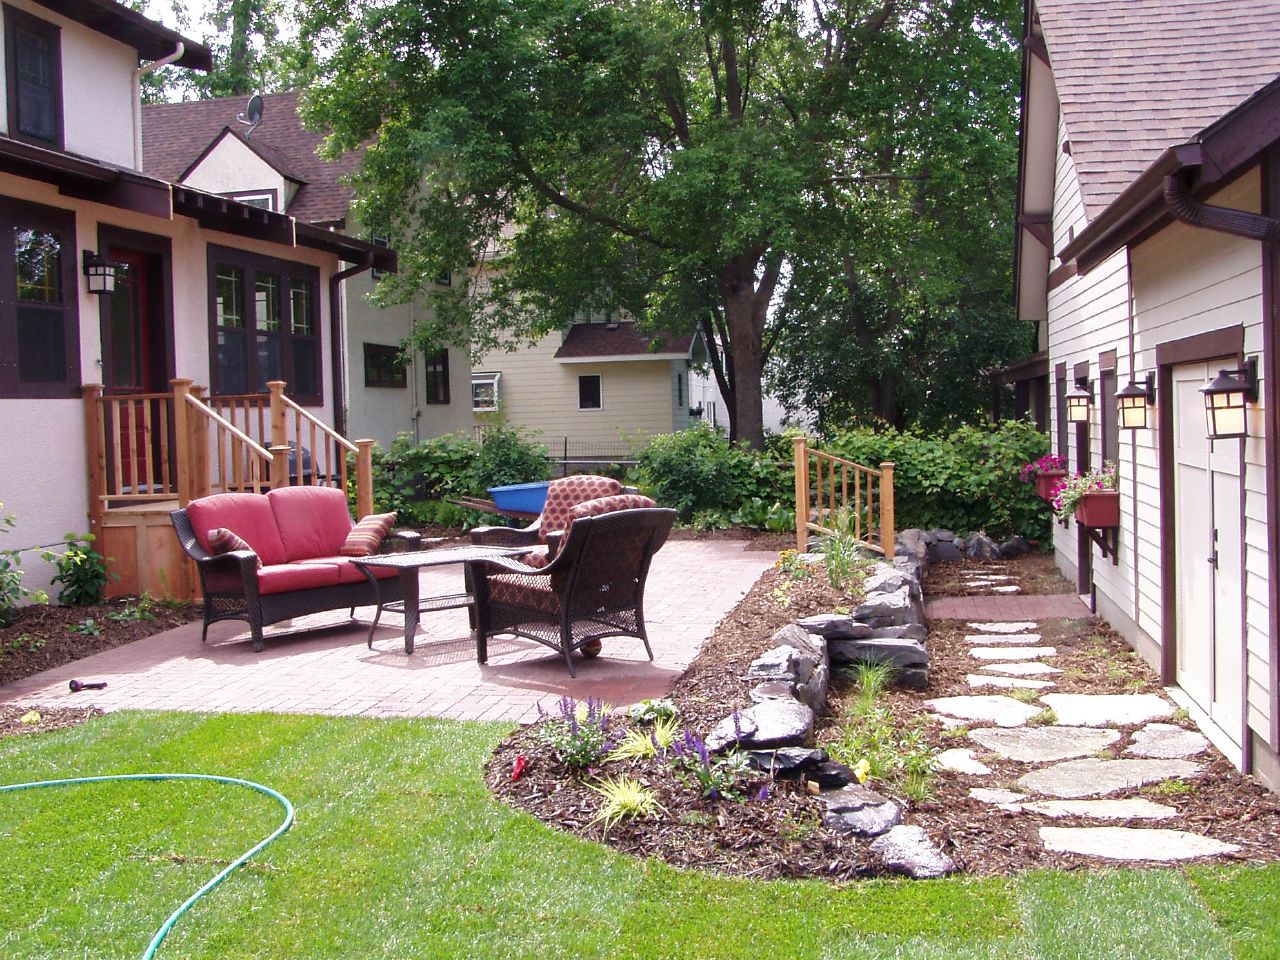
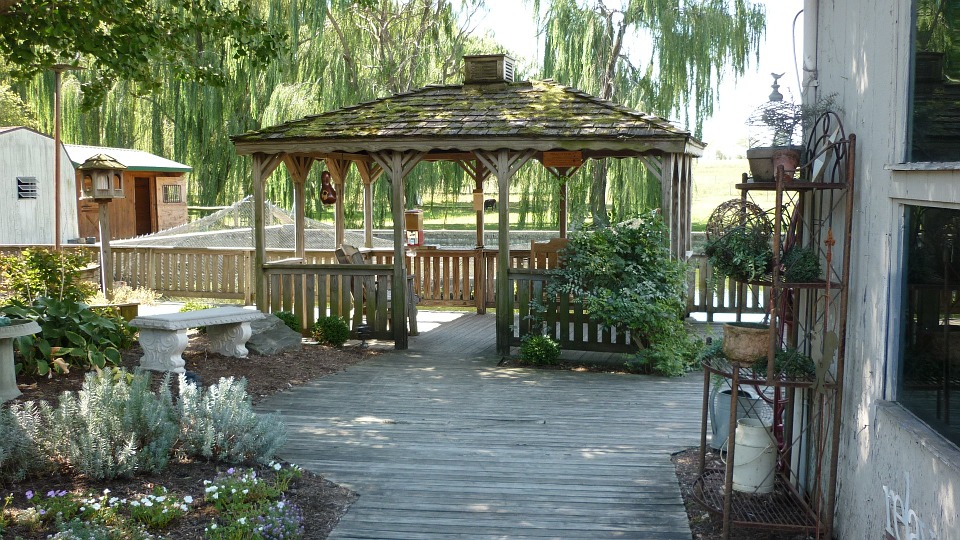
There are certain vital principles that you must keep in mind when you are planning to landscape an area that has trees else. The desired results may not be achieved, and your landscaping can go wrong. Therefore, let us look at some of the issues that you must keep in mind when landscaping around the trees.


  1. Simplicity is the key

If you are designing the landscape around a large, beautiful tree, keep the design simple. If you make the surrounding too complicated, the overall beauty of the tree can get lost. You can try planting simple ferns around the trees. Another good option can be creating a ground cover with periwinkle or the myrtle vine with tiny violet flowers. You can select other varieties that grow well in the shade and can complement the beauty of your tree.


  1. Coordinate colors

When you landscape around flowering trees, you must keep the color scheme in mind when planting the foliage around the trees.  Remember to plan your garden’s colors in different seasons to keep the landscape look like a work of art, a professional from nampa lawn & landscape pros can help you even with changing seasons and the peak blooming period.


  1. Keep in mind the lighting

Keeping in mind the light and shade zones around the trees is essential when you are creating the landscape as the level of light may not be uniform in all areas and all times during the day. Some trees like maple, magnolias may allow more light than evergreens. Place plants that grow well in shades closer to the tree, while those which need sunlight in the outer, sunnier areas will allow your plants to grow well around the trees.


  1. Challenges with thriving

Large trees, apart from less sunlight, also pose the challenges for the roots of foliage around it. These trees have long roots that go deep into the earth, and hence the plants and around these trees will always face stiff competition for water and nutrients and, therefore, will struggle to survive. Thus you have to select tough foliage that can survive under these conditions. Adding mulch around the plants can also help the roots of these plants will keep these new plants well hydrated even in the presence of the deep-rooted trees.


  1. Pay attention to the soil level

Many people create a raised soil level around the trees with a border to plant other things. However, the raised soil around the tree trunk often causes rotting in the bark of the tree and gives rise to infections and diseases that may attack the tree. It is better to create a border that leaves a gap from the tree trunk. If you wish to make a plant bed under the tree, it’s essential to remove the grass before adding fresh soil else. It will be difficult for the tree roots to get air and oxygen, and they may get clogged and will eventually start affecting the tree’s healthy growth.


  1. Take care of Tree Roots

When you are planning a landscape around the trees, it is important not to damage the tree roots while planting other plants. This should be done more carefully, especially for trees with shallow roots or those that have roots spread even above the ground. If you cut damage these roots during landscaping, the tree’s health may get affected. So dig the soil around the trees with utmost care.


  1. Use Stones & Rocks for Maintenance free landscaping

Though plans and lawn around a tree base may look beautiful, they will take regular maintenance. If you do not wish to spend a right amount of you time in maintaining your landscape, make use of bricks, stone and rocks around your trees, Keep the designing sustainable and do not layer the stones or rocks on a plastic sheet and this is will create a barrier for air and water and impact your trees and plants.


  1. Make it a focal point

Using the large beautiful trees as a focal point in your garden and creating landscape around it will give a unique personality to your landscape. If you have a large tree, instead of trimming it down, create the additions like a patio or seating area around it. This will give you a different texture to your landscape while retaining the beautiful trees.


Vinyl: Is It Really a Good Material for Fences?


Before we begin on the topic, let’s make it clear that whether a fencing material is actually good or not, largely depends on what purpose it serves. This is why chain-link fences are excellent options when protection or physical security against potential intruders is a primary concern, but they are not going to be the best for obvious reasons, if you have privacy concerns. Keeping that in mind, let’s now discuss vinyl and what purposes it’s good for as a fencing material.

Vinyl is It Really a Good Material for Fences

The Short Answer

Even with the point about specific use purposes in mind, vinyl cannot be considered as anything but one of the most all rounded fencing materials available for most people out there. So, the short answer is yes, vinyl is a great fencing material in general, and especially for private residences.

The Long Answer

The claim for vinyl being one of the best, if not the best fencing material available today is often made by companies that deal in vinyl fencing exclusively. However, that claim isn’t totally unfounded, because it just has too many advantages over almost every other fencing material we generally use. To shed more light on the kind of advantages we are discussing here, let’s get into the details.

Moderate Protection

The physical protection which a vinyl fence can offer is somewhat limited, as compared to its metallic and hardwood counterparts such as steel and cedar. In spite of that, high quality, thick vinyl fencing can also provide significant physical protection against potential break-in attempts. It may not be industrial grade protection, but as far as home invasion is concerned, thick vinyl fences can provide dependable protection.

Privacy

Make your vinyl fencing high enough and no one will ever be able to peek in while passing by. There are no gaps (unless you want gaps) in vinyl fencing, so privacy is guaranteed.

Design

While it used to be boringly white at one point in time, that is no longer a limitation. Pay a visit to Northlandfence.com if you want to choose from vinyl fencing options that come in a wide range of colors, designs and patterns. They even offer a non-prorated lifetime warranty on all their vinyl fencing products and installations.

Lifetime Investment?

Unlike any other material used for building fences, vinyl does not or rather cannot rot or rust. This technically makes vinyl fences a lifetime investment. This means that come rain, snow, ice or sunshine, your vinyl fences will remain unaffected by the weather for decades.

Zero Maintenance

Unless there’s intentional, natural or accidental trauma, vinyl also doesn’t get chipped, and it won’t peel away or develop cracks under normal circumstances. The color may or may not fade after a long time though, depending on the quality of the material itself.

It’s not just one aspect of the material that makes vinyl perfect, but it’s the combination of it all. If you take the time to do some of your own research, there is no other fencing material in the market that can cover so many fronts, especially at that price point.


How to revamp your backyard

2662428584_45604d474b_o


Your backyard should be an oasis for you.  It’s your private green pasture that you can mold as you see fit, without changing the curb appeal of the front of your home.  Unfortunately, this freedom leaves people frozen in indecision with what to do with it.  This need is reasonable, all that most people need is a push in the right direction.

Here are some tips to give your yard the life and beauty you’ll want everyone to see.

First, Plantlife

The state of your greenery is paramount to your backyard.  You need to ensure that you’re building up from a good base so that you don’t have to try and put in flower beds around furniture.

Consider the flow of your yard

Mow all of your grass to start, make sure you weed and rake if there are stray leaves.  From there, decide what portions of your yard will go mostly unused.  The best places for flower beds are close to the home, no more than three feet out.  With a more substantial yard, you could get more creative, heavily consider what space you have to work.

Go for flowers that are local to your area, and avoid any plant life that might cause allergy issues for anyone in the home.

Shade

If you live in a warmer climate, you understand the need for shade.  In summer, standing in the shadow could mean it feels ten to fifteen degrees cooler.  This effect is due to a lack of solar radiation that you would usually feel in full sunlight.

Look at what kind of shaded structure would work best for you.  Smaller yards may need a sun umbrella or two, but with larger yards, you can put in a structure like a gazebo or build out a structure with a permanent roof.

Furniture

Again, this option has to do with how much space you have.  Define areas with lawn furniture.  You can even put in a patio for lounging, and layer it so that a lower section is for grilling and enjoying drinks.

Go for a furniture style that compliments the rest of your home, while also keeping budget in mind.  It’s easy to spend a lot when it comes to these, so keep an eye out for a Home Depot coupon code or other things that can help you save some cash.

Water Features

Putting in water features can be the most exciting part.  It can be anything, from a coy pond to a Jacuzzi: but keep a budget and a vision in mind.

Moving water is for the best if you’re in a humid area since it’ll stop mosquitoes from breeding, and consider what kind of enjoyment you’d like to get out of it.  If you want to swim, and you have space, plot out a pool!  If pool upkeep is a nightmare for you, consider putting in a waterfall fountain, or something else that fits your style.


The most important thing about a backyard is that it matches your style.  So take your time, think deeply about that, and you’ll have no trouble creating a backyard perfect for you!


The Homeowner’s Guide to Shed Insurance

shed plans


With the average price for materials ranging between $17-$24sqft, it can cost homeowners about $2,500 to build a typical 10’x12′ DIY shed. Depending on the size, style, siding, roofing, and extra features such as plumbing, electrical, overhead doors, or solar panels, the cost can soar upwards of $10,000 or more. Then, if you consider what’s being stored inside of your shed? The total value of the structure and its contents can undoubtedly raise a few eyebrows and questions, especially when it comes to being vandalized or totally lost due to a natural disaster or fire.

There are several reasons why homeowners might have a shed on their property. In most cases, these structures are covered by their homeowner’s insurance policy; however, there are also cases where they are not. The biggest mistake that some homeowners make is failing to call their insurance company to see if the new shed and its contents will be covered under their current policy. This guide is designed to help the average homeowner understand how it works with some tips along the way, and without further ado, here’s everything you need to know about shed insurance.


What’s Other Structures Protection?


Whether you have a shed, detached garage, gazebo, chicken coop, fence, or in-ground swimming pool located on your property? In the world of insurance companies, this type of homeowner’s insurance policy is known as other structures protection. In general, the standard coverage is about 10% of your entire home’s insurance policy. For example, if your home is insured for $150,000? Under the other structures protection policy, your shed and other outbuildings would be insured for $15,000.

It’s essential to call your insurance company or read the fine print in your homeowner’s insurance policy to know what the number of your coverage limits are. The next thing you need to know is the value that your new shed brings to your home? If your new shed has an amount more than what your current coverage limits are, it’s a good idea to have your insurance agent raise and adjust your coverage limits to protect your investment.


What’s the Value of Your Shed?


DIY sheds generally include just the cost of materials to build it and perhaps a good shed plans from Shedplans.org to work from, but you still need to know what it’s worth before you talk to your insurance company about raising your rates. A simple way to get a rough estimate of your shed’s value is by taking the cost of materials and tripling it. Most professional contractors charge about two thirds above the cost of materials for their labor.

On the other hand, you can expect that most insurance companies will want proof of the structure’s existence and paperwork backing its value, especially if they’re going to write you a check to repair or replace your shed. In cases such as this, it’s always best to have a home appraisal conducted. You can easily find a professional with any appraisal management company. These experts are certified and licensed in their perspective states or countries to determine the value of a structure objectively, fairly, and without bias opinions.


Does a Homeowners Insurance Policy Cover the Shed Contents?


Most homeowner’s insurance policies will have a set amount of protection for personal property. This also includes the contents stored inside of your shed or other outbuildings. The amount of protection is typically determined by the amount of insurance outlined in your home’s insurance policy. While insurance companies cover certain items stored in outbuildings such as ATVs, lawnmowers, power equipment, garden tools, there may be a limit to what your insurance company is willing to fork over.

On the flip side of the coin, items subject to damage from moisture and humidity like clothing, photographs, and other personal effects, in most cases, wouldn’t be covered by your insurance company. Therefore, these types of personal items should be kept safe in your house to qualify as being insurable under your insurance policy’s protection for private property.


Are There Any Limits on Shed Insurance?


In the real world, although your shed and its contents are covered under your homeowner’s insurance policy, it’s wise to talk to your agent about your policy’s stated coverage limits. This allows you to make a few different decisions based on what best fits your needs.

For example, let’s say your shed’s finished value is $5,000, and you’re basically using it for storing lawn and garden tools and supplies with a riding lawnmower that’s valued on the lower end of the scale? In most cases, this will not affect the limits on your homeowner’s insurance policy, which also includes the other structures protection plan. Meaning, your current coverage rates, and limits will not be affected.


When Does a Shed Limit Apply?


When you have specific items stored in a shed or outbuilding, limits will apply. As an illustration, if you have a $10,000 side-by-side ATV in your shed and a natural disaster or fire occurs? There may be a limit of $2,500 on the entire contents of the shed, including your expensive toy. Other items where restrictions may apply include but are not limited to:

  • Motorcycles
  • Snowmobiles
  • Vehicles
  • ATVs
  • Guns & Hunting Bows
  • Woodworking equipment
  • Expensive power tools
  • Small farm machinery
  • Zero-Turn riding lawn mowers

Pro Tip: To protect expensive items that are stored in your shed, talk to your agent about additional coverage for these specific items. You may discover that it’s best to insure them separately as opposed to raising the coverage and rates on your homeowner’s insurance policy.


Is There Anything Else That I Should Know About Shed Insurance?


One key component to shed insurance for theft claims is to make sure that you have either a keyed lock or a paddle lock installed on the doors of your shed. Contrary to what you may believe, some insurance companies will not give you a dime if you don’t have a lock on your shed, and theft occurs.

Anytime that you have a question about what your homeowner’s insurance policy covers, contact them and get it to explain to you because the information you need to know is usually contained in the small print that every homeowner hates to read. And lastly, you can certainly benefit from building a new shed yourself, but make sure you are covered.


3 Ways to Increase Your Property’s Appeal by Renovating Your Yard


Homeownership is one of life’s greatest milestones, and owning a property is often one of the biggest financial investments we will make in our lifetimes.

fhgjfdgjdfjdj

Most people will pay a lot of attention to the interior spaces of their homes. Every year, millions of dollars are spent on interior design, home appliances, and features that add both conveniences and value to a property; but not enough people take the time to add some value to their gardens or yards.

Here in this quick guide, we are going to look at the three best ways to add some value and features to the outside of your home to make it one of the most desirable houses in the neighborhood and help you make a quick and profitable sale when the time comes to move on.

Use Decking to Take the Inside Outside

One of the most popular uses for a garden or yard is to use it as a cooking or dining area when the weather permits.

Having a space in your garden for dining is a great way to add value and character to a property and having a barbeque or outdoor oven nearby means you can take your mealtimes outside and enjoy good weather all day and into the night.

Use wooden decking to designate a dining space in your garden or yard, and give you a flat and even surface for a dining table or garden furniture. Decking can be incredibly good value and easy to install. Features like this are fun for you to use, and more than pay for themselves in property value.

Landscape Your Garden or Yard

You may well have a lovely garden on your property, but with a little extra work and investment, you can take a garden to the next level and give your home the ‘wow’ factor with a landscaped and themed garden or yard.

Giving a garden a theme can be a fantastic way to show off your outside space and give you more reasons to make better use of your garden or yard. A Hawaiian theme is a popular choice with a lot of homeowners as it is easy to achieve, uses hard-wearing and low-maintenance plants, and can incorporate desirable features like a hot tub or a fire pit.

Re-Lay Your Driveway

If you have a driveway in the front of your home, you have a great opportunity to increase your home’s ‘curb appeal’ by re-laying and recovering your driveway with a new surface that is easy to maintain.

Asphalt, or blacktop, has become the driveway covering of choice recently as it is inexpensive, quick to install, is easy to maintain and lasts a long time. At Richfield Blacktop, you can get a comprehensive planning service and a professionally laid surface for less than ever before. Having a blacktop surface also creates an opportunity to use your drive for sports like basketball and street hockey, which are popular with teenagers. You can even get ‘court markings’ painted on your asphalt, adding a feature to your home.

Our homes are one of our life’s biggest investments, and many of us will have our financial future tied closely to our home’s resale value. Small, high-value investments like these can make a huge and profitable difference to a home’s resale value, and our retirement.


A small guide to swimming pool styles

gjkhkghjkhjk

Swimming pools, just like houses, come in all sizes and styles and you have a whole variety of models to satisfy your family with. There are lots of ideas worth trying, but finding the right one requires time and patience. Luckily for us, new technologies make it a lot easier to install and maintain a pool in your garden. If you’re planning your DIY small project there is no reason to waste your time and be unmotivated when you have so much information on how to start if you already established a budget by now. Be aware of your family needs and taste, and patiently plan your next move. A spacious landscape is essential when you decide to incorporate a swimming pool in your garden, so plan carefully. Here are a few options of plain ideas perfect not only for you two but also for the little ones:

The Average Rectangular Pool

The main purpose of having a pool in your backyard is to have fun and relax. This simple style with a symmetrical design and blue tiles is perfect for those who want to stress the importance of big spaces and important gatherings. Its concept is plain but satisfying when it comes to recreational purposes. The pluses this pool offers is that you could delight the small ones incorporating all sorts of fun ideas like tunnels, caves, crazy slides, ideal for all ages. The maintenance should not be a headache, especially with lots of necessary equipment and information at your disposal. You could pay a visit to the nearest store or do small Internet research where you’ll find plenty of helpful experts like 1st Direct Pools and lots of handy details to begin and maintain your small project.

The oval shaped pool

The oval-shaped pools maintain the cosy design and offer your back-yard a much-desired appearance. Its smooth appearance and the total lack of corners makes it ideal for late-night pool-parties and not only. Is one of the frequently used designs and the simplest choice for your garden. Thanks to it a plain style you’re allowed to decorate and designs its surroundings as you wish. You could use decorative pave stone with different patterns or build amazing travertine terraces to upgrade this beautiful place. With a bit of imagination and patience using colorful ambient lights and the right choice of plants to surround it, not only your pool but the entire garden can be entirely transformed according to your wish.

Above-ground Pool

Have always been a choice for starters. They have become more alluring in time for those who don’t have that much space available in their gardens. This style is more appealing for all types of family, are much easier to maintain when its design makes harder for natural debris to get into the pool. Its main advantage is portability, the above-ground pool is suitable for every type of land even on rocky terrains. Its shape should not impede if you wish to transform your backyard into a much-desired oasis.

The Lazy River

A charming addition to your backyard, the lazy river is ideal for people who are already bored with those plain pool ideas. Frequently seen in hotel resorts, at a high scale, the river shaped pool requires a lot of space but also can be incorporated and designed for private homes. Just imagine how many plants and decorative stones you could place along this river. Its design allows you to maintain a jungle-like aspect and play with a diversity of greenery. The lazy is one of the craziest and most wanted projects you could try in your backyard and you’ll never get bored with its complex design.

Weston Style

Ideal for couples this small oval-shaped pool offers a dramatic surrounding. Its originality consists of bluestone pavement presenting an oasis-like ambience. If possible, you can spice up its style using huge rocky stones and ferns to remind you of your last mountain trip. It requires simple maintenance, and the necessary equipment is to be found almost everywhere.

Lap pool

Perfectly designed for fitness and health purposes, this long and narrow pool has almost 45 feet in length. The lap pool has been first designed in a rectangle form by the ancient Greeks and Romans, for athletic purposes like nautical games or military exercise. They’ve gained popularity as residential terrains have become smaller. To maintain the heat in your pool during cold days and reduce the utility bills, a cover should be handy.

Natural pool

Ideal for those who love gardening this lake like style, allows you to set free your imagination stream and experiment with a variety of wild plants and moss. It can be designed in a rustic manner with waterfalls and boulders. Natural pool requires more attention especially when you have to maintain a wild aquatic landscape. This charming design is reinforced with polyethylene, so-called “regeneration zone” which functions as an organic cleaning zone. The aquatic landscape is given by the variety of wild pond plants and grass you choose to incorporate. Its maintenance could be difficult if you don’t have excellent gardening skills.

Garden Island

For those who want to maintain a tropical vibe in their backyard, this pool is brilliant. Undoubtedly, you could use a huge variety of tropical plants to decorate your island, like Anthurium, The Bird of Paradise, Ficus and Palm Trees. Tropical plants require plenty of sun and humidity, don’t forget to tend them correctly if you wish to maintain your tropical ambience. This is one of the most common styles of pools and building don’t require too much budget or time. The Island Pool can be built at any scale for any type of backyard and is enjoyable for every age. Your kids will love reaching and conquering the island every time they’ll get in the pool.

Finding the perfect swimming pool for your recreational space should not be a hassle, especially when you’ve already planned your projects and gathered what is necessary. It is an enjoyable process through which you can discover and apply your longings.


DIY Projects You Don’t Need a Pro For

8216770915_d99f7effce_b

If you’re itching to fix up your home, but don’t have the cash to pay a professional to do the work for you, fortunately, there are many projects homeowners can do themselves to improve their home’s value, look, and functionality. Don’t be afraid to get creative and get your hands dirty – these DIY projects really don’t need a pro, just a little time and effort.

Backsplash

Professionals typically charge around $60 per hour for labor costs to install a new backsplash. Although they make look very difficult to install, any homeowner can do it themselves with a little research and a few tutorial videos. The only tools and materials you need are a level, tile cutter, spacers, adhesive, grout, and of course, the tile. Intricate tiling or mosaics come with a mesh backing for easy installation, so don’t let the beautiful detailing scare you.

Outdoor Fire Pit

 If you own Raleigh real estate, you might want to enjoy some evenings outdoors in the warm summer season. An outdoor fire pit is one of the easiest projects to do yourself and a fairly inexpensive way to add a spot for outdoor entertainment.

You can purchase cement pavers from any major home improvement store, such as Home Depot or Lowes. Before you buy spend some time thinking about how large and how tall you want your fire pit to be. You might even try playing around with them at the store to get a better idea of how it might look. Once you’re home, you can wrap them around an old barbeque ring or place them freestanding. Small square pavers can be used for the bottom or flooring of the pit or you can use gravel or rock. Sand, cement, or mortar can help to fill in any gaps.

Refinish Wood Floors

If you have nice wood floors under those dirty carpets, it’s time to rip those old carpets out and refinish the beautiful wood underneath. While carpeting is preferred by most homeowners in the bedrooms, the look of wood floors in common areas is a popular trend. It’s rather simple to refinish them, too. Start by renting a walk-behind sander from your hardware or home improvement store – the type of sandpaper depends on the finish you currently have. Thick finishes or painted floors initially require coarse sandpaper. Every floor should be followed with a medium and fine paper to achieve a smooth finish; be sure to thoroughly clean up the dust with a vacuum and tack cloth. Next, choose between three finishes: polyurethane, varnish, or a penetrating sealer. Each has its own distinct look and various durability. Follow the instructions closely on the finish you choose.


5 Home Improvements for Families with Children


When you have children, change is to be expected. Not only do you have to adjust your life so it works around your children, but you will also have to adjust your home. When you make changes to your home, you need to make sure you choose wisely. Wrong decisions can reduce the value of your property and can end up costing you a lot more money than the improvement was worth, but when something is done right, not only will your property go up in value, but your family will be happier for it. To help you make the right decision, here are five home improvements you should consider if you have children.

gfmxfxfnxfgnx

Convert Rooms

Reinventing a room can increase the value of your home as well as make your life easier. You can convert spaces that aren’t being used, such as a garage, basement or attic space, into something that could be used. You could change them into an extra bedroom, a second living room, a games room or a room that can be used by your child if they have a particular hobby they want to excel in, such as music, craft or exercise.

Consider a Playroom

A playroom is another good idea if you have the space and they have many benefits. This can keep the rest of your house tidy and in good condition because your children will have their own area where they can play and make a mess. If you decide to move home, this feature would appeal to buyers who have or plan to start a family.

Add an Outdoor Play Area

Exercise and fresh air are essential for child development. If you have a good-sized back or front yard, then installing an outdoor play area for your children is a great way to ensure they get outside, and it will be a safe area for them to do so. If you don’t have the time or skill to create your own outdoor play area, you should contact KG Landscape to help you create a safe, fenced play area.

Increase Storage

Nowadays, people like a minimalist look when it comes to their homes. This can be a hard thing to achieve when you have children, but it isn’t impossible. Making alterations that increase the amount of storage your home has will increase the value of your property and will make it look neat, tidy, and modern while you live there. It can also make your home safer, especially if you have young, curious toddlers walking about.

Improve Your Home’s Efficiency

There is no denying that children are expensive, so making changes that help to save you money as well as increase the value of your property whilst helping the environment are always great ideas. One of these changes would be to improve how energy efficient your home is. You can do this by adding installation, adding renewable energy sources, and installing double glazed windows. These are just a handful of things you can do.

To summarize, when you decide to make changes to your family home, space, efficiency, and usefulness are the key things you need to consider. If the alterations will help you, then there is a high chance it would help someone else, which leads to a rise in property price.


Chic Outdoor Spaces With Pergolas


Entertaining at home is often done outdoors, on the patio, deck, verandah or in the garden. Lush greenery, floral scents, stone paving and well thought out garden beds all inspire serene feelings of calmness and joy.

gazebo-195524_960_720

Even you are an avid gardener, you have spent many happy hours outside either tending to your garden or just relaxing in the sun or breeze. If you enjoy being outdoors, perhaps now is the time to transform your piece of green heaven and introduce some new and exciting features to use outside. Think pergola.

Perfect Pergolas

The quickest and easiest way to transform your outdoor space is by placing a pergola outside. There are so many ways to use these structures, you will never be stuck for pergola ideas.

Pergolas come in a variety of makes. You can opt for the traditional timber pergolas, composite, steel frames or a combination. Add vinyl, cloth or shutters on the top and your pergola can take on many functions.

Pergolas give the sense of incorporating an extra room to an area because of the pillars and roof which mimic a room. This makes a pergola the perfect outdoor addition which will not only delight homeowners but adds value to the property.

Function And Form

Whether you want a practical outside dining area, seating area or relaxing area, you can achieve any look and feel with a pergola.

Warm winter evenings outside with a fireplace and blanket might be your taste or a functional dining area in spring where everyone can sit outside comfortably. Add a bar for that instant poolside feeling.

Perhaps you desire privacy and would like your outdoor spa to be covered, or a quiet place to lie outside and read in the hazy summer days. All these functions can be achieved by using a pergola.

Adding color and accessories to your pergola area is easy when you have decided on what the look and feel of your space should entail. Keeping it classy and chic is just as easy if you plan the accessories properly. Look for weather-resistant or outdoor pieces that will be easy to maintain and move around.

The great thing about having a pergola is that when you decide to update or refresh the look and design of your outdoor space, you simply bring in new elements to make the change. Remember less is more, a cluttered outdoor space is not a haven of peace and tranquillity.

Simply Add Furniture Or Plants

Attaining chic looks under your pergola can be done in so many ways. The best way to add flair and functionality to your pergola is to add furniture.

Do you want a seated area? Add weather-resistant outdoor furniture and pillows. Include small side tables and an ottoman or two to entice relaxing family gatherings outside. If your pergola is poolside, add sun loungers and potted plants with a side table or two.

If you prefer your pergola be a simple extension of your garden added creepers or plants in pots to grow against the pillars and over the roof. Perhaps you can grow a grapevine and add two chairs and a table for intimate Italy like dinners by candlelight.


5 Tips to a Greener Home

Every homeowner wants the best for their family. From cozy living rooms to serene bathrooms, we all want to improve the way we live by considering home improvement projects that help us achieve a more appealing home.

But when it comes to making a home that’s safe and healthy, we will have to look for green solutions. After all, this is the first step to achieving a healthier home.

Let’s check out a few important tips to a greener home.

  1. Ditch commercial materials

Whether you’re mopping up the living room floor or repainting the exterior walls of your home, the materials you use may contain chemicals that not only pollute the air but also cause a wide range of health conditions on your family. You may need to update your shopping list and get rid of brands that are known to contain high traces of cancer-causing chemicals such as glycol and benzene.

If you’re making a change for the better, you might as well look online for shops selling organic materials for your next home improvement project.

  1. Think of a redesign

Often the best way to build a green home is to start from scratch. Fortunately, if you’re planning to settle in a home that’s both functional and eco-friendly, there are local builders who can help you along those lines.

If you live in Baltimore, you’ll find Maryland home builders who can provide custom designs that help reduce your carbon footprint. But if you already have a home, you can always opt for a redesign by using proper insulation, as well as materials and concepts that allow for better cooling and heating.

  1. Upgrade your lighting

If there’s anything that passes as an eco-friendly solution, changing your light bulbs will do the trick. Especially if it has been a while since you last upgraded your lighting, swapping your bulbs with LEDs will really keep your energy consumption low along with your power bills.

  1. Prepare a compost pit

Managing a garden is tough work, but choosing a safe alternative to commercial fertilizers has to be tougher. Sure enough, familiar fertilizer brands could be more acidic and, in effect, harmful to your plants.

Commercial fertilizer might give your garden the lushness it needs, but when it comes to keeping the soil healthy, preparing your own compost using kitchen scraps has to be the better option. It’s organic and it won’t pollute the ground much as synthetic fertilizers do.

  1. Improve your insulation

Whether there’s a blizzard or a heatwave, the thermostat has to be your best bet in keeping your home’s temperature well-regulated. Then again, you will have to pay a price for keeping your home well heated or cooled during extreme weather. By keeping your home well-insulated, you won’t have to set the thermostat high or low.


A greener home is possible, so long as you use the right approach. That way, you won’t have to worry about putting your family’s health and safety at risk.


Eclectic and Awe-Inspiring Design Ideas to Spice Up Your Home

0685684

Your home design is all about you, your partner and your family. Every element present at home reflects a certain aspect of life. The colors painted all over the walls remind you of peace and serenity. The decor beautifying the walls project decision-making and artistic skills. The materials used inside and outside the house, from flooring to roofing, display style and preferences. Spacing and arrangement either defies customs or depicts centuries-old traditions and beliefs.

When buying a new home, building one or making a facelift, you want to be immersed in the process, from planning the details to the finishing touches. After all, the house is your safe haven for years or even for a lifetime. It is a pleasure to flip through the color palette, the portfolio of home decor and the gallery of design ideas you want your eyes to scour. It is also no wonder if you have been making sketches or notes with design ideas for the kitchen, living room, master bedroom or even the garage.

To help you out, we have compiled a list of unique bits of design that may seem bizarre but are actually awe-inspiring ideas that will make your house stand out from the rest.

Pendant Lighting

More and more restaurants, especially intimate ones, are now adorned with pendant lighting that hangs just slightly over the heads of guests. From a style perspective, pendant lighting offers a great addition to your home. But it provides more than just a decorative accent. It also plays a major role in terms of highlighting a room, adding a different glow while incorporating a decorative style.

Now, how do you plan on adding pendant lights at home? You can try hanging them to illuminate your entryway, a kitchen counter or dining table. Although the lights are usually close, you may also opt for a design that spreads all throughout the space you want to brighten up, like a dining table with a large seating capacity.

Natural Lighting and Ventilation

Sustainability solutions start at home. Measures to lower consumption of energy and water do not just lead to lesser utility bills but also contribute less to greenhouse gas emissions. Apart from using less electricity and water, you can incorporate sustainability measures in your building design.

This means you will need less light during the day and nature’s fresh breeze will surround your home, instead of turning on air conditioning for cooling the house. Ask your home renovations and remodeling service provider or a local Excel Builders to craft a design that allows natural lighting and ventilation to come inside the house.

Big Plants

Desert plants are the usual staple for decor inside the house. But it is 2019, and trends change over time. Small plants, flowering or non-flowering, are also attractive. Nowadays, big plants are eye-catching accessories that can attract attention. Before you purchase bold plants, you need to know the relevant information such as water and sunlight requirements to keep plants healthy and green.

Floral Patterns

While people live in a modern world, everybody loves a design redux for styles that were trendy in the past. In 2019, floral patterns have risen to the occasion. You might think the floral pattern thrived during your grandma’s adolescent period. Well, yes indeed. But filling your home with floral design may be a better replacement for bland or flashy colors that dominated the previous years.

Fortunately, floral print today is redesigned with contemporary lines and is much bolder than in years past. There is a list of fresh design for your floral patterns, from orchids to cherry blossoms, to give your room an updated look. 

Multi-Functional Space

Whether you’re limiting furniture to save space or just practicing less is more through minimalism, a multi-functional space can work wonders at home. You can remodel existing furniture pieces or purchase new ones that offer more than just one function, such as a bed with pull-out drawers or ottomans with added storage.

You can also design two or more rooms in one space, such as an office space in a living room or transforming kitchen counters into a workstation. Success in multi-functional space depends on layout. The design should manifest proper balance between two or more functions, and clearly indicate the division between spaces.

Bar Area

You, your partner, friends and family members can enjoy the spirits and entertainment at your home by putting up a bar. You can display your prized wines, tequila and other liquor you want to enjoy. Hang those wine glasses, put in the rotating stools and roll out those barrels to start partying without going outside.

With a bar area, it’s easy for guests to get cold drinks while the party is hot on the dance floor. The bar does not have to be limited to drinking alcoholic beverages alone. You can also have your morning coffee, brew a late-night tea or whip up a smoothie at the bar.

Biophilia

It is now that we are seeing more and more people that are interacting with nature. By installing sustainable solutions at home or in the office, everyone is more involved today than on previous years when it comes to getting closer with nature. At home, people create gardens to commune with the environment. Now though, design has brought nature closer to you through biophilia. A biophilic setting expands beyond houseplants or floral patterns. It has design and decor that bring the sight, sound and smell of nature indoors.

So, how do you create this biophilia? For one, work with water. The sound of flowing water not only relaxes our senses, it also blocks noises caused by street sounds. Another element is to breathe in the fragrant scent of nature with aromatic candles or essential oils. Aim to create a space devoid of gadgets, equipment and screens. A biophilic setting wants us to awaken our senses and technology works against it. Just have a corner where distractions are absent.

There is a Santa Claus list of eclectic home design ideas you can experiment in your new dwelling or for an upcoming renovation. As long as it speaks to your style, character and beliefs, you can never be wrong with your choices.


3 Tips to Keep in Mind While Putting Up a Fence On Your Own


Installing a new fence can be a demanding DIY project if the area to be surrounded is large enough, but it isn’t the most difficult project that you can undertake either. That being said, mistakes are quite common and, therefore, in case you have any plans to set up a few fences on your own anytime soon, it’s worth it to glance over these three tips that even experienced DIY enthusiasts can find useful at times.

5577336463

Asking the All-Important Questions

Before you even start planning your fence installation project, it is of the utmost importance to ask yourself and your family a few questions first, and they should be along the lines of the following.

  • What is the primary objective behind the installation of the fence?
  • Is privacy more important to you or does security take precedence?
  • How much are you really willing to or can afford to spend on your fencing project?
  • What are the choices in material that you have?
  • How much maintenance will your new fencing require and how much will that cost you?

To illustrate why all these questions are so important, let’s get to the next tip.

Understand What Your New Fencing Will Bring With It

Steel fences last for decades. In fact, the steel fencing from Northland Fence comes with a warranty of two decades! It will remain unhindered by the weather conditions as neither the sun nor the frost will be able to even scratch your steel fencing for years. While the durability of steel also makes it an excellent material of choice when security is your priority, it will not provide you with any privacy at all. When privacy is more important, then go for vinyl fencing instead of steel. Northland Fence has consciously switched over from cedar wood to vinyl because the material lasts longer than wood and provides better security than wood as well. As far as the looks are concerned, vinyl fencing can be made to look exactly like cedar, so you won’t have to sacrifice on décor. Besides, to make wooden fences last, it does require a lot of maintenance.

Checking with the Local Zoning Laws

There are limitations, rules, and regulations, alongside must-have safety precautions that every household in a US state must adhere to while putting up any kind of fencing. For example, in order to put up any fences in Minnesota that are more than 30-inches in height, you will require a building permit that will only be granted on producing a satisfactory site plan. These laws change with the state in question, so do make sure you are thorough with your understanding of what you can and can’t do in your area.

Given the time, effort, and knowledge of fine details it requires, it is recommended that you leave any big fencing project to the professionals, as they deal with them regularly and are well aware of them. Nevertheless, if you want to do it all on your own, at least now you are a bit wiser than before!


What’s So Special About Saltwater Pools?

Whats So Special About Saltwater Pools

Saltwater pools are gaining popularity as an alternative to traditional chlorine pools. Saltwater pool owners enjoy key benefits, but it’s important to learn what you’re in for before deciding on the right type of pool for your home.

Here, we’ll clear up some common misconceptions about saltwater pools, and weigh the pros and cons of saltwater pools over traditional pools.

The Basics

In a traditional pool, the chlorine level is maintained by periodically adding chlorine to the pool. However, a saltwater pool generates salt chlorine from added salt by the process of chemical electrolysis, using a salt chlorine generator. This highlights an important fact: a saltwater pool is a chlorine pool, it simply uses an alternate means of chlorination. That being said, a saltwater pool’s chlorine content tends to be much lower than that of a traditional pool. The significantly lower chlorine content in a saltwater pool is much gentler on the skin, hair, and eyes.


But, What is a Salt Chlorine Generator?

A salt chlorine generator is a metal cell that carries a low voltage electrical current. The generator is installed inline the pool’s existing pump system so the water is pumped through the generator before being returned to the pool. As the water passes through the metal cell, the current splits the salt into water and hypochlorous acid, which provides the disinfecting function normally achieved by adding chlorine.

A saltwater generator creates salt chlorine from simple table salt (NaCl), eliminating the need to handle chlorine. Because the chemical electrolysis converts the salt back and forth between salt and salt chlorine, and because salt does not evaporate (unlike chlorine), there is a reduced need to replenish the pool’s chlorine content. Still, the chlorine content of a saltwater pool must be monitored and salt must be added, as appropriate, to maintain safe levels.


Is It Like Swimming in The Ocean?

Note quite. The salinity of a saltwater pool is about one-tenth that of seawater. In fact, a saltwater pool is less salty than human tears. In the ocean, it’s easier to float on your back due to the added buoyancy of the salt. Saltwater pools don’t provide the effect quite as well.

The reduced salt of a saltwater pool in comparison with the ocean has a few benefits. You won‘t feel the “salty” feeling on your skin and hair quite as intensely after drying off. A pool’s water also does not sting your eyes in the same way ocean water will.


How Do I Convert My Pool?

Converting a traditional chlorine pool to a saltwater pool is fairly easy, but can be expensive. First, you would need to determine what size pool you have and install a salt chlorine generator capable of handling the volume. Salt chlorine generators range in cost from several hundred dollars to thousands of dollars. If you are not completely confident in your understanding of the system, you might also want to high a professional to do the installation so as to avoid damage to your equipment. It’s also important to not that the salt chlorine generator will need to be replaced every few years.

Then, you need to determine how much salt your pool needs. Pool salt test strips can tell you your pool’s existing salt level so you can accurately determine how much you need to add. Again, a saltwater pool uses simple table salt which should be easy to find. After you add the salt, you should run the pump (but NOT the salt chlorine generator), for 24 hours to allow the salt to evenly mix with the pool water. After that, you should test the water for appropriate salt, free chlorine, pH, cyanuric acid, total alkalinity, and calcium hardness, before running the salt chlorine generator. This process is referred to as “balancing the pool water.”


Are Saltwater Pools Low Maintenance?

Again, we’re here to debunk a common misconception. While saltwater pools require reduced maintenance steps, the water must still be routinely tested and adjusted to maintain proper sanitation. The salt chlorine generator cell must also be inspected at regular intervals for buildup and debris. Calcium buildup is a common issue in salt chlorine generators.


Is It Worth It?

The general consensus has been that the benefits of a saltwater pool far outweigh the negatives. The popularity of saltwater pools is on the rise as people appreciate the improved swimming experience:

  • The low salinity of the water means that very little salt remains on the skin.
  • The significantly lower chlorine level gives the water a softer feel, and is gentler on skin, hair, eyes, and even clothing.
  • Not having to physically handle toxic liquid chlorine or tablets has also been a big selling point among pool owners. Owners also appreciate the savings from no longer needing to purchase chlorine.
  • Also, there is generally less loss of chlorine to the environment with a saltwater pool than there is in a traditional pool.
  • Restoring a saltwater pool’s chlorine level can be as easy as simply adding some table salt.


While the benefits of saltwater pools are clear, it’s important for a potential owner to know the facts about what they are and what they are not:

  • A saltwater pool is not quite like the ocean. The salinity of a saltwater pool is far lower than that of seawater.
  • Installing a saltwater pool requires a higher initial investment, and fixing any broken equipment can be more expensive.
  • A saltwater pool is not low maintenance. Maintaining a sanitary saltwater pool requires consistency and attention to detail. All other parameters required for a safe pool still need maintenance.
  • Since a saltwater pool simply employs an alternate means of chlorination, many of the same issues that come up with a traditional pool will persist with a saltwater pool.
  • Salt can be corrosive to equipment surrounding your pool.


About the author:

Jason Caldwell is a Seattle-based writer and contributor to lifestyle blogs and magazines. His clients include An online swimming pools supply company. When he’s not running up against a deadline, he enjoys planning DIY projects and cooking for his family.