Redesign: Which Major Home Projects Are Worth It?


A little sprucing up goes a long way in boosting your home’s value, but the money is not always there to do major renovations. You can always try to work on some projects yourself, but others are better left to the professionals. It is important to think about what you want for your home and what your home needs. In this article, we will discuss some major home improvement projects that may be worth your time.

1.  Incorporate Energy-Saving Fixtures

Most consumers prefer home improvements that promote environmental sustainability because these improvements are also energy-efficient and help save more money. If you incorporate more of them into your home, you’ll be a step ahead not only for yourself but also towards building an eco-friendly environment. Consider doing these things:

  • Use sustainable building materials for your renovation
  • Develop more efficient waste recycling systems
  • Install solar panels
  • Rework your home’s caulk in the attic, windows, and doors
  • Replace plumbing fixtures with low-flow alternatives

2.  Upgrade Your Outdoor Space

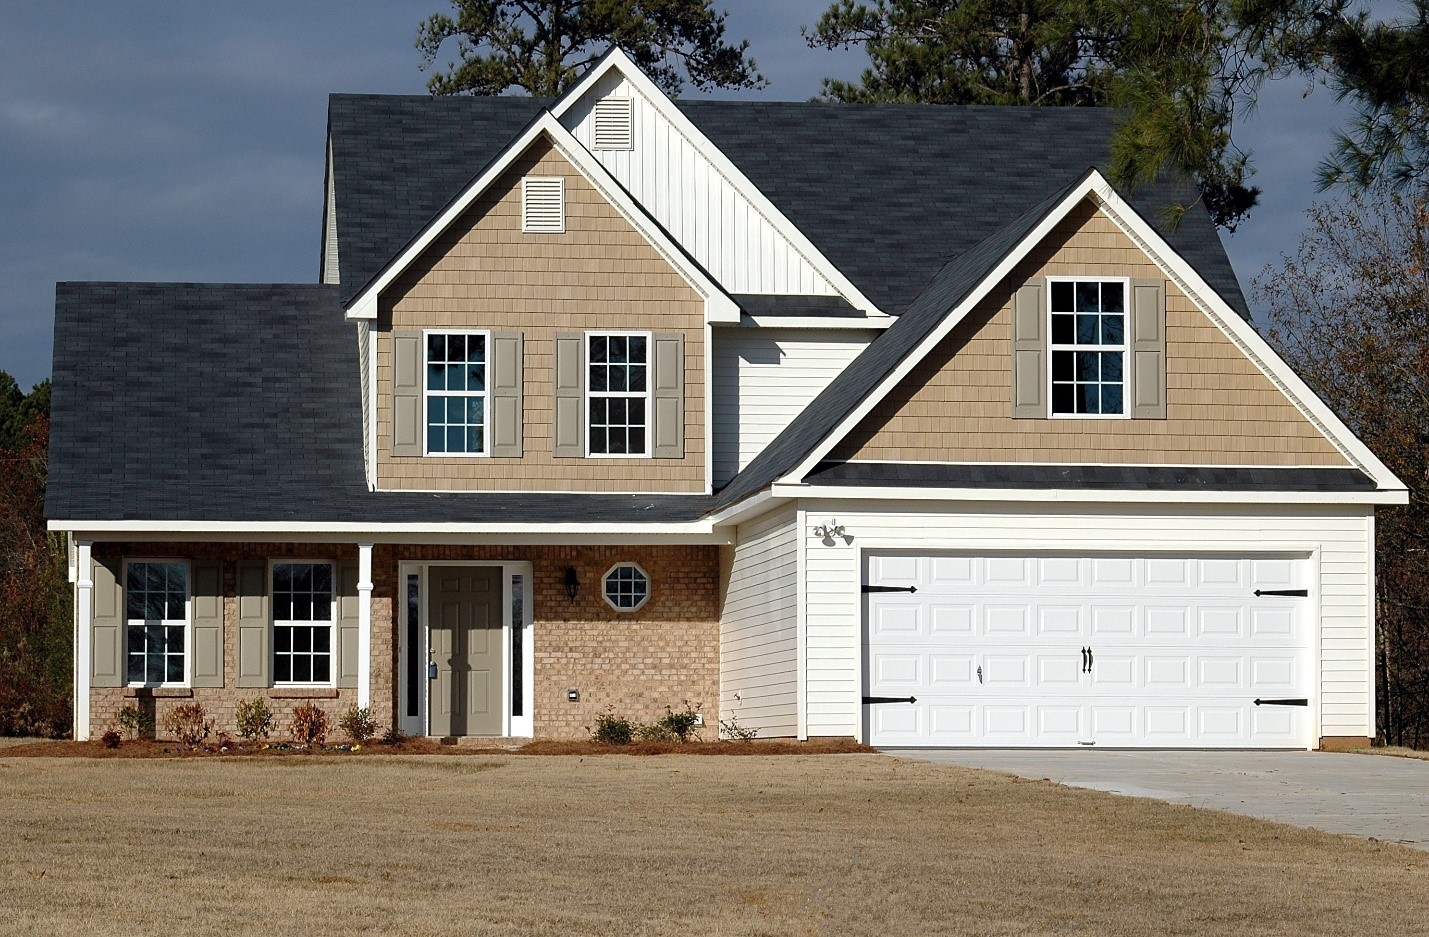
Your home’s exterior is the first impression your visitors get before entering your home. Therefore, you must spruce it up the best way you can. If there’s one thing that COVID-19 taught us is the freedom to enjoy the outdoors. Most people would instead buy a home or work with a custom home builder in Ocean City to create a space where they can rest outside on their own property without restrictions

These upgrades won’t cost you much but will certainly do the trick. Consider the following:

  • Powerwash any concrete surface like your front steps or patio
  • Add a firepit
  • Repaint your home’s exterior, including the door
  • Get a yard professional to reseed and tend to your lawn
  • Repave your driveway and pressure wash it

3.  Expand the Living Area

A home is not complete without a sufficient living room space. It’s the main center for interaction, entertainment, and relaxation. If you have an underutilized space like the attic or basement, you can finish it to create a new living space. You can add a home theater, a library, or a playroom just by taking advantage of under-utilized spaces in your home. It’s typically a less expensive option than a home addition, and it’s a worthy consideration.

4.  Modify the Kitchen

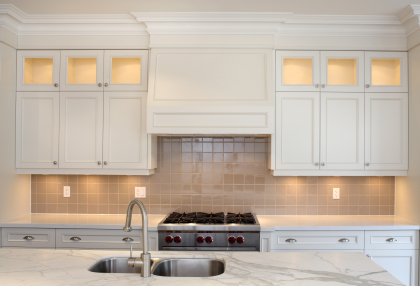
The kitchen is a central functional space in any home; therefore, an upgrade is worth the cost. There are tons of renovations that you can do to give your kitchen that stylish look and easier to maneuver while in it without looking crowded. Consider doing these things:

  • Modernize the storage places by using built-in cabinets with lighting beneath them or repaint
  • Replace the countertops
  • Upgrade the sink and faucet
  • Buy stainless steel appliances
  • Replace the lighting fixtures
  • Update the flooring with ceramic tiles in a pattern of your choice

5.  Upgrade the Bathroom

Besides the kitchen, the bathroom is the next space you can focus your energy on when thinking of a remodel. It may be uncouth to discuss, but everyone needs to use the bathroom at some point. Here are upgrades to consider:

  • Install a new bathtub or replace it with a modern showerhead to get more space
  • Replace old plumbing fixtures
  • Install support bars
  • Update the lighting and floor
  • Setup storage spaces

6.  Refresh Your Windows

More homeowners are opting for uncomplicated techniques of refreshing their home looks by taking advantage of the available modern window treatments, which are more energy-efficient. Depending on your choice of window treatment, the professionals can seamlessly fix blinds inside glass panes of your existing windows.

Over time, this has become a popular option since it doesn’t require a complicated fixing process. Windows with internal blinds can transform your home since you can get rid of the heavy curtains. Alternatively, if you have more wall space, you can add more windows or a skylight, especially in the darker rooms. The bottom line is to ensure that all rooms are well-lit.

7.  Add Automated Systems

In a modern world, it would be ignorant not to acknowledge the effectiveness of modern gadgets even in our homes. Smart devices can make your home’s life easier, especially security, convenient operation from anywhere, and energy management. Consider adding automated systems for:

  • Security-house alarms, door locks
  • Garden Irrigation by a sprinkler system
  • Lighting and appliance control through voice commands
  • Thermostat for temperature control

8.  Replace Old Flooring

Tile floors can easily stain, they’re hard to clean, and they can get freezing over the cold season. In the cold season, these tile floors are also hard to heat up, and they may increase your utility bills exponentially. For this reason, vinyl floors have risen in popularity since they’re easy to install, and you can easily coexist with them across all seasons.

At least with these, you will not need many rugs, which makes the floor look crowded. For your bathroom, however, the best option remains porcelain non-slip tiles. However, if you need wooden flooring for your bathroom, you must ensure that it’s well refinished to prevent water from sipping into it.

9.  Do an Entire Interior Paint Job

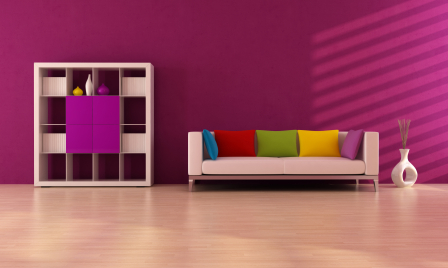
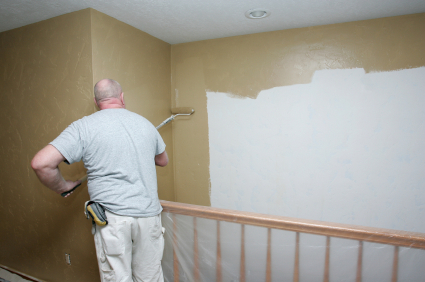
Just like you did that exterior repaint, a complete interior repaint will undoubtedly refresh your home’s look. Avoid mixing unusual colors and stick to colors that easily blend in with almost everything. The most common colors are; beige, white, and grey. Use durable high gloss paint with a non-porous finish that’s also easy to clean.

10.  Think About Renovation Your Closets

Storage is a crucial factor for many homeowners with large families. No matter how neat you are, your bedroom’s storage choice will always let you down if it doesn’t hide away everything in your bedroom in place. It’s also exciting to wake up to a neat bedroom, rather than one with a crowded look.

A closet redesign ensures that your bedroom is always tidy and livable and enhances organization. Depending on your space, look for the best closet system to use for your bedroom.

If you’ve wanted to revamp your home, then those upgrades will do just that. Please don’t shy away from doing your research to ensure that you get it right and hire the right professionals to do it.


5 Essential Things to Do When Moving into a New Home

5 Essential Things to Do When Moving into a New Home


Have you recently bought a house and you’re thinking about the millions of things you have to do? Your list is probably blowing up, and you don’t even know where to start. So, what are the first things that you need to do whenever you move into a new house?

Depending on what project it is, there might be more or fewer things to do. We’re not going to talk about repairing any damages to your house; it’s more like those things that everybody should do whenever they buy a new home. Packing and unpacking is not the only major thing to do, getting connected with your new home, learning how it works, and prioritizing what tasks need to be done first is another essential role of a homeowner.

You have a lot on happening already, so you’ll probably need help with organizing everything. To make things easier, here are a few ideas you might use when moving into a new home. Of course, moving requires a lot of effort to be done, but if you take your time and relax, soon enough, you’ll be sitting back and celebrate your new home.

1.      Do a Walk Around the House

What better time is it to do a walk-through of your new home than when it’s empty? So, make sure that you check if it needs any repairs, everything that you paid for does not miss, and that everything works right. Check the fixtures, the lights, the outlets, etc. Before unpacking everything and unloading the truck, set up a plan. Take a look into the living room, the kitchen area, and the bedrooms. Decide how you’ll want your furniture to be placed and make sure that you don’t overcrowd. An open space area gives your home a whole different aspect, and you’ll have more room for yourself.

Also, make sure that there aren’t any problems against the sale contract. If the previous owner decided to sell the house, including the kitchen furniture, and you were surprised not to find it there, call your real estate agent and see what could be done. Other issues that are not covered in the contract will be 100% your responsibility.

2.      Call for a Moving Company

When moving into a new home, the whole moving process might get stressful along the way. With all the furniture and personal things that need transport, you already feel overwhelmed. Have you considered yet scheduling the move? Calling for a moving company will handle every detail of your relocation, including packing, unpacking, planning, and storage.

Would you like to have someone to take care of the process from the beginning until the end? An experienced moving company will carefully plan and perform transports of any size. Be prepared to go when movers arrive, and don’t forget to place the small boxes in your car. You can carry in your vehicle things like kitchen furnishings, bedroom sheets, plants, etc. Planning your move by calling a moving company will help you set everything up according to the plan.

3.      Apply a Fresh Coat of Paint

To most people, it is reasonable that it’s essential to paint your home after you bought it. Although painting can be so messy, and you often need a lot of space to do it, you have to determine what you’re painting. If it’s just the walls, the trims, or even the ceiling, it is so much easier to do it without furniture in. You don’t have to be as careful; you can be as messy as you want to. So, do it right away, pretty much as soon as you get the keys in your hand.

Painting can also be such a pain for most people. Some do enjoy it, but when it comes to painting the entire house, at some point, everyone is like “I am sick of it, I don’t want to deal with it anymore.” So, do it right away, you’ll be so much happier when everything is done and the big part of moving, such as painting, is out of the way.

And on top of that, fresh paint can transform the entire house. After finishing the painting, everything looks so fresh and clean. Of course, you get to choose the color that you most like, the goal is to add a fresh coat of paint. Also, if the house that you moved in has a little bit of an odd smell, or maybe the old owners were smokers, fresh paint also helps with that.

4.      Clean the House

Start cleaning the entire house, and that includes the floor, windows, kitchen, bathroom, the bedrooms, and so on. Depending on how big your home is, it won’t be done in two hours; it can take a couple of days to clean the entire place. If you’re “lucky,” and the old owners didn’t clean the house for whatever reason, it’s essential to do it. Think about that strangers were living in that house, is their dirt, you don’t want to live in it. Get a sponge and clean the entire house, especially if you suffer from allergies.

Even if the sellers cleaned the house before, you don’t know how well they cleaned it. Even if it looks clean, unfortunately, bacteria can’t be seen, so just be on the safe side and clean everything before you settle in. Also, even if the sellers cleaned the entire house, now it’s twice as clean, so you can sleep much better knowing that you live in a clean and healthy environment.

5.      Set Up Candles and Air Fresheners

Put up some air fresheners or scented candles. If you just moved into a new house that has been owned by other people and the house still smells weird, use candles with your favorite scent to make it feel like home. The house will take some time to start carrying your smell, but in the meantime, use scented candles and air fresheners to get to the point.

So, these are some of the essential things you need to do when moving into a new home. Hopefully, it will help in any way and don’t forget, the sooner you’ll take care of the important stuff, it will start to feel like home.


Temperature & Humidity vs. Paint


Rain and wind are not the only environmental factors that affect ideal painting conditions. Homeowners, contractors and handymen must contend with different humidity and temperature levels, too, during exterior projects. Painting under the right conditions can make the difference between a job well done and a redo. Read on to learn about the ideal circumstances for painting to avoid any unwanted issues.

 How Temperature Affects Drying

Why does temperature matter? When it comes to painting a house, temperature is a huge factor in the way a fresh coat of paint will dry. Drying paint in temperatures that are too low or high could result in cracking and peeling. For example, extremely low temperatures can prevent fresh coats of paint from correctly drying because moisture within the formulation can actually freeze solid before it dries completely. On the other end of the spectrum, extremely hot temperatures can evaporate the moisture from within the paint faster than normal. This can cause the top layer to skin over before the layers underneath dry, which can produce cracking, blisters and other imperfections.

There are some rules of thumb to follow when it comes to different types of paint. Temperatures above 45 degrees Fahrenheit are recommended when using solvent or oil-based paints. Latex and acrylic paints dry much better in temperatures that exceed 50 degrees Fahrenheit. If temperatures dip, dew can form on surfaces and cause the water in the paint to evaporate too slowly. Some paints are now formulated to dry at lower temperatures, such as 35 degrees Fahrenheit. It’s vital to follow the instructions on paint containers, since each paint formula is designed to be used within specific temperature and humidity parameters.

How Humidity Affects Drying

When high-humidity conditions are combined with low temperatures, the protective qualities of paint may be compromised. Condensation can occur on the paint’s surface, which creates issues with the paint’s drying and adhesion. In some cases, high humidity can cause unsightly streaks or surfactant leaching, which is a brown or white discoloration on the top layer of the paint. Additionally, excess moisture in the air can be absorbed into wood surfaces and affect paint adhesion. This can result in bubbling or peeling paint.

Avoiding Problems

 Be sure to check the weather forecast before starting any outdoor painting project. It’s also a good idea to monitor the temperature and humidity levels during painting projects. The best time to paint, depending on geography, would likely be early summer or fall. These seasons usually offer the best weather conditions, with minimal rain and fluctuations in temperature from day to night. This can ensure that the paint adheres smoothly and has a chance to dry and cure properly. Summer also tends to be the perfect time for painting since it is typically dry and warm. Aim to paint when you have a clear, low humidity day with the ideal temperatures falling around 60 and 85 degrees Fahrenheit.

Sticking to these guidelines can help you end up with a flawless finish. Before you get started on your next painting project, take a look at the accompanying infographic to review how temperature and humidity can affect a fresh coat of paint.


5 Tips to Make a Bedroom Look More Expensive in 2020


A lot of the times, it is difficult to emulate the picture-perfect bedroom looks you see on the covers of famous interior design magazines. However, with a little redecorating and a strong vision, a plain room can become a luxurious centerpiece of your house. It doesn’t mean that the furniture or accessories cost a lot of money. If you’re on a shoestring budget, check out 5 tricks below, that will make your bedroom design look like it has been decorated with impeccable taste.

Get Rid of Clutter

The first step to making your bedroom look lavish, is de-cluttering. A clean and dust-free environment will not only provide more storage space, but also give your room a major transformation. Removing excessive bedroom items such as unread books, stuffed animals or even ottomans, immediately make the room more spacious and livelier. When you take out all the unnecessary accessories and organize your drawers, a feeling of cleanliness will radiate from the room. It is a process, not a one-off project. You have to constantly vacuum, remove folded clothes from your bed and change sheets in order for the room to shine and look its best.

Style Key Areas

Styling your bedroom isn’t only a matter of style and preferences, but it is a skill. How to make a small number of items look expensive and modern? Another way of achieving an expensive bedroom look with a little money is by styling your nightstand or shelf. There is a difference between a stack of unread books that only collects dust and organizing the bookcase in a stylish way. By putting some bold-colored clocks, colorful vases or metallic trays on your nightstand or a bookcase, you can elevate the space and cut down on visual clutter.

Bedding Richness

For a completely polished look, add texture to the room with a perfect bedding. People tend to neglect the importance of a high-quality bedding and mattress. Adding a pop of color and texture to you bed, really makes a difference, all without making you break the bank. Foam beds provide the utmost comfort and their classy white color goes well with every color and shade you can think of, which makes it a perfect choice for your new bedroom look. Fold the edges of your sheets at the end, layer the pillows and daydream on your perfectly made bed.

Curtains All the Way

When you think of curtains, it might seem that they are too old-fashioned to be incorporated into a modern-looking bedroom. However, if you’re having privacy concerns and want to upgrade your bedroom space, monochromatic sheer white curtains will fit any bedroom like a glove. Classic curtains match your bedding perfectly and add a touch of elegance and luxury to the room. You can match the color of the rods with the aesthetics of the room, but classic white ones are the safest choice to open up the space.

Color Play

Some new colors for 2020 interior design trends are emerald green, terracotta or mustard yellow. Apart from adding greenery to your bedroom, opt for these colors for your accessory statement pieces, such as pillows, paintings or lamp-shades. With a white bedding and white drapes, these are the strong colors that will seamlessly tie into the bedroom decor.

The key is in making the furniture arrangement look expensive, even though it is essentially the same room, only with more style. “Less is more” approach will never go out of style for a bedroom transformation, so these five tips are the perfect simple ways to make your bedroom more appealing. What strategies have you employed so far? Tell us all about it in the comment section below.


Paint Color Psychology – How Certain Home Colors Affect People

People have their own color likes and dislikes depending on their individual character and growth phase. There is a cycle of changing colors that affect our body and mind through different periods of life. These are reflected in our changing color preferences.

Decorating with color can be a little daunting, as the colors say a lot about your character. Picking the right colors for your home is just as important as picking colors for your clothes and it is key to set the kind of atmosphere you need for your home.

iStock_000013024827_ExtraSmall

How Shades of Blue and Green Affect Your Home Atmosphere
A soft blue would be a good choice for a living room or library, considering its soothing properties. Lighter blues will surely stimulate the atmosphere of your home and help you think clearly, while softer blues can have a soothing effect to help you focus. Blue is known to have sedative effects and is considered as an intellectual color.
Green sits right in the middle of the spectrum and hits your eye in a manner that needs no adjustment. Thus it immediately gives the atmosphere a sense of balance and calm. Green has a similar effect on your home atmosphere as blue as it also has a calming effect.

When building or remodeling a house many home builders often use different specters of colors to make specific effects in different room. Colors will change your home atmosphere through your perception. As you can see, the biggest factor in creating atmosphere in your home is you and your feelings, so decorate your home with colors that make you feel comfortable and at peace.

How Yellows and Reds Change Your Home Atmosphere
The best benefit of having red color in your home is that it can give your home an atmosphere energy, warmth and strength. Each color has its own wavelength and red has the longest of all wavelengths. Red is the strongest color because it has the longest wavelength.

Although red is often a symbol of risk, in China, red is color for joy, and in many people use it in wedding ceremonies as a symbol of purity.

Yellow is the color with second largest wavelength and is considered as the most stimulating color. Yellow will give an atmosphere of a friendly feeling and helps to set a mood of innovation.

Since yellow is a brilliant color and is a color that can amplify the light, decorating your house with yellow color, will give it a happy and awake atmosphere.

How Can Colors Affect the Moods of People of Various Age Groups?

Elderly People and Colors
Older persons may fit well with soft pastels. Peaches, apricots, warn tans, terracotta and pink can also be used to awaken their mood and mind. Softer shades of red and orange are warming and can help with circulation and energy levels.

Teens
Black, if used, needs to be mixed with other colors, as it is not beneficial for emotional development. Teens sometimes go through an identity crisis and often use black to hide this because they feel it’s cool.
Citrus greens and bold blues also provide some peace and release of pressure. Red is good for this age group – it expresses sexual vigor and extreme energy.

Older Children
Different shades of blue-greens work as study / learning colors. They create stimulation energy when combined with yellow-creams and minor amounts of orange-yellow.

It is good practice to avoid geometric patterns on the walls or curtains, as they are usually distracting.

Very Young Children
Bright, intense colors like dark red, yellow and orange have shown signs of disrupting sleeping patterns and have also been known to bring young children to crying more easily. Strong, bright colors have the effect of shocking child’s internal steadiness and can make the child anxious and restless.

DIY – How to Refinish Kitchen Cabinets with Paint or Woodstain

Your kitchen: it’s where you start your day, prepare your family’s meals, and enjoy some quality conversation at dinner time. Even if you’re not exactly a culinary aficionado, the kitchen is one of the most important room’s in the house with its aesthetics depending heavily upon the appearance of cabinetry. Dark, dull, and dingy cabinets disrupt the room’s aura, making it an unpleasant space to spend your time.

iStock_000016335408_ExtraSmall

If you think the only way to rectify this plight is through a messy and costly renovation, you’re very much mistaken; cabinets can be quite easily refinished to achieve a like-new look without hiring a contractor. The best part? It’s something you can do yourself with some basic tools and a little patience.

Tools and Materials

-Phillips/flathead screwdriver
-Sandpaper (60, 120, 150, 220, 400 grit)
-Trisodium phosphate
-Paint stripper
-Metal scraper
-Primer
-Paint (color of choice)
-Stain/gel stain
-Polyurethane sealant
-Tape/drop cloths
-Various brushes (1″-4″), rags for wiping stain
-Wood grain tool

Note that not all methods of refinishing will require all tools listed above. In all situations, begin by removing all cabinet hardware and placing doors and drawers on a clean, dry work surface. Also, mask off and cover all areas that you wish to keep clean.

Let’s look at the first–most traditional method–of refinishing wood cabinets.

Complete Refinish
These following steps will explain how to completely refinish kitchen cabinets by stripping away all of the old finish and applying a new finish. If your cabinets are still in very good shape and showcasing that authentic wood grain is of chief importance, this is the way to go.

Begin by applying your paint stripper of choice and following the manufacturer’s instructions. Citristrip is a quality, environmentally-sound product, as it doesn’t contain harmful chemicals. After letting the product sit on the old finish (generally at least half to a full hour), begin scraping the old finish until it’s completely removed. Alternatively, you can (painstakingly) sand down the old finish with coarse grit sandpaper, although this can prove messy and extremely time consuming. Once complete, wash the surfaces with a trisodium phosphate (TSP) cleaner and allow to dry thoroughly.

Now it’s time to begin applying the stain. Using even brush strokes, uniformly apply the stain, wiping down the wood occasionally to remove any buildup. Once the stain is no longer tacky, you can remove burrs by gently sanding with 220 grit sandpaper. Repeat this process until the desired shade is achieved.

To complete the process, apply 2 coats of a polyurethane sealant and lightly wet sand with 400 grit sandpaper.

Painted Finish
Maybe you’re not a fan of the wood used in your cabinets or you simply desire a specific color that really sets off the decor in your kitchen; in any case, painting your cabinets is a simple and cost-effective way to breathe into them new life. Since paint will largely hide the wood grain, it isn’t necessary to strip the old finish, saving a considerable amount of time.

The main preparatory step in this method is washing down the existing surfaces with a TSP cleaner; not only does this remove waxes and oils, which inhibit adhesion of the new paint, but it slightly scuffs the surface, promoting adhesion.

Once dry, begin by applying primer to the surface. One coat should be adequate as it doesn’t need to completely conceal the old finish. Once dry, sand with 220 grit sandpaper before applying as many finish coats of paint as necessary to achieve the desired color. Finish by lightly sanding with 400 grit sandpaper.

Faux Wood Grain
Either your cabinets are in poor shape and/or you don’t want to completely strip the old finish; no matter the case, you still want the appearance of wood grain. Fortunately, this only takes a few more steps than painting your cabinets. Begin by following all steps included in the painting section; just be cognizant in your finish coat color choice. Pick a color that’s similar to the stain variety you desire.

Once the solid color has been dried and sanded, apply gel stain with a brush. Instead of wiping with a cloth, though, brush a wood grain tool across the surface to produce the appearance of wood grain. After this has dried, finish by applying a polyurethane sealant and wet sanding with 400 grit sandpaper.

The Average Cost of an Exterior House Painting Project

Changing the color and curb appeal of your home’s exterior can be done by applying a new coat of paint. New paint for your home can be applied by a professional or as a do-it-yourself (DIY) project. The cost to paint the exterior of your home is based on factors that include the cost of labor and the tools that are required. In this post we will more closely take a look at the average cost of doing this project on your own.

The Average Cost of Hiring Professionals

Professional house painters are a good option for homeowners who lack the skill or the time that is necessary to paint the exterior of their home. The average cost of hiring a professional exterior house painter is in the range of $3,000 to $8,000 or more based on the size of the home and other factors. That average price typically includes the coverage of tools, supplies etc. no fuss, no worries and typically an excellent finished project, if you hire professional painting contractors, obviously. If you skimp on this, your home may end up looking quite a bit worse than what you had hoped for, because the quality of the finished product is usually in the preparation.

Do-It-Yourself Project – The Average Cost

Painting the exterior of your home by yourself “can” save you money on the cost of labor. However, you will need to have the time available to complete the project and a handful of tools and other helpful items (see scaffolding below, that’s the tough one).

If done on your own, paint will typically cost between $25 and $50 per gallon. Primer will be needed for the project and will cost between $10 and $15 or more per gallon. The average size home in the USA requires between 6-12 gallons of each. If you decide that hiring a painter to paint your home is too expensive, then the project can be done by yourself. Paints with primer already included in them can be purchased, but are on the higher side of that cost per gallon previously mentioned. On average, a homeowner can do the exterior paint project on their own for around $1,000, after all supplies are purchased / rented.

Matching paint colors can be an issue for homeowners. There are products out there available to assist with matching current colors up with new colors (see here).

Renting / Borrowing Tools

Many tools that you need to paint the exterior of your home can be found or rented from a home improvement store in your area.  Look to see if the tools you need are available from friends, family members, or neighbors. Lets review some of the necessities:

Pressure Washer

One special tool you will need is a pressure washer. This tool can typically be rented at a cost of $50 to $70 for each day of use. You can also purchase a decent pressure washer for under $300. The pressure washer will easily remove dirt and grime from existing siding. This step is essential for a professional finish. Keep in mind that a pressure washer can be used in the future for things like deck, patio, siding, brick resurfacing and more. If you are DIY buff, a pressure washer is a healthy investment.

Paint Sprayer

The use of a paint sprayer will make the painting process go much faster. You will also keep your arms and hands from aching by not using a paint brush or roller. A decent paint sprayer costs about $70 each day. If you are renting the paint sprayer, be sure to have already pressure washed the exterior prior to renting and you either want to complete the trim work painting (or taping / coverage of non-painted areas) prior to or after the paint sprayer is rented.

Scaffolding

The use of scaffolding is a great way to ensure you can easily reach high areas. You may want to rent a scaffolding system if your home is more than one story, as a ladder may not meet your needs. The rental of a scaffolding unit is typically based on its size and can be between $15 to $50 per day. For most homes, a base scaffolding set will do the trick.

Heat Gun

A heat gun will run between $40 and $75 or more depending on the model being purchased and it is not needed in most cases. On most homes, old layers of paint can be removed cleanly with a pressure washer and scraper. A heat gun is needed in situations where multiple layers of older paint exists on the surface. As paint is layered, varying heights on the paint surface (from older, lasting paint) can cause an uneven look, which can define a homes age too much. As sun hits uneven paint, it will show slight shadows which really show the blemishes of the exterior. A heat gun may be necessary if you are truly looking to add a pure, even professional and new looking paint job to you house.

Paint Scraper

A paint scraper can be used in combination with a heat gun to remove old paint. This tool can be found for a price range of $8 to $25 at a home improvement store. In almost all scenarios, this will be a necessary tool and it is likely that you will use a paint scraper multiple times in the future. So it is never really a bad investment.

Putty Knife

Old caulk and paint that cannot be easily removed with a scraper will require a putty knife. This tool is inexpensive and can be found starting at about $5. You can also use this tool in combination with a heat gun.

Sander

Sanding the exterior of your home is needed to remove old paint and allow new paint to stick properly. There are a variety of types of sanders available pretty much anywhere. The best choice for exterior sanding is a pole sander. This tool will require sheets of sandpaper that cost between $3 and $10 per package. Areas that are hard to reach as well as corner / edge spots of the house will require sanding by hand. The purchase of a pole sander will cost about $15.

Metal Brush

Areas you cannot thoroughly cover with a sander or sandpaper will require a metal brush. The bristles of the brush are wire and used to loosen paint that is thick or hard to remove. A metal brush can be purchased at a hardware store for around $10.

Painting Tape

Areas that do not require paint typically need to be covered with either tape, or a combination of tape and plastic (for larger areas of course). The average house exterior may require as much as a $25 worth of tape and usually varying sizes should be purchased. 3/4 of an inch to 1 and 1/2 inch tape varieties should be on hand. In fact, if you spend a healthy amount of time properly applying tape and plastic covering to non-painted areas, you can usually save a substantial amount of time on the overall project, because it will allow you more liberal use of the paint sprayer (hint – this makes for an easier job).

Squeeze Some Sunny Spring Cheer Into Your Kitchen

Lemons are just the spring touch that your kitchen is craving after a long, chilly winter. If properly placed, they can add modern zest, a fresh, clean look and sunny cheer. A creamy, crisp lemon color is paired well with the modern and sophisticated tone of black, and toile is a delightful way to introduce it. Black and white toile will add French country sophistication to your kitchen, and it is easy to access. Typically found in fabric, wall paper and even linens, this is a fun, fresh way to usher in a bit of boldness with a traditional and timeless pattern to instantly update and enhance your kitchen space. Black and white toile is a lemon’s long, lost love. They just belong together like meringue atop lemon custard. Whether you are in for a full kitchen overhaul or looking to simply update, the buttery, golden yellow of lemons blended with black and white toile will squeeze some irresistibility into your kitchen space.

Sunny Side Up

A subtle splash of color is essential to lay the foundation for your French Country kitchen redesign. There are so many yummy and refreshing lemon tones available. Avoid a stark, primary yellow and instead introduce milder tones for the softness that this look requires. Great places to apply paint are the walls to start, then the backsplash, and even possibly the ceiling. If you’re shy about committing to a new color on every wall, choose an accent wall to paint then perhaps the window casings, door frames or trim as well. Be certain to reserve some paint for unfinished wood bar stools or to coordinate the back panel of your dining room hutch.

If you decide to leave the ceiling white consider painting a lemon yellow star around the base of your light fixture in place of a traditional ceiling medallion.

Create Crowning Cabinets

Never overlook the cabinetry, your kitchen’s “furniture,” as it should become part of the action too. Not sure about committing to completely sand and paint the cabinets? There are other fun ways to update and add distinction. Try applying wall paper to the inset portion of cabinet doors. This is a perfect place to introduce a black and white toile patterned paper. Measure, trim and apply the paper once all of your cabinet doors have been removed. Glue a roping or black trim to the edges of each panel to finish the look. Also, try removing the center panel of a few key cabinets (perhaps those above the stove or sink) and stapling in chicken wire. This will become a favorite place to display a few plates or a jar of faux lemons.

Love the look of custom soffit lighting? Create it by laying white stringed mini lights down flat on the top of your cabinets. They should be well hidden behind the upper cabinet molding. When lit they will provide ambient lighting that your guests will think was professionally installed.

Outfit and Accessorize

Accessories are an essential when creating cohesion throughout your space. Consider items that are not traditionally found in the kitchen. An antique step ladder painted black and distressed a bit will become a fun, funky place to hang hand towels or pots and pans. Also, window shutters are a great place to pin recipes.

The counters are best kept free from clutter, so choose a few key accessories that will bring the theme home. Fill glass apothecary jars with lemon drops or white meringue cookies for all to see. Embellish the outside of the jar with black grosgrain ribbon and monogramed labels. Display your yellow dish soap liquid in a glass olive oil bottle embellished to match your apothecary jars.

Have fun outfitting your table with yellows or black toile linens that will help give life to the look. Remember napkin rings, plates and cups should all coordinate with your new look too. Use table runners laid across a rectangular table instead of place mats for a new and interesting look. Also, if there is any black and white toile wall paper left over from the cabinet project, be sure to cover light switch plates by wrapping them like a gift and securing the back with tape.

From concept to completion, this is a sunny and stylish spring kitchen that would appeal to the palette of even the most style conscious epicurean. Whatever life gives you– make lemonade!

The Average Cost of a Home Interior Paint Job

Painting a room is a quick and cost-efficient way to give any home a fresh, updated look. However, the job can be complicated for large houses or oddly shaped rooms. If you want to revive the appearance of your home with a new paint job, you may benefit from hiring a professional. There are various factors that determine how much a professional will charge for any interior paint job.

iStock_000001555992_ExtraSmall

When comparing the fees of painters, it’s important to understand what is covered. In most cases, the paint and other supplies are included in the estimate. You may be able to request certain supplies, such as better quality paint rollers, but you will have to pay more. Some professional painters also allow the customer to choose the paint brand. This will affect your overall cost as well.

One of the main considerations when calculating costs is the size of the room being painted. Many painters charge per square foot. You may find a professional who charges a flat hourly rate, but most will present you with a bid that is equal to their base fee. If you have an exceptionally large room to be painted, or if the room has high ceilings, you may be charged on the higher end of the scale.

The cost of a paint gallon varies depending on the quality of the product. Expect to pay between $10 and $50 per gallon. A professional paint job typically includes two coats of paint for each area. If you select a less expensive brand, it may be thinner and will need an additional coat. The painter may need to use a primer as well. Primers are also often necessary for covering stains or any existing paint that is exceptionally dark.

Before you obtain any estimates for your interior paint job, you will need to know the square footage of the rooms being painted. This will give you a rough idea of what to expect. The cost per square foot can range from $1.25 to $2.75. On average, you will pay between $200 and $400 per room. Some professionals offer discounts on additional rooms, so it pays to have several jobs handled by one person.

Experienced painters will perform prep work prior to painting any room. This will affect your overall cost. You can do the preparations yourself, but a professional will likely do a more thorough job. Preparations include moving or covering furniture, taping any molding and removing small objects from the work area. For an average size room, you will generally pay $200 to $400 more for prep work.

Seasoned professionals typically supply the drop cloths, tape, brushes, rollers and other materials. They will include the prices for these items in their estimates. However, if you are expected to pay for the supplies separately, it can add up to $50 on your total costs. When getting any estimates, be sure to ask the painter to clearly break down every fee so that you know what you’re paying for.

Where you live may affect the price of the interior paint project as well. The cost of living in each area determines what many professionals charge. Living in a larger city may mean higher costs. In addition to location, the extra labor required will affect final fees. High ceilings, wainscoting, baseboards, crown molding and other detail work may require an additional fee. The price can go as high as $200 per room.

You may be able to get certain discounts to lower your out-of-pocket expenses. If you hire a painter during the winter or late fall, you may see significant savings. Some painters also offer a price reduction if you agree to have your project completed in between other jobs. You may also save money by hiring a novice who charges by the hour and allows you to purchase all the materials. Hourly rates range from $25 to $50.

Before hiring anyone, get several estimates and request references. You may also inquire about seeing the painter’s work. Ask what types of paint and brushes will be used as well. If you are not satisfied with the quality of the paint, speak up. Cheaper paints usually don’t last as long as high quality products, which means you may need to repaint sooner than expected. To further protect your wallet, ensure that the painter is licensed and insured in your state.

The Average Cost of New Replacement Windows for Your Home

Even before the economy took a nosedive, homeowners were looking for ways to save money. Home improvements can improve your property’s value while increasing energy efficiency. If you’re looking to replace some or all of your home’s windows, here’s what you can expect to pay. We have laid out the average cost of new home replacement windows.

New Home Windows Best Case Scenario
You will save a lot of money if your existing window frames are in good condition. If the frames are free of major defects, you can replace just the windows and save up to half of the cost of replacement windows.

Only a certified contractor or other window installer should remove the old window and inspect the frame for any damage. That same contractor will be able to repair a salvageable frame or remove a damaged one, but any additional work will end up costing you money. Most contractors work for about $100 an hour, and frame replacement can easily add another $200 to your total bill.
After you have the measurements, you have enough information to order the replacement windows. The window size is fixed unless you want to enlarge the opening. For load bearing walls, that process is both time consuming and expensive, and you should expect additional labor to cost another $200-$300.

Average Window Materials and Prices
The windows themselves come in a variety of materials. Vinyl is relatively inexpensive and easy to maintain, but it usually doesn’t come in too many colors. Unfortunately, most paints will quickly fade and crack on vinyl after a few years. However, paint manufacturers like Benjamin Moore have begun selling paint specifically designed for vinyl surfaces.

Energy Efficient Vinyl Windows Being Installed Other common materials include wood, aluminum, and fiberglass. Wood is an excellent insulator but is expensive compared to vinyl. It also holds up poorly in humid regions and can rot over time especially if rainwater is allowed to accumulate.

Aluminum is a lightweight metal that won’t corrode like iron. Many homeowners go with aluminum clad windows that encase the exterior surface in aluminum but leave the interior window wood for a beautiful appearance. Aluminum clad windows cost more but offer excellent weather resistance and insulation.

Fiberglass is a relatively new window material, and it offers a number of advantages over vinyl, wood, and aluminum. Like aluminum, it won’t corrode, rust, or rot. It can hold paint well, and it will insulate better than the other materials. Fiberglass contracts and expands with the temperature at roughly the same rate as glass, so it won’t leak as much air during the winter and summer months. By filling frame cavities with foam insulation, fiberglass windows offer the best insulation out of any type of window.

An average standard home window can cost as little as $300 for vinyl but 2-3 times as much for fiberglass. Wood and aluminum clad windows typically cost about $500-$700, and they offer a good compromise between cost and energy efficiency.

Triple-pane windows will also drive the cost up over double-pane windows, but they offer superior insulation. Insulating gas between the panes will also increase the overall cost but help save money on heating and cooling bills. Have a damaged frame? A new one will increase the cost by 50-100 percent including the additional labor required to tear out the old frame and install the new one.

Bottom Line
At a minimum, expect to pay on average at least $300 for materials and $100 for labor per window. If your home has 10 windows and you’re replacing all of them, the job will cost at least $4,000.

Once you add in extras like triple-pane windows or fiberglass frames, the material costs can increase up to about $1,000 for a standard window. That same 10 window home will cost about $11,000 instead.

Every frame that needs to be replaced will cost another $200-$700. With all of the bells and whistles for each window, you’re looking at anywhere from $1,000-$1,500 per window. Larger windows and additional work can add several thousand dollars more to the eventual cost.