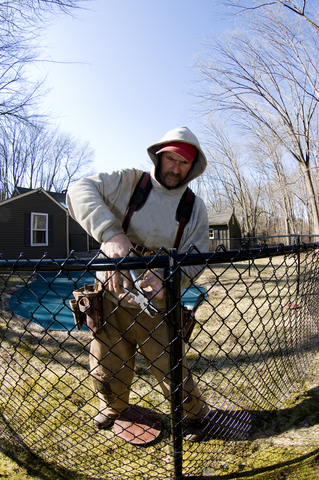
A chain link fence features a frame built from rails and posts. With time and patience along with the proper tools and materials, you can build a chain link fence around your home and yard.

Tools and Equipment
The caps are the sections that hold the fence’s structure together. Furthermore, after you install the frame, the installation process will require you to stretch the fence’s mesh across it. Before purchasing the fence materials, assess your current tool supply as you may need more items. The full tool list includes:
• Socket wrenches
• Post hole digger
• Pipe cutter or a hacksaw
• Pliers
• Rubber mallet
• Level
• Shovel
• Trowel
• Mason’s line
• Fence puller or a pull bar
• Plumb bob
• Line level
When you work on installation or assembly jobs that require you to use tools and equipment, be sure to wear safety glasses and work gloves for protection.
Material Details
Before visiting the home improvement store for your fence materials shopping spree, make a list of the products that you’ll need. Be sure to include:
• Pre-mixed concrete
• Gravel
• Chain link mesh
• Rails
• Posts
• Hinges
• Caps
• Brace bands
• Latches
• Tension bars and bands
• Tension wires or hog rings
• Tie wires
Fence Parts
Most home improvement stores sell mesh in rolls that are 4, 5 or 6 feet tall. Steel is the strongest material that you can buy, but manufacturers also make the mesh out of aluminum, which is lighter. The regular posts come in a 2-diameter size while the posts for your corner and end sections are available in a 2 3/8-inch size.
Installation Directions for the Posts and Rails
The first step is to dig holes for the posts. Make the holes three times wider than the diameter of the posts. Then, fill the holes with about 4 inches of gravel and compress it. Next, add 6 inches of concrete to the corner, gate and end posts. Check the alignment of the posts after every few shovelfuls of concrete. Once the holes are filled, set the posts into the wet concrete. With a level, make sure that they are straight.
To allow water to drain away from your posts, slope the concrete’s top sections. Permit the concrete to cure for several days before continuing your fence installation. Keep in mind that the holes for the line posts should not be filled with concrete. Also, do not set the line posts.
The next step is to connect the fence’s tension bands and gate hardware. You should slide the tension bands onto every corner, gate and end post. After you’ve added the tension bands, install the hinges and latch hardware. You’ll need the rubber mallet to set the end post caps. Also, slide a brace band over each post.
You’ll then be ready to install your fence’s looped, rail and end post caps. With your mallet, pound the looped caps into the line posts. Then, set the posts in the holes, but don’t fill them in yet. You’ll need to bolt a rail cap to the fence’s brace bands, and slide the rails through the looped caps. With your hacksaw, cut your fence’s rails to the proper size. After you’ve sized the rails, place them into the rail caps, and be sure to tighten the brace bands. Fill the line postholes with dirt. Once you have them full, pack them in until they are secure.
Chain Link Installation
For your fence’s chain link installation, you’ll need to unwind the mesh. The chain link will also require a tension bar. Be sure to slide the tension bar through the mesh’s links, which are at the end of the material. This step makes the end section of the fence inflexible. It will also create an attachment unit for the posts. Use your socket wrench to secure the tension bar into the tension bands. Then, pull the chain link mesh tight to prevent sagging. With a fence puller, stretch the mesh. The next step is to crank the fence puller until the fence’s mesh loops will not shift more than ¼-inch when you attempt to squeeze them together.
Be sure to insert the tension bar close enough to the tension bands for fastening. With your socket wrench, tighten the bolts on the bands. Then, repeat the hanging and stretching process along the rest of your fence. You’ll need your pliers to connect the mesh sections to the rails. Furthermore, you can complete the action by forming a hook out of one end of an aluminum tie wire. Loop the wire around the top section of the rail, and tie the wire to the mesh.
To finish your fence, run a wire through the mesh’s bottom loops. Be sure to tighten it around the end posts. Also, wrap it around itself a few times to complete the connection.
The Benefits of a Chain Link Fence
When you fence in your home and property, you’ll add a layer of protection. Furthermore, the enclosure will keep your children and pets inside your property and dissuade uninvited guests from entering.
Tags: chain link fence, fence
