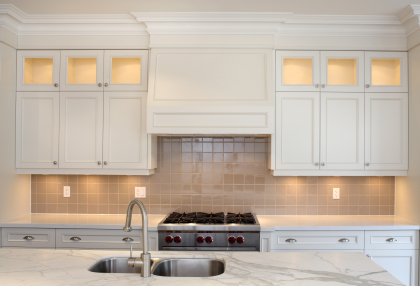
Your kitchen: it’s where you start your day, prepare your family’s meals, and enjoy some quality conversation at dinner time. Even if you’re not exactly a culinary aficionado, the kitchen is one of the most important room’s in the house with its aesthetics depending heavily upon the appearance of cabinetry. Dark, dull, and dingy cabinets disrupt the room’s aura, making it an unpleasant space to spend your time.

If you think the only way to rectify this plight is through a messy and costly renovation, you’re very much mistaken; cabinets can be quite easily refinished to achieve a like-new look without hiring a contractor. The best part? It’s something you can do yourself with some basic tools and a little patience.
Tools and Materials
-Phillips/flathead screwdriver
-Sandpaper (60, 120, 150, 220, 400 grit)
-Trisodium phosphate
-Paint stripper
-Metal scraper
-Primer
-Paint (color of choice)
-Stain/gel stain
-Polyurethane sealant
-Tape/drop cloths
-Various brushes (1″-4″), rags for wiping stain
-Wood grain tool
Note that not all methods of refinishing will require all tools listed above. In all situations, begin by removing all cabinet hardware and placing doors and drawers on a clean, dry work surface. Also, mask off and cover all areas that you wish to keep clean.
Let’s look at the first–most traditional method–of refinishing wood cabinets.
Complete Refinish
These following steps will explain how to completely refinish kitchen cabinets by stripping away all of the old finish and applying a new finish. If your cabinets are still in very good shape and showcasing that authentic wood grain is of chief importance, this is the way to go.
Begin by applying your paint stripper of choice and following the manufacturer’s instructions. Citristrip is a quality, environmentally-sound product, as it doesn’t contain harmful chemicals. After letting the product sit on the old finish (generally at least half to a full hour), begin scraping the old finish until it’s completely removed. Alternatively, you can (painstakingly) sand down the old finish with coarse grit sandpaper, although this can prove messy and extremely time consuming. Once complete, wash the surfaces with a trisodium phosphate (TSP) cleaner and allow to dry thoroughly.
Now it’s time to begin applying the stain. Using even brush strokes, uniformly apply the stain, wiping down the wood occasionally to remove any buildup. Once the stain is no longer tacky, you can remove burrs by gently sanding with 220 grit sandpaper. Repeat this process until the desired shade is achieved.
To complete the process, apply 2 coats of a polyurethane sealant and lightly wet sand with 400 grit sandpaper.
Painted Finish
Maybe you’re not a fan of the wood used in your cabinets or you simply desire a specific color that really sets off the decor in your kitchen; in any case, painting your cabinets is a simple and cost-effective way to breathe into them new life. Since paint will largely hide the wood grain, it isn’t necessary to strip the old finish, saving a considerable amount of time.
The main preparatory step in this method is washing down the existing surfaces with a TSP cleaner; not only does this remove waxes and oils, which inhibit adhesion of the new paint, but it slightly scuffs the surface, promoting adhesion.
Once dry, begin by applying primer to the surface. One coat should be adequate as it doesn’t need to completely conceal the old finish. Once dry, sand with 220 grit sandpaper before applying as many finish coats of paint as necessary to achieve the desired color. Finish by lightly sanding with 400 grit sandpaper.
Faux Wood Grain
Either your cabinets are in poor shape and/or you don’t want to completely strip the old finish; no matter the case, you still want the appearance of wood grain. Fortunately, this only takes a few more steps than painting your cabinets. Begin by following all steps included in the painting section; just be cognizant in your finish coat color choice. Pick a color that’s similar to the stain variety you desire.
Once the solid color has been dried and sanded, apply gel stain with a brush. Instead of wiping with a cloth, though, brush a wood grain tool across the surface to produce the appearance of wood grain. After this has dried, finish by applying a polyurethane sealant and wet sanding with 400 grit sandpaper.
Tags: cabinet ideas, cabinets, home improvement, kitchen cabinet pictures, paint, wood, wood stain
