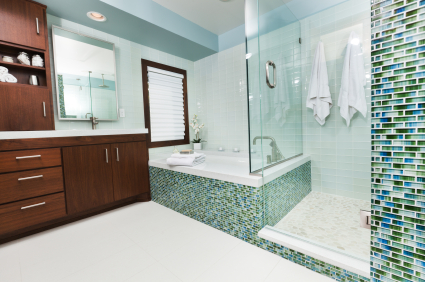
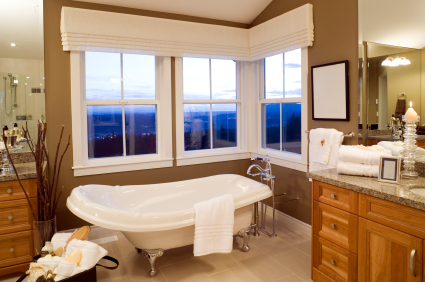
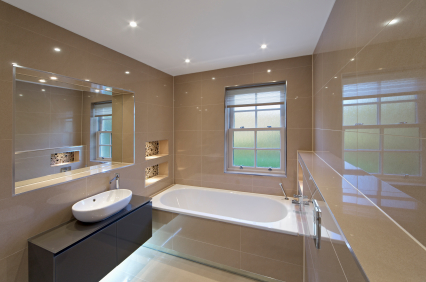
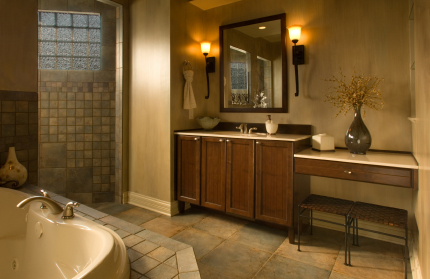
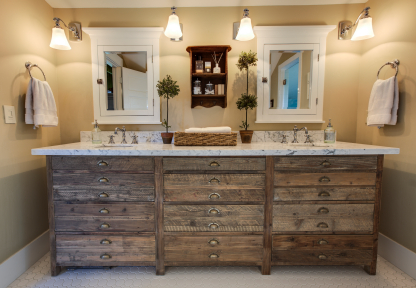
The Ultimate Bathroom Organization And Storage Guide

Morning attitudes and chaos can easily be triggered by a lack of bathroom organization. Utilizing storage solutions allows you to add functionality and space to a tight bathroom. Floating or open shelving can add a modern touch over the use of traditional storage cabinets. These are great for everyday items like lotions, extra toilet paper, or even towels. Over the toilet and corner shelving can also make great use of wasted space. However if you are storing items above a toilet, you need to make sure to keep the lid closed as items can easily fall or become contaminated.

No matter what size your bathroom is, savvy storage ideas can help you add space and stay organized. Check out the below infographic for more tips.

Graphic created by Modern Bathroom.

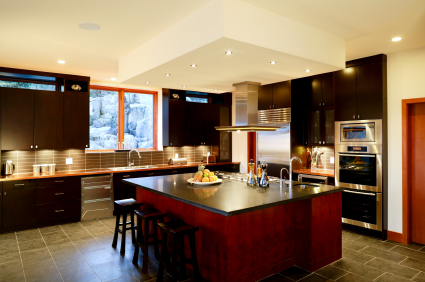
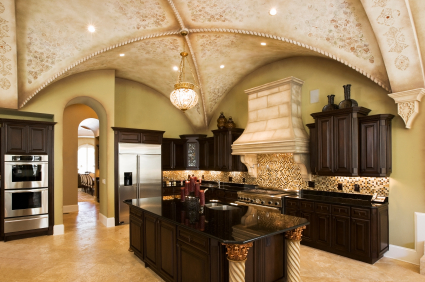
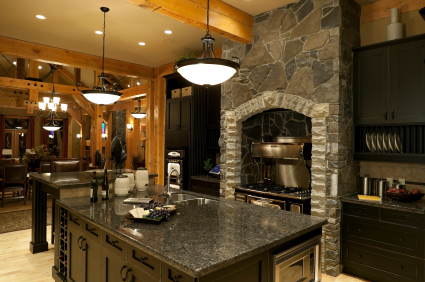
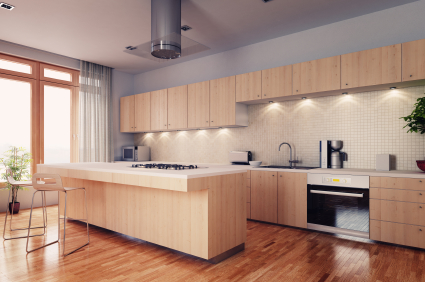
Your Kitchen Corner: Creating a Chic and Unique Kitchen


When a person who has worked hard wants to show off the fruits of their labor, they often do it by buying and owning an amazing house. If you’re one of those people, then it’s a good feeling to get recognized through the compliments we receive from our visitors. This kind of appreciation heartens us to give our home a touch up—minimal or extensive.

Most of the time, we often dwell in the kitchen for every particular hour of the day. We drink our morning drink in the coffee table next to the dining table where we eat our meals. We would always dine together with our families near the kitchen. The point is, we often spend more time in the kitchen than one would think. Because of that fact, we all should need to improve how our kitchen looks.

Shop Online

Because of the pandemic that’s putting a halt on our routine activities such as shopping, going online and buying straight out of the internet is the best choice today. From extensive options for product specifications to a wide range of prices, online shopping is the ultimate way to look for stuff during the pandemic. If you have a particular set of wants and needs, then all you need is to narrow down your choices on getting what you really what.

With that said, you can shop for almost anything online. And with “anything,” that includes all the stuff you need for your kitchen’s looks. Here are a few more things to your kitchen that you can get through shopping online.

     1.     Kitchen Cabinets

If you fancy storing spices and utensils in the kitchen cabinet rather than in the countertop, then don’t skip this section. When it comes to kitchen cabinets, the gallery you find on online listings would seem endless, so you have to cut to the chase and rely on recommendations.

Although you won’t be able to physically see the kitchen cabinet you want to buy, pictures will be provided so you can view every detail about it. Shopping online will help you save up on delivery fees. You won’t have to pay labor to move it inside your house. With ready to assemble kitchen cabinets, you’ll also save more money and time in installing them.

     2.     Kitchen Countertops

Coffee lovers would absolutely prefer countertops for their coffee machines. Brewing coffee is more agreeable when you have a pleasant countertop where you would place your favorite cup while waiting for your coffeemaker to finish its job.

A kitchen without a countertop is like a garden without flowers. Sounds absurd, right? Aside from brewing your favorite cup of coffee, a countertop is where you would want to start preparing meals. From chopping the raw ingredients down to garnishing your dish, the countertop is one busy area that you absolutely need.

     3.     Kitchenware

If you already have a good looking countertop, your kitchen wares should also follow suit. A particular section of your kitchen cabinet should be available for kitchenware. Though having plenty of colors inside your kitchen may look good for some, it can get a bit disorienting for some. Having the proper color combinations with your kitchen wares can give your eyes that refreshing feeling.

Customized Purchases

If you are into hands-on kitchen designing, you should get your kitchen customized by a reliable professional. Though you could hire someone to plot your own kitchen, your participation in deciding on the smallest details could be more satisfactory than giving it all to the builder.

From kitchen sinks to wall tiles, it’s your job to have a say on your personal preferences as the owner of the house. If you’re a fan for everything custom-made, there are actual customization shops for kitchen wares that you can check out. Having a place that you help design and conceive is one of the best places to stay in.

Get a Kitchen Remodeling Professional

It is necessary to look into the reputation of the contractor. You need to at least check the kitchen remodeling specialist’s profile as a prerequisite for this undertaking. Remember that your kitchen is your pride booster. You wouldn’t want to trust anyone out of the line.

For homeowners who spend most of their time in the workplace away from home, getting the job done by an expert with an excellent reputation is worthwhile. Giving your kitchen an upgrade demands you to invest a lot of time and money. Making sure that you get the best person to do the job makes sure those investments don’t go to waste.

Takeaway

As a hardworking person, it would only make sense to have a home that’s uniquely you. One of the best ways to make a house look good is by upgrading the kitchen. The tips above will help you get a good looking kitchen that doesn’t sacrifice quality and functionality over looks.


What You Should Know About Wood Primer and How To Use It


Wood primer is a type of preparatory undercoat coating applied to wood, especially before applying paint to it. Wood primers are designed to increase the durability and longevity of a paint job and ensures improved adhesion of paints to a surface. It also protects the wood surfaces that you plan to paint over.

Primer is one of the important parts of the painting process. It also adds beauty and visual appeal to paint jobs by providing a polished, uniform, and smooth look to structures. Primer also ensures you use a lot less paint during the painting process.

When Should You Be Using Wood Primer?

This depends on the type of wood you plan to paint. If you are painting an unstained new wood, it is best to use a high-quality oil-based primer or a latex primer. If the wood is stained or painted, it is better to go for a stain-blocking primer. More weathered or old wood requires a high-quality oil-based or latex primer.

Why Does Wood Need A Primer?

Primers contain a blend of chemicals that dissolve onto the surface in order to hide any imperfections. Primers are also designed to ensure the wood receives the paint better in the way of improving and enhancing the existing surface. Primers have adhesive characteristics that ensure the paint absorbs and adheres well. A wood primer also assists with hiding small holes present in the wood and it helps to make knots and stains less visible. A primer will ensure that your paint looks better and lasts longer than it would without the primer.

Tips On How To Apply Primer To A Wood Surface

Before you get started, make sure to choose best wood primer which is well combined, and that you are using the correct technique to apply the primer. You can use either a spray, a roller, or a brush to apply a high-quality primer to your wooden surfaces. If you are looking for the easiest way to apply primer, choose one of the spray primers. With a spray primer, you will need to apply a number of coats to achieve good coverage. Brushing does take more effort and time, but the layers will be more even, consistent and thinner.

Every primer comes with its own set of instructions on how best to use and apply the product. However, here are the general steps on how to prepare and apply primer to a wooden surface:

– Clean the surface, ensuring there is no grease, dust, or grime on the wood.

– After thinning the primer properly, apply the product to the wood using a brush, roller, or spray.

– Allow the product to dry for at least 6 to 8 hours before you apply a polishing paste.

– Use a 180 sandpaper grit to sand over the putty. From here you can apply another primer coat.

Experts recommend using a fine-grit sandpaper to achieve an even surface between each coat.

From here your wood surface is now prepared and ready for a paint application.


DIY Projects You Don’t Need a Pro For

8216770915_d99f7effce_b

If you’re itching to fix up your home, but don’t have the cash to pay a professional to do the work for you, fortunately, there are many projects homeowners can do themselves to improve their home’s value, look, and functionality. Don’t be afraid to get creative and get your hands dirty – these DIY projects really don’t need a pro, just a little time and effort.

Backsplash

Professionals typically charge around $60 per hour for labor costs to install a new backsplash. Although they make look very difficult to install, any homeowner can do it themselves with a little research and a few tutorial videos. The only tools and materials you need are a level, tile cutter, spacers, adhesive, grout, and of course, the tile. Intricate tiling or mosaics come with a mesh backing for easy installation, so don’t let the beautiful detailing scare you.

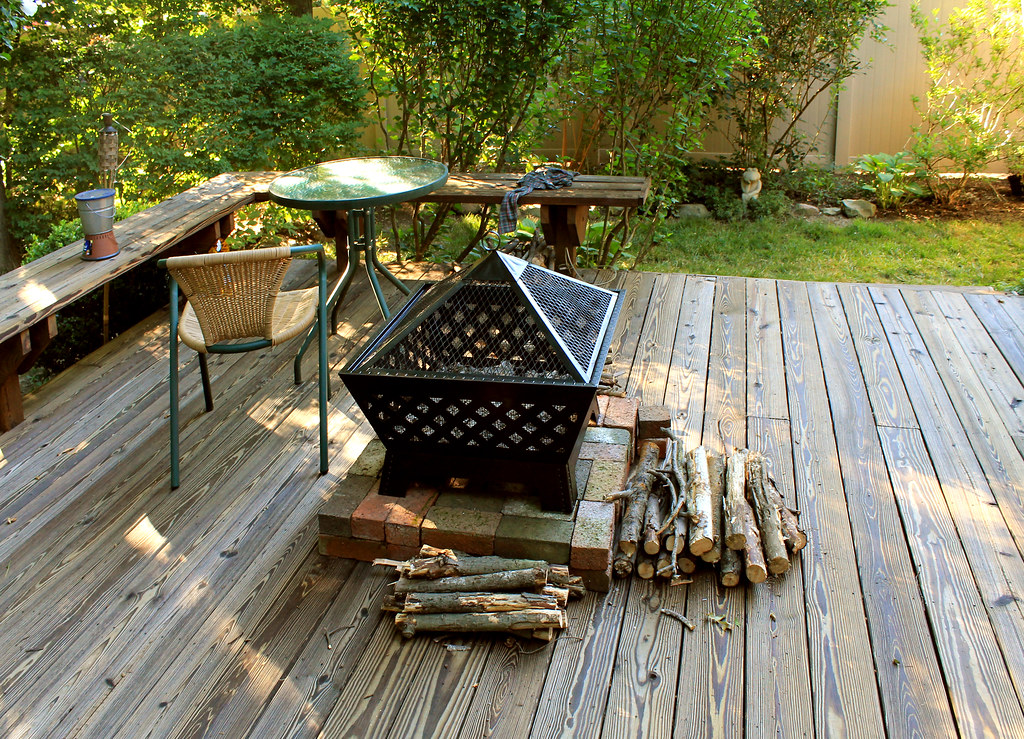
Outdoor Fire Pit

 If you own Raleigh real estate, you might want to enjoy some evenings outdoors in the warm summer season. An outdoor fire pit is one of the easiest projects to do yourself and a fairly inexpensive way to add a spot for outdoor entertainment.

You can purchase cement pavers from any major home improvement store, such as Home Depot or Lowes. Before you buy spend some time thinking about how large and how tall you want your fire pit to be. You might even try playing around with them at the store to get a better idea of how it might look. Once you’re home, you can wrap them around an old barbeque ring or place them freestanding. Small square pavers can be used for the bottom or flooring of the pit or you can use gravel or rock. Sand, cement, or mortar can help to fill in any gaps.

Refinish Wood Floors

If you have nice wood floors under those dirty carpets, it’s time to rip those old carpets out and refinish the beautiful wood underneath. While carpeting is preferred by most homeowners in the bedrooms, the look of wood floors in common areas is a popular trend. It’s rather simple to refinish them, too. Start by renting a walk-behind sander from your hardware or home improvement store – the type of sandpaper depends on the finish you currently have. Thick finishes or painted floors initially require coarse sandpaper. Every floor should be followed with a medium and fine paper to achieve a smooth finish; be sure to thoroughly clean up the dust with a vacuum and tack cloth. Next, choose between three finishes: polyurethane, varnish, or a penetrating sealer. Each has its own distinct look and various durability. Follow the instructions closely on the finish you choose.


Small Kitchen Space? Why You Should Install Large Kitchen Drawers During Your Next Remodel

Every cooking enthusiast dreams about having a larger kitchen, but many times the budget just does not allow for it. There are many ways to create the illusion of an expensive looking, more open feeling kitchen without having to knock down any walls or break the bank. You can start with rethinking your cabinet drawer size and opting for large drawers rather than standard sized drawers.

iStock_000005173975_ExtraSmall

The primary reason why it is a good choice to incorporate large kitchen drawers in your remodeling plans is that they make the space appear larger. If you have many smaller drawers on your cabinets, it can make the kitchen look busy and cramped. The same rule about using larger tiles on your floor to give the illusion of larger square footage can be applied with cabinet drawers. The less that you have going on, the larger the space will appear.

Many homeowners are choosing to install large kitchen drawers because they offer a fresh, contemporary look. Large drawers work nicely with the clean-lined, open concept style that most people desire when doing a kitchen remodel. Small drawers tend to make kitchens appear dated, so if you want a higher-end, updated space, large drawers are an excellent choice.

Another good reason to include large kitchen drawers is that they offer more options for organization. They make it easy to incorporate all the great customizable drawer organizers that are available on the market today. Drawers are not merely for holding flatware and knives anymore. People are choosing large drawers over cupboards for heavy cumbersome items such as cookware and small appliances. The ease in which drawers slide out, allowing a clear view all the way to the back is the reason they are a great option for storing bigger items. There are pegs that can be placed in deep drawers to hold stacks of plates and bowls. Tiered organizers can be used to neatly display every spice in your collection. Large drawers are now the answer to the dreaded question of where to store all those food storage containers and lids.

The addition of large drawers in your next kitchen remodel is a great way to get the look of a large, updated custom kitchen, without breaking the bank and offering more options for storage as well.

Kitchen Remodeling ROI – Best “Bang” for Your Buck

If a kitchen remodel has always been on your to-do list, or if you’ve just outgrown the décor and design of your kitchen, the simplest solution isn’t to sell the house and move. You will be much happier if you put in the effort to make your house feel like home again with an affordable kitchen remodel. Remodeling the kitchen or the bathroom is the fastest and often the most economical way to add value to your home. However, kitchen remodeling price tags can often be upwards of $10,000. Of course, it doesn’t have to be that much.

iStock_000002578170_ExtraSmall

In an era when more and more homeowners are looking for ways to save and keep money in the bank, smart, affordable remodeling is within your reach. Ready to embark on your own affordable remodel? Hire a kitchen contractor and use him as a reference for choosing the best, most cost efficient products and materials on the market. You can also keep these tips in mind as well.

Smart Remodelers Make Smart Choices

With any remodel, the name of the game is creating a new look and feel. Feeling like you’re walking into a brand new room doesn’t necessarily have to involve stripping the room and starting from scratch. If you love the layout of the kitchen, but hate the look, refinishing your cabinets might be a smart choice for you. By taking what you already have and refinishing it, you create something brand new out of something you already had. This saves you money, but you’ll still have great results.

When you’re trying to keep a manageable kitchen remodeling budget, you’re going to have to make tough choices about materials. It’s completely understandable if you have your heart set on having a new granite countertop installed. They are durable and, of course, absolutely gorgeous. However, in your kitchen remodeling project, it might be more cost efficient and just as attractive to use slate or granite tile instead. With the money you save on granite, you will be able to either save more, or add to your budget for another part of your remodel. Talk to your contractor about the elements of the kitchen remodel you really don’t want to live without and see if he or she can help you make your décor dreams come true without breaking the bank.

An affordable kitchen remodeling doesn’t mean a cheap and unattractive one. You can have some of the materials you want in your home and still save money. It’s simply a matter of making compromises and really understanding the pros and cons of your choices.

So if we are seeking to embark on an affordable kitchen remodeling project we might surely ask ourselves about the ROI (return on investment) of various updates.

As mentioned in our last post, ROI really depends on what sort of “return” you are seeking.  For real estate investors, “return” is the sale price of the house or the rental fee they can get.  Thus, ROI is essentially asking “how much more can I sell or rent this house for” divided by “how much did this project cost”.

For many homeowners, its not just about resale but also about your appreciation of where you live.  Thus, gauging “return” can be a bit more vague.  But you can rather easily measure the latter part of the ROI formula – the investment.

iStock_000019343636_ExtraSmall

Here are some ideas for low-cost kitchen remodeling projects:

Paint – this one is easy, a new coat of paint goes a long way in any room.  The kitchen is no exception.  Unless you just recently painted, its hard to beat a new coat of paint in a kitchen remodeling project.

Cabinet Refacing – “reface cheaper than replace” is the slogan here.  The idea is that your cabinets frames (plus the installation of them) is a big part of the cost of new cabinets.  In most cases though, cabinet frames are in great condition.  Most people replace cabinets because they want a new look or style.  For that, you can either a) paint the cabinets, or b) reface them by replacing the doors and hardware .  As such, kitchen cabinet refacing is a great ROI project. You can also refinish them but this is a bit more of a project!

New Countertops – Everyone wants granite counters, and they certainly add to a home’s value.  But they aren’t cheap.  Consider granite tile as a more affordable alternative, or lower-cost Corian or Ceramic.  If you are replacing laminate countertops than any of these new kitchen countertops is a great option.  You might even check into Butcher-block.

New Flooring – Again not the cheapest, but consider a product like Pergo or QuickStep in place of real hardwoods.  Depending on where you are starting, this can really upscale your kitchen quickly and easily.

Appliance Refacing – this is a pretty new concept, but basically for $10-30 you can reface your appliances by covering them with a coating or film.  This can make a regular dishwasher look like it has a stainless steel finish, without the price tag.  Be careful though, you want to do a good job here so it doesn’t look tacky.  Also don’t go too cheap on the materials.


*Get free kitchen remodeling estimates from local contractors by filling out the form on the upper right hand side of this page*

DIY – How to Refinish Kitchen Cabinets with Paint or Woodstain

Your kitchen: it’s where you start your day, prepare your family’s meals, and enjoy some quality conversation at dinner time. Even if you’re not exactly a culinary aficionado, the kitchen is one of the most important room’s in the house with its aesthetics depending heavily upon the appearance of cabinetry. Dark, dull, and dingy cabinets disrupt the room’s aura, making it an unpleasant space to spend your time.
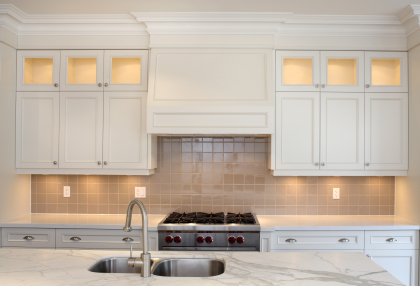
iStock_000016335408_ExtraSmall

If you think the only way to rectify this plight is through a messy and costly renovation, you’re very much mistaken; cabinets can be quite easily refinished to achieve a like-new look without hiring a contractor. The best part? It’s something you can do yourself with some basic tools and a little patience.

Tools and Materials

-Phillips/flathead screwdriver
-Sandpaper (60, 120, 150, 220, 400 grit)
-Trisodium phosphate
-Paint stripper
-Metal scraper
-Primer
-Paint (color of choice)
-Stain/gel stain
-Polyurethane sealant
-Tape/drop cloths
-Various brushes (1″-4″), rags for wiping stain
-Wood grain tool

Note that not all methods of refinishing will require all tools listed above. In all situations, begin by removing all cabinet hardware and placing doors and drawers on a clean, dry work surface. Also, mask off and cover all areas that you wish to keep clean.

Let’s look at the first–most traditional method–of refinishing wood cabinets.

Complete Refinish
These following steps will explain how to completely refinish kitchen cabinets by stripping away all of the old finish and applying a new finish. If your cabinets are still in very good shape and showcasing that authentic wood grain is of chief importance, this is the way to go.

Begin by applying your paint stripper of choice and following the manufacturer’s instructions. Citristrip is a quality, environmentally-sound product, as it doesn’t contain harmful chemicals. After letting the product sit on the old finish (generally at least half to a full hour), begin scraping the old finish until it’s completely removed. Alternatively, you can (painstakingly) sand down the old finish with coarse grit sandpaper, although this can prove messy and extremely time consuming. Once complete, wash the surfaces with a trisodium phosphate (TSP) cleaner and allow to dry thoroughly.

Now it’s time to begin applying the stain. Using even brush strokes, uniformly apply the stain, wiping down the wood occasionally to remove any buildup. Once the stain is no longer tacky, you can remove burrs by gently sanding with 220 grit sandpaper. Repeat this process until the desired shade is achieved.

To complete the process, apply 2 coats of a polyurethane sealant and lightly wet sand with 400 grit sandpaper.

Painted Finish
Maybe you’re not a fan of the wood used in your cabinets or you simply desire a specific color that really sets off the decor in your kitchen; in any case, painting your cabinets is a simple and cost-effective way to breathe into them new life. Since paint will largely hide the wood grain, it isn’t necessary to strip the old finish, saving a considerable amount of time.

The main preparatory step in this method is washing down the existing surfaces with a TSP cleaner; not only does this remove waxes and oils, which inhibit adhesion of the new paint, but it slightly scuffs the surface, promoting adhesion.

Once dry, begin by applying primer to the surface. One coat should be adequate as it doesn’t need to completely conceal the old finish. Once dry, sand with 220 grit sandpaper before applying as many finish coats of paint as necessary to achieve the desired color. Finish by lightly sanding with 400 grit sandpaper.

Faux Wood Grain
Either your cabinets are in poor shape and/or you don’t want to completely strip the old finish; no matter the case, you still want the appearance of wood grain. Fortunately, this only takes a few more steps than painting your cabinets. Begin by following all steps included in the painting section; just be cognizant in your finish coat color choice. Pick a color that’s similar to the stain variety you desire.

Once the solid color has been dried and sanded, apply gel stain with a brush. Instead of wiping with a cloth, though, brush a wood grain tool across the surface to produce the appearance of wood grain. After this has dried, finish by applying a polyurethane sealant and wet sanding with 400 grit sandpaper.

Squeeze Some Sunny Spring Cheer Into Your Kitchen

Lemons are just the spring touch that your kitchen is craving after a long, chilly winter. If properly placed, they can add modern zest, a fresh, clean look and sunny cheer. A creamy, crisp lemon color is paired well with the modern and sophisticated tone of black, and toile is a delightful way to introduce it. Black and white toile will add French country sophistication to your kitchen, and it is easy to access. Typically found in fabric, wall paper and even linens, this is a fun, fresh way to usher in a bit of boldness with a traditional and timeless pattern to instantly update and enhance your kitchen space. Black and white toile is a lemon’s long, lost love. They just belong together like meringue atop lemon custard. Whether you are in for a full kitchen overhaul or looking to simply update, the buttery, golden yellow of lemons blended with black and white toile will squeeze some irresistibility into your kitchen space.

Sunny Side Up

A subtle splash of color is essential to lay the foundation for your French Country kitchen redesign. There are so many yummy and refreshing lemon tones available. Avoid a stark, primary yellow and instead introduce milder tones for the softness that this look requires. Great places to apply paint are the walls to start, then the backsplash, and even possibly the ceiling. If you’re shy about committing to a new color on every wall, choose an accent wall to paint then perhaps the window casings, door frames or trim as well. Be certain to reserve some paint for unfinished wood bar stools or to coordinate the back panel of your dining room hutch.

If you decide to leave the ceiling white consider painting a lemon yellow star around the base of your light fixture in place of a traditional ceiling medallion.

Create Crowning Cabinets

Never overlook the cabinetry, your kitchen’s “furniture,” as it should become part of the action too. Not sure about committing to completely sand and paint the cabinets? There are other fun ways to update and add distinction. Try applying wall paper to the inset portion of cabinet doors. This is a perfect place to introduce a black and white toile patterned paper. Measure, trim and apply the paper once all of your cabinet doors have been removed. Glue a roping or black trim to the edges of each panel to finish the look. Also, try removing the center panel of a few key cabinets (perhaps those above the stove or sink) and stapling in chicken wire. This will become a favorite place to display a few plates or a jar of faux lemons.

Love the look of custom soffit lighting? Create it by laying white stringed mini lights down flat on the top of your cabinets. They should be well hidden behind the upper cabinet molding. When lit they will provide ambient lighting that your guests will think was professionally installed.

Outfit and Accessorize

Accessories are an essential when creating cohesion throughout your space. Consider items that are not traditionally found in the kitchen. An antique step ladder painted black and distressed a bit will become a fun, funky place to hang hand towels or pots and pans. Also, window shutters are a great place to pin recipes.

The counters are best kept free from clutter, so choose a few key accessories that will bring the theme home. Fill glass apothecary jars with lemon drops or white meringue cookies for all to see. Embellish the outside of the jar with black grosgrain ribbon and monogramed labels. Display your yellow dish soap liquid in a glass olive oil bottle embellished to match your apothecary jars.

Have fun outfitting your table with yellows or black toile linens that will help give life to the look. Remember napkin rings, plates and cups should all coordinate with your new look too. Use table runners laid across a rectangular table instead of place mats for a new and interesting look. Also, if there is any black and white toile wall paper left over from the cabinet project, be sure to cover light switch plates by wrapping them like a gift and securing the back with tape.

From concept to completion, this is a sunny and stylish spring kitchen that would appeal to the palette of even the most style conscious epicurean. Whatever life gives you– make lemonade!

Bathroom Remodeling and Design Ideas and Pictures

As we love to do here at HomeOwnerIdeas.com we created this post for the homeowners who love to visualize design and remodeling ideas. Below you will find a wide variety of modern, contemporary, luxury, vintage etc. bathroom pictures that you can feel free to share with your remodeling contractor to get ideas for your new bathroom redesign. Enjoy!

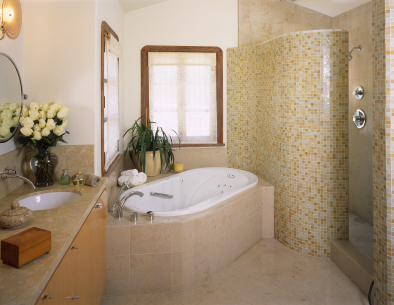
The traditional modern bathroom these days often looks like the picture below. To best utilize space a glass shower is attached to a sunken bath tub. This bathroom also utilizes natural light. Tile, granite and wood cabinets tie the luxury feel together here.

iStock_000001676454_ExtraSmall

In this next modern bathroom design the homeowners wanted to incorporate more color in to the actual design, which is often most easy to do through the use of small glass or ceramic tiles.

iStock_000018000389_ExtraSmall

The luxury bathroom below uses every ounce of available natural light but also incorporates uniquely designed stainless steel raised plumbing features, custom window coverings, granite countertops, wood cabinetry and medium tile flooring.

iStock_000007953677_ExtraSmall

The next bathroom picture shows a design to make a smaller space look much larger. Carefully placed recessed lighting echoes off of the full tile walls in this bathroom while mixing in the natural light giving the bathroom an illusion of being much larger than it actually is.

iStock_000019504171_ExtraSmall

The following bathroom has a classic “natural look”. Large and small stone faced tile, natural wood cabinets and earthy colors complete the look for this bathroom.

iStock_000001129531_ExtraSmall1

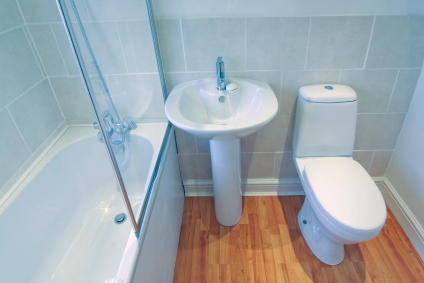
Sometimes in cases like city condos or row houses, a homeowner only has a small space to work with. In this very small bathroom below you see a small bathroom still transformed into a luxury setting. Large tile can give the appearance of a larger space and a pedestal sink is always the best bet. The modern, narrow toilet also allows for greater floor space.

iStock_000003204725_ExtraSmall

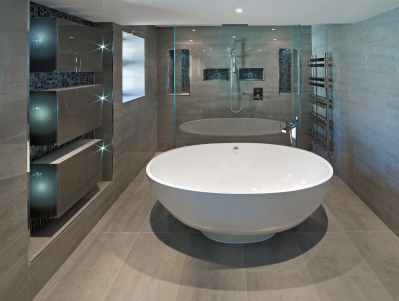
This ultra-modern, super-contemporary bathroom has really been designed to “wow”. The large oval bathtub is a rare but stunning focal point while just past the tub is a walk-in shower with a single glass wall. To complete the contemporary look, the remodel included extra-large, over-sized tile on the floors and walls.

iStock_000017754415_ExtraSmall

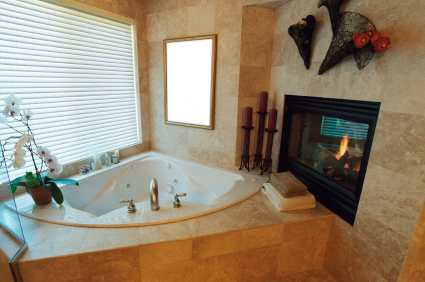
Becoming more common these days is the tranquility of adding a fireplace to your bathroom. Nothing accentuates the peacefulness of a jacuzzi tub like a gas fireplace.

iStock_000001183268_ExtraSmall

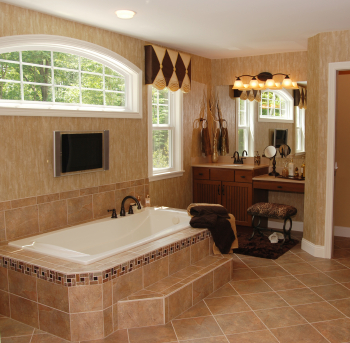
Lately, many bathrooms include flat screen televisions. This country style bathroom seems to truly be a place to spend time.

iStock_000007365049_ExtraSmall

The bathroom picture below is quite a unique and artistic idea indeed. Natural but bright coloring and a wide open design with cabin shower mixed together with large tiles, small tiles, stone tiles and glass tiles.

iStock_000006903957_ExtraSmall

This bathroom features a sink that stems from the wall, small tile design and a large walk-in shower.

iStock_000002508627_ExtraSmall

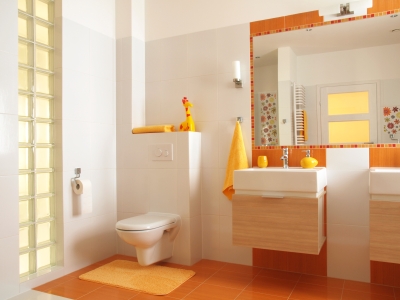
This next picture gives the homeowners looking for contemporary children’s bathroom ideas plenty to think about. A citrus color designed is tied together by the orange tile.

iStock_000019856108_ExtraSmall

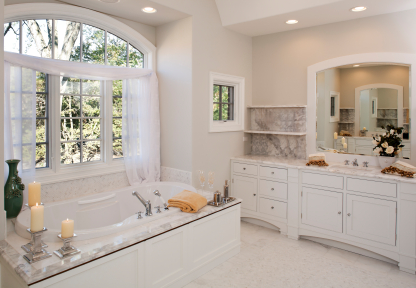
Finally we finish with an ultra-luxurious white toned bathroom. This space features custom cabinets, lots of marble and large jacuzzi tub. Mix in the large window and the small window and this bathroom will truly wake you up in the morning.

iStock_000015175813_ExtraSmall

We hope you enjoyed our collection of bathroom design and remodeling pictures and ideas. If you are looking for a contractor for your renovation project, use the form on the upper right hand corner of this page. Best of luck with your new bathroom!

Kitchen Remodeling Ideas and Pictures

If you are coming up on a kitchen remodel or renovation and you are looking for some great designs and ideas to incorporate into your plans, have a look below. We have put together a collection of kitchen pictures that you can then use to share with your builder. Use the form on the right to get in touch with a local top rated kitchen remodeling company if you have yet to take that step. We hope you enjoy these great kitchen ideas!!

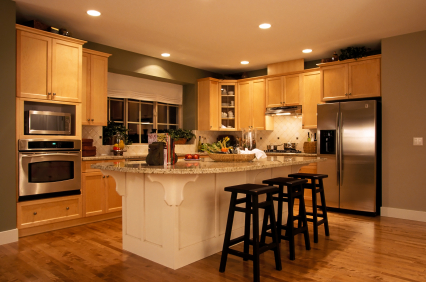
Here is a modern traditional kitchen. Notice the island which mixes white into a otherwise wood look.

iStock_000003687778_ExtraSmall

The long and narrow kitchen below uses a great deal of white colors to accentuate the natural light. The mix of stainless steel appliances and antique finished cabinets is more common in kitchen remodeling plans lately.

iStock_000019343636_ExtraSmall

The kitchen below also incorporates a great deal of white that blends with the stainless steel appliances. However, this kitchen is contemporary / modern because of the cabinets and lighting.

iStock_000006930189_ExtraSmall

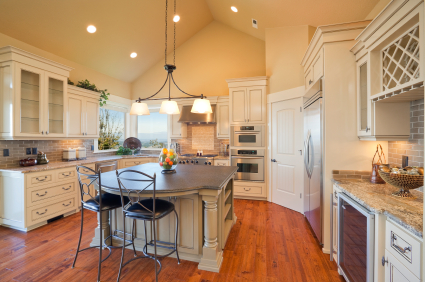
This luxury kitchen below is designed to accentuate the vaulted ceiling. The built in wine space on the right includes a wine rack above and wine cooler below. Glass cabinetry and classic lighting and chairs give this kitchen a unique, sophisticated look.

iStock_000014686306_ExtraSmall

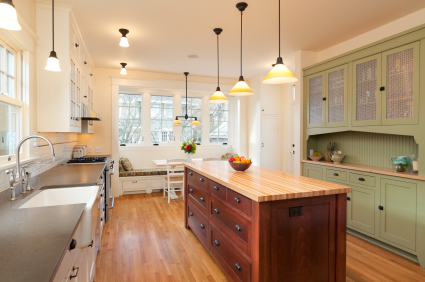
Below is a bright, modern country style kitchen that features contrasting colors and a stand out kitchen island.

iStock_000020649751_ExtraSmall

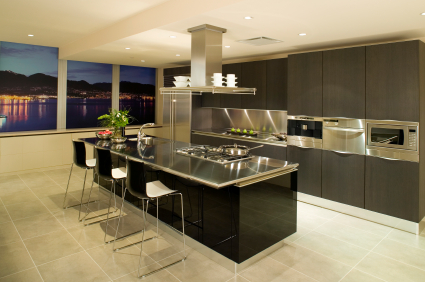
To contrast the kitchen above, this pic below shows a modern city style kitchen. This type of kitchen is great for a condo in city highrise. True stainless steel with dark cabinets and white oversized tile flooring, this kitchen is perfect for city-slickers.

iStock_000006784071_ExtraSmall

Many people these days are building their stovetops into their island. This usually comes with an exhaust fan directly above the cooking unit which can often be a centerpiece of the kitchen.

iStock_000016863827_ExtraSmall

Some kitchens feature a backsplash that is worth building around. In this case, the backsplash sets the look of the kitchen and gives is a country and comfortable feel.

iStock_000002578170_ExtraSmall

This kitchen is designed to accentuate the eccentric vaulted ceiling.

iStock_000006900176_ExtraSmall

This kitchen exudes a look and feel of a rustic cabin in the woods.

iStock_000019724860_ExtraSmall

Here is a modern version of the 1950’s kitchen. The use of light wood and the general color scheme give it the 1950’s style look while the modern sleek appliances and contemporary exhaust fan bring it in to the future.

iStock_000020336759_ExtraSmall

We hope you enjoyed our collection of kitchen pictures and ideas!

How to Give Your Bathroom a Modern Antique Look

Remodeling a bathroom can be rewarding, even with only minor renovations and on a budget. Combining the clean lines of modern décor with period-style or antique-look fixtures and accessories transforms a tired, outdated bathroom into a room with a distinctive look.

Evaluate what is already there and in good shape. If the basic plumbing and flooring of the bathroom are sound, a re-do can be accomplished without major construction. Painting the walls, replacing bathroom hardware like taps and sinks, changing the shower curtain and towels to reflect the new style and adding well-chosen cabinets or vanities will result in a new look with minor effort. Lighting, mirrors and wall hangings can complement the new look.

iStock_000020100236_ExtraSmall

First, decide whether you want an eclectic look that combines design motifs and styles from several periods or if you prefer to go with a single decorative style. When you decide on a style, be it Art Deco or Victorian, select hardware fittings for the bathtub, shower, sink and cutoffs that complement the style. New taps give a new look to old fixtures, so you may not need to replace the sink or tub. Manufacturers feature lines of hardware that embody classic design styles but are modern. Do-it-yourself hardware stores have a large selection of styles and finishes in materials like stainless steel, brass, ceramic, bronze and copper.

To accent an Art Deco theme, look for hardware with simple, clean lines or geometric shapes. For a Victorian look, choose cross-handle faucets with ceramic buttons labeled hot and cold. Match the taps with a shepherd’s crook spout for an elegant touch. For a more authentic antique look, replace single-handle faucets with two-handled models. Make sure that the sink has the correct hole openings for the new fittings.

Match towel racks, soap holders and other accessory hardware with the plumbing fittings to enhance the style, but don’t feel that you must use all new accessories. Flea markets often have accessories that lend a charming accent to new décor. Wall-mounted ceramic soap dishes give a vintage look to any décor.

If your bath has an under sink vanity, refinish it to reflect the new style. Updating hardware and repainting may transform a tired-looking vanity into a chic addition to the new scheme. For an Art Deco look, add chrome trim to the outside. For a Victorian look, try distressed paint in off-white with an accent color for trim.

If you choose to replace the vanity, consider refurbishing an old wooden dresser or small cabinet. A wooden cabinet can be converted to a vanity by adding a marble top and wash basin, running piping through the back and refinishing the wood. Another choice is to replace the sink vanity with a legged sink console.

If your bath has a tub, it need not be replaced. An old tub can be refinished with good results. For a built-in tub, replace the shower curtain with one that that complements the period look you want. For a clean, modern touch, add frameless, clear tempered glass panels or a glass swinging door across the tub opening.

Lighting plays an integral role in an interior design scheme. Make sure that the light fixtures complement the new style. Glass and mirrored fixtures blend well with almost any period décor and lend a modern, clean look as well. Wall sconces, ceiling lights and accent lights can be placed appropriately to enhance the mood of the room.

Are the floors of tile, hardwood or some other material? If the bath is carpeted, will the dominant color go with your new decorative scheme? Can carpets be replaced or updated? If the carpet covers another type of flooring like tile or hardwood, you may want to remove the carpet and use the original material. If the original flooring is in bad shape and should be covered, replacing the carpet may be preferred.

Of particular importance when remodeling is attention to scale. For a modern look, a small bathroom should not be overwhelmed with heavy or large furniture or too many knick-knacks. A large mirror mounted over the sink reflects light and gives the illusion of space. Light-colored walls also make a room look bigger. For larger bathrooms, furniture should be on a scale with the size of the room. Too many items may look crowded, but well-chosen pieces like an antique vanity and a stand-alone tub will give an authentic touch while keeping modern lines of simplicity and uncluttered space.

Three Unique Kitchen Cabinet Looks for a Contemporary Kitchen

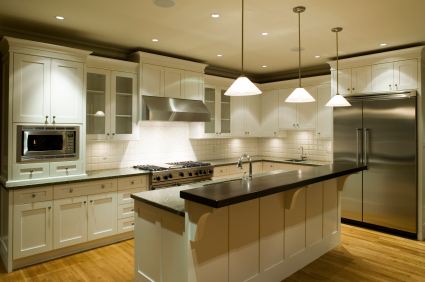
Whether you are designing the kitchen for your new home or remodeling an outdated kitchen to accomplish a more contemporary look, you will want cabinets that not only bring the whole space together, but give your kitchen a unique style all its own. Some of the more modern materials used in making contemporary cabinets include glass, exotic woods, and stainless steel. While there are dozens of contemporary design schemes to choose from, here are three unique kitchen cabinet looks you may be interested in when considering your contemporary kitchen design.

Black, White and a Splash of Color

Black and white has always been at the forefront of the classic kitchen design, but now it is coming into its own as a wonderful combination color palette for contemporary kitchen cabinets. Try installing glossy white kitchen cabinets and pairing them with black marble or granite countertops. Once you have the basic cabinetry down, you can choose one or two colorful accessories, such as fire-red pendant lighting above the black and white island/bar seating area or a vivid color tile for the kitchen backsplash. The cabinets in this design should be sleek and tall with little or no adornment on the doors to give the area a clean, industrial look. This design is perfect for smaller kitchens because the slim, light design can make the space appear larger.

Smooth as Glass

The open cabinet design is used when you have an eclectic mix of beautiful dinner and glassware you intend to showcase, but the openness of the design doesn’t quite fit within a contemporary kitchen where everything must appear in order. To be able to display your wares without giving your kitchen a farmhouse look, you might want to consider using glass inserts in your cabinets. Glass can be used many ways. It can be etched, fluted, or frosted to obscure the contents behind.

Dark wood such as mahogany turns any kitchen into a contemporary masterpiece. The glass inserts fit nicely into this type of cabinet. Stainless steel cabinets, by themselves, can appear too stark for some modern kitchens, but if you use glass inserts, such as the fluted type, it can transform your kitchen into a most inviting modern space.

Contemporary Glass Kitchen Cabinets

The New Green

One of the best ways you can do your part to save the environment is to consider using green materials in your contemporary kitchen cabinet design. Thinking outside the box will enable you to create a unique-looking kitchen starting with the cabinets. Renewable materials such as bamboo/plywood and lyptus, taken from a hybrid of the eucalyptus tree, are not only as sturdy as traditional hardwoods, but they are extremely beautiful woods that fit perfectly within the contemporary design scheme. In addition to their unique appeal, cabinets fashioned from green materials also offer additional health benefits by emitting less chemicals into your environment than those made from traditional cabinet materials.

Whichever contemporary cabinet design you choose, be sure that it fits within your overall modern design scheme. A qualified interior design expert can help you decide which materials and colors to choose to accomplish a unique look that you and your family can enjoy for many years to come