
DIY
Smart Ways to Plan for a Major Renovation
There are many reasons why a renovation is exactly what you need. The right improvement and changes made around the house can greatly affect the property’s comfort level, ambiance, and even value. In many cases, a major renovation is also needed because of structural damage or problems that need to be solved.
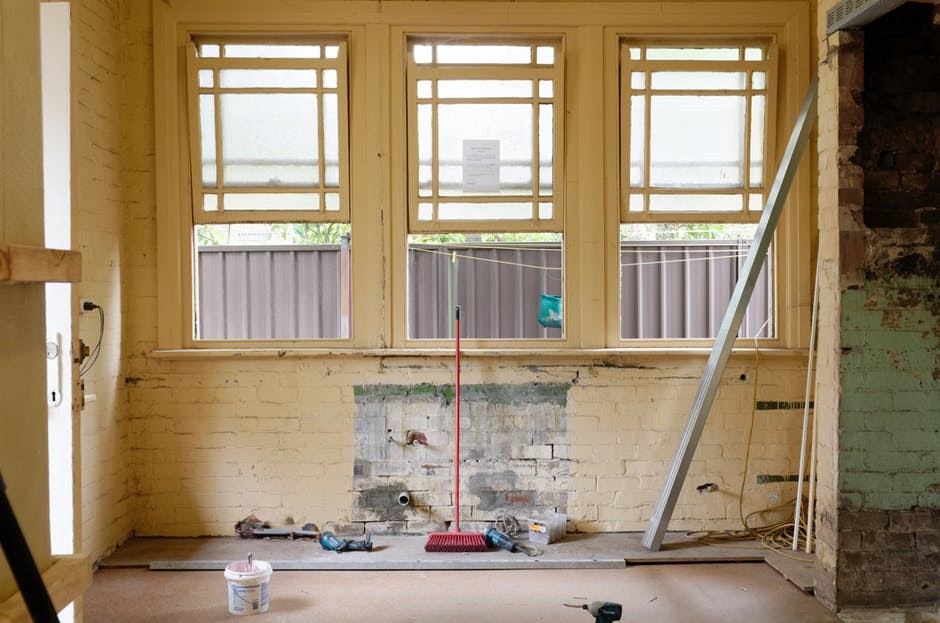
Unlike smaller remodeling projects, a major renovation is trickier to deal with. There are more factors to consider and things to prepare in order to have a smooth and efficient renovation project. To help you get started, we are going to focus on how you can plan better for a major renovation in this article.
List the Necessary Changes
You should always do a thorough inspection – well, have professionals do the inspection – before planning a major renovation project. The inspection will reveal issues around the house, giving you the opportunity to add fixing those issues to the plan.
The inspection should cover everything from top to bottom. You need to know if there are leaks and moisture affecting the walls, whether you have roofing problems to deal with, and even if there is wirings or fixtures that need to be replaced around the house.
After the inspection, compile a list of all the things you need to do. The list is your guideline when you are trying to plan for the project. Divide them based on areas and start working on a renovation plan. Prioritize tasks and organize them accordingly.
Prepare for the Worst
Even when you have a complete list of things to do, there are still additional things to prepare before you can have a truly smooth and uninterrupted project. At this point, you want to start interviewing contractors and finding a good one to work with for the renovation project.
Depending on the size of the contractor and the tasks in hand, you may need to schedule the renovation to be done in stages, tackling one room or area of the house at a time. This will allow you to keep the house usable for the duration of the project.
You also need to tackle details such as preparing additional restrooms for the workers or replacement restrooms for when your main bathroom is being renovated. You can now have Satellite handle everything from setting up portable restrooms all the way to keeping them clean using Satelite Industries deodorizers for maximum convenience.
Plan Your Deliveries
One last challenge to tackle is the delivery of materials. Essential materials must be available on the site for the renovation project to continue smoothly. This is often easier said than done, especially when you have multiple suppliers to work with.
Worry not because careful planning is how you overcome this challenge. Work with your contractor and create estimates on when each set of materials is needed. Schedule the delivery of the materials early by one or two days. You can keep the project running smoothly without filling your house with piles of materials this way.
Careful planning is how you have a smooth renovation project. Don’t hesitate to go into detail and to anticipate everything as you plan for your own major renovation. The better you plan, the easier it will be to manage the project.
Tags:










4 Instant Hacks To Make Your Home Sell Faster
They say that the average amount of time to sell a home is ten weeks, but for many of us this goes on for a lot longer. Unfortunately, statistics seldom help us when it comes to the property market and what happens for one seller, certainly isn’t guaranteed to occur for another. There are simply too many variables.
Following on from the above, we cannot claim to have all of the answers when it comes to selling your new home. What we do have are some tried-and-tested methods to help you along your way and through the course of today’s post, we will take a look at some of these methods in further detail.
Inflate the size (artificially, of course)
Don’t worry, this first tip isn’t about paying for a brand-new extension. This guide is all about quick hacks after all, and this first one involves making your room at least appear larger than it really is to the naked eye.
There are various ways to trick the eye, and one of these involves manipulating light. For example, mirrors can make a room immediately appear significantly bigger than it is, and the effect is multiplied in a smaller room.
Lights have the same effect. If you have any dark corners of a room, try some Pagazzi lighting to brighten things up. In a flash, the area will appear more spacious.
The small fixes all add up
A broken door handle here, a bit of peeling plaster there. In isolation, they really don’t mean much. However, as soon as a prospective buyer wanders around your property, they start to set eyes on them and the dollar signs start to add up. They will look for more problems, regardless of their severity, and they’ll quickly realize that your home isn’t quite as spruced up as it might have appeared in the real estate brochure.
The solution? Make all of these little fixes. They won’t cost you a small fortune, but they will save potential buyers a lot of time and make them more inclined to make an offer.
Work on the curb appeal
Curb appeal is perhaps the biggest buzz phrase in real estate now, but it’s for good reason. As we have been taught for a number of years, first impressions are made within the first few seconds. As such, if the front of your home doesn’t look inviting, you’ve just ruined someone’s first impression and made them less likely to pursue the property.
As such, work on the front door, garden and anything else you can spot from the outside. It will make a monumental difference to opinions.
Let the estate agent do their job
One common mistake that eager sellers make is trying to jump in and run proceedings as soon as someone comes to visit their property. Instead, take a step back, and let the estate agent do their job. Chances are, some tricky questions might come their way, and they know exactly how to handle them. Just remember, if you say the wrong thing, you can turn a “maybe” into a “no” quite quickly in the property game.
Tags:
Here’s What You Need to Know About Mold and Mildew in Your Home
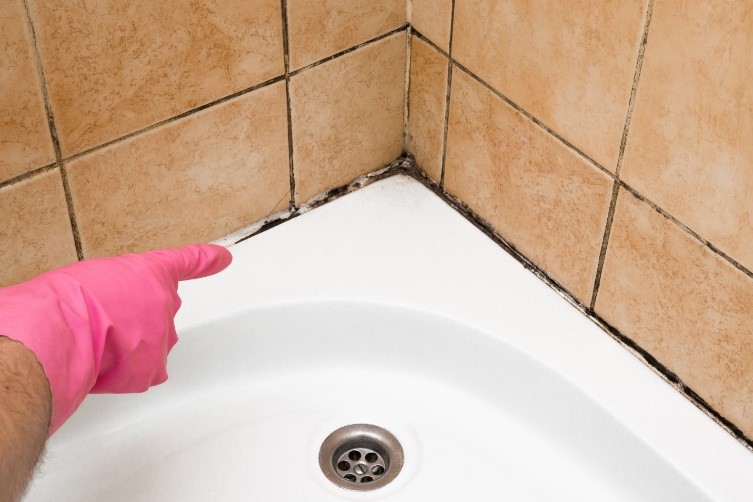 While one tends to be more serious than the other, both mold and mildew can cause problems in your home. Besides being unsightly and generating a musty odor, mold and mildew can cause serious health problems for you and your family, not to mention doing serious structural damage to your home. That’s why it’s so important to be on guard against letting mold and mildew grow in your home.
In order to protect your family and your home against mold and mildew, you need to understand what they are, because each type of fungal growth requires a different approach. Know where mold and mildew are most likely to grow, so you can monitor your home for their appearance. Know how to deal with mold and mildew yourself, and when it’s time to call in the professionals.
Mold vs. Mildew: What’s the Difference?
When it comes to identifying mildew vs. mold, you need to understand the characteristics of each type of fungal growth. Mildew is typically considered an early stage mold, and is therefore less serious and easier to treat. Both mold and mildew require moisture, high levels of oxygen, warmth, and darkness in order to flourish. Mildew likes to grow on flat, damp surfaces, and can most often be found in bathrooms and on window sills. It can also be found on paper, fabrics, and organic materials in your home.
Mildew may appear either powdery or fluffy, and is usually yellow, gray, or white in color. It can turn brown or black with time. Its growth appears flat, and it can cause a musty smell.
Mold, on the other hand, looks fuzzy, and may be white, black, blue, gray, green, brown, or even red. It can appear as irregular spots on any surfaces in your home where a damp, warm, dark environment is present. It, too, can create a musty odor. Though thousands of mold fungi appear in nature, mold inside the home is typically caused by one of five fungi:
- Alternaria, which is gray, black, or brown, and has a downy or wooly texture;
- Cladosporium, which is black or olive-green and can grow in cool conditions;
- Aspergillus, which is white, yellow, green, grey, black, or brown;
- Penicillium, which is green or blue, spreads easily, and causes a strong musty smell; and
- Stachybotrys chartarum, a toxic form of black mold that can cause serious illness.
Unsure whether you have mildew or mold? An easy way to tell the difference is to spray some bleach on the affected area. If it lightens, you have mildew. If it stays dark, you’ve got mold.
How Mold and Mildew Affect Your Home and Your Health
While mildew usually only causes cosmetic damage, if any at all, mold can cause serious structural damage to your home. That’s because mold and mildew fungal growths actually eat the surfaces they’re growing on. In nature, this allows fungi to break down and decompose dead plants and animals, but in your home, it’s bad news. A serious mold infestation can drastically compromise your home’s structural integrity, and even minor infestations can require completely replacing the affected materials.
Mold and mildew can also cause health problems. About ten percent of people are allergic to mold and mildew spores, and can experience allergy symptoms including:
- Itchy, dry skin
- Sneezing or coughing
- Runny nose
- Irritation of the eyes, throat, and nose
- Tightness in the chest
- Shortness of breath
- Wheezing
- Coughing
Symptoms can be mild to severe, depending on factors such as age and whether or not you have asthma. Stachybotrys chartarum, or toxic black mold, can cause severe symptoms even in people who are not allergic, which can range from respiratory problems, to fatigue, chronic sinus infections or asthma attacks, and depression.
Dealing with Mold and Mildew
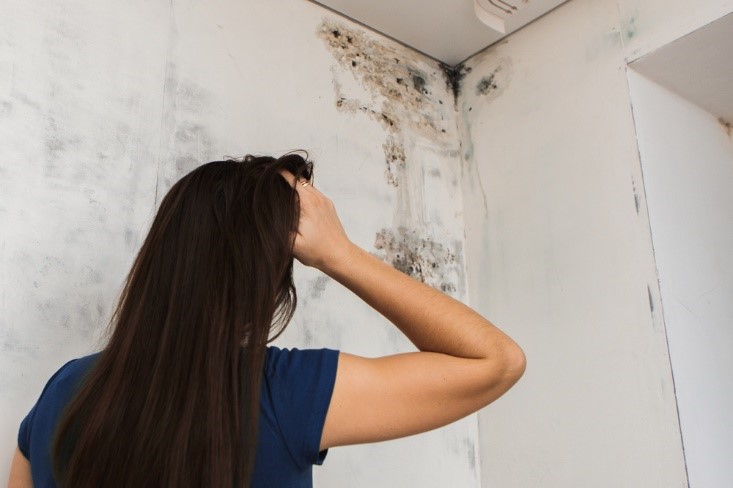 If you have mildew, you can get rid of it with bleach cleansing spray and some elbow grease. Clean surrounding areas well to ensure that you’ve removed all of the fungal growth. Wear a face mask and gloves while cleaning, especially if you are allergic. Prevent the recurrence of mildew by eliminating sources of moisture, or, if that’s not possible, clean the mildew regularly.
If you have mold, you should call a professional remediation company. Not only will your home probably require extensive repair to eliminate the mold and prevent its return, but dealing with a mold infestation yourself can cause severe health problems if you don’t use proper safety equipment. It’s best to let the professionals deal with a mold problem.
Mold and mildew can be smelly, unsightly, and even dangerous. Don’t let fungal growth get out of hand in your home. Take steps as soon as you suspect a mold or mildew infestation, to keep your home and family safe and healthy for years to come.
Tags:
3 DIY Solutions to Upgrading Your Home On A Budget

For thousands of Americans, the amount spent on home improvement projects ranges anywhere between $5,000 – $18,000. However, if you plan to Do-It-Yourself, you can transform your home into a mini paradise with just a fraction of the cost to hire an interior designer. Whether you have just moved into a new home or are looking to spice up the aged design, check out these 3 DIY solutions to upgrading your home on a budget.
Create the illusion of a bigger room
Paint is one of the most important aspects of interior design. The color scheme of your walls could be the difference between boring and exciting. In addition, paint is rather cheap and currently, there are hundreds of colors to choose from. For smaller rooms, it is advised that one should use softer and lighter colors. You can also experiment with different colors on different walls in a room.
According to this interior design firm in Orange County, CA the mirror should not reflect anything unpleasant or another mirror as this could make them totally spoil the design of your home. Decorative mirrors are also great for smaller rooms. Their reflection makes the room look much more spacious. This has been proven to create the illusion of a bigger room.
Optimize space
One of the greatest mistakes that most people make is having too many things in one room or in a small space. Clutter is the main reason that most houses seem poorly designed. That does not mean that you have to go minimalist and ditch half of your belongings. You can use well-designed shelves to store away things that are not complementary to the general design of the house.
One smart idea that is gaining traction is the using of old items for unique creations. You can hang old cutlery from the ceiling to create a beautiful art scheme. What about repainting and remodeling your old furniture? The most important thing to remember is that you should not overdo the design. Small changes can make huge differences.
Go Eco-Friendly
With everything going green, why not do the same to your home? Besides the already well known environmental and possibly health benefits plants have, they can also transform your home’s interior design. What is more is that plants come in different colors. You can get some green plants or yellow and orange flowers. The options are unlimited.
Plants are known to add color and texture to the design of the room. In addition, plants give you the option of playing around with vases of different colors, shapes and sizes giving your home that edgy look.
With the tips mentioned, you can cost-effectively transform your house into a masterpiece. Find a design you like and use it to meet your taste. The rule of the thumb is to never overdo a design but also never limit your creativity.
Tags:
Funding Solutions When Remodeling Your Home

The average expense for multiple room renovations in the US ranges from $17,000 – $63,000, and homeowners are spending more and more each year. It’s the harsh reality that, before you’ve even begun your home improvements, you may find out that you’ve not quite got the funds; and on top of that there are hidden expenses of remodeling that haven’t even been budgeted for in the initial planning. Whether your project involves a complete redecoration to bring your house back to the 21st century, or just installing a new bathroom, funding always seems to come up as a barrier to realizing your ideal remodeling project. But, no matter the scale, there are funding solutions that can keep your plans on track and on budget without having to sacrifice your vision for the perfect home remodeling.
Secure your finances early with mortgages or loans
Most homeowners need to consider whether to go with mortgage or loan solutions when renovating their property. A home equity loan is one of the more common solutions to funding your home improvements as it offers a lower interest rate and larger available funds than a personal loan; however, it does involve a fixed payment plan. Some consider refinancing their mortgage instead if they know they will be able to pay it back over time and might get a lower interest rate in the process. However, a reverse-mortgage should also be considered if you are over the age of 62. These are based on just a percentage of the equity of your property and aren’t required to be repaid until the property is sold of you have moved out; making reverse-mortgages the most secure finance solution for remodeling your home.
Use cash assets and do-it-yourself for smaller aspects of the project
As cash doesn’t involve interest rates, it is best to pay with cash for the much smaller aspects of your home improvements such as buying the odd piece of material from the DIY store. And of course, where possible, do-it-yourself! DIY is all part of the fun and will save you on labor when it comes to smaller tasks such as painting walls, nailing in the skirting boards, and putting up shelves or small units. Save where possible, get stuck in when you can, and the positive effects on your budget will really show.
When it comes to remodeling your home, you don’t have to let your finances get on top of you. Early planning and secure budgeting solutions such as taking out a reverse-mortgage and knowing which aspects of the renovations can have cash assets spent on them will make all the difference. Then, you will be well on your way to realizing your dream home remodeling project, no matter the scale or budget.
Tags:
Best Remodeling Ideas for Your New Home
[et_pb_section bb_built=”1″][et_pb_row][et_pb_column type=”4_4″][et_pb_text _builder_version=”3.0.76″ background_layout=”light” border_style=”solid”]

Our house is our castle, but after a few years even the most amazing castle becomes redundant in appearance. Looking at the same painted walls, carpet or furniture may feel tired…and boring. Every home needs a facelift eventually, but sprucing up your sanctuary doesn’t have to be budget ending.
Remodeling means different things to every homeowner. While a remodel may be as drastic as adding on a new wing to a home, the renovation process may be as subtle as a new coat of paint. No matter how extreme or conservative your plan, the choice to remodel is one that every homeowner considers during their residency. Taking the big leap doesn’t have to be scary, though, because you can take baby steps toward that final vision of home perfection.
Ready to give your castle a facelift? Check out these home remodeling ideas that can take a boring blah space into a modern masterpiece!
A Sweep of Color
If a room’s walls have been the same color for years—or maybe decades—it’s time to consider a new look or hue. You don’t have to go crazy with color palettes, but adventure is good…in the realm of color. The beauty of paint is that it can be changed if the color doesn’t flatter the room or your end design. Of course, you should swatch a color first and see if that hue is the one that screams décor perfection. However, if a room is small, don’t pick a dark shade…otherwise you will make the room look even smaller. You also can add interest to walls by using different textures of paint.

New Fixes for Old Fixtures
If overhead lighting, lamps or other household fixtures in a room look dated and old, switch them out. Choose a bold new chandelier to hang in the middle of a great room or head to an antique shop to discover amazing vintage lamps and other treasures. New fixtures also can transform old bathrooms in an instant. Select fun and funky faucets for a modern update or replace a tired old vanity with a pedestal sink and an antique mirror.

Decorate with Greenery
Plants and flowers infuse oxygen and beauty into a room. Houseplants also provide an instant touch of style and interest without the work of intense remodeling. Before you start adding bouquets of fresh flowers or investing in plants for any room, be sure to figure out how much work each variety requires. Houseplants require upkeep…and some are more finicky than others. Succulents are often fairly low-key and can be used to create modern and inexpensive dish gardens on tabletops. Head to a local nursery for advice about what varieties will work best for your home and lifestyle.
Light it Up
Lighting can transform the room; softer bulbs provide a warm ambience. Don’t forget to use natural lighting to transform a room as well. A large picture window or a wall lined with multiple windows opens up a room. Use roller shades to easily cover and uncover large window spaces to take advantage of the sun’s natural glow. Flameless candles also may be set within an unused fireplace for a décor touch that combines form and function. When decorating with candles, mix up the sizes for a bouquet of candlelight. You also can gather a group of flameless (or real) candles alongside a bathtub for romantic ambience.
Most homeowners will consider remodeling to update their home’s appearance. But remodeling doesn’t necessarily mean major construction and never-ending mess. Giving your home a face lift can be as simple as a new color of paint, fun fixtures or updated lighting. Small changes can make a huge impact on the beauty of your home.
Authored by NYC Writer Maggie Baker
[/et_pb_text][/et_pb_column][/et_pb_row][/et_pb_section]
Tags:
How To Minimize Plumbing Emergencies In The Summer
While plumbing emergencies can strike at any time of the year, there are certain types of problems that are especially common during the summer. Many of these issues are due to children being home during the day, which can lead to overuse of certain fixtures. Also, appliances such as washing machines tend to get more of a workout. Here are some examples of typical summertime plumbing problems and what you can do to minimize the chances you’ll have to deal with them.


1. Toilets
When the kids are home, naturally, the toilet gets used much more often. In order to reduce the risk of potentially troublesome and expensive clogs, make sure you tell everyone to be careful about the amount of toilet paper they should use. Also, remind your children never to flush anything that should not be flushed, such as small toys or other items. Taking some time now to talk about these things could help prevent serious issues from occurring.
2. Outdoor Faucet Leaks
You may not have used your outdoor faucet for several months, so check your faucet thoroughly when turning it on for the first time. Look closely for any signs of leaks around your home before you use that faucet for washing your car or filling your pool. If you don’t perform this check and you leave that faucet on for several minutes at a time, there is a chance you could do some serious damage.
3. Sewer Lines
If you are in an area that tends to get a lot of summertime thunderstorms, that could result in a backup of your sewer lines. In addition, tree roots can invade those lines and cause a major obstruction. Have a plumber give this part of your plumbing system a thorough once-over to see if there are any signs of problems.
4. The Garbage Disposal
With your children eating at home more during the summer, the garbage disposal will very likely get additional use. Do not let anyone in the home try to put items such as fibrous vegetables, starchy foods, hard fruits, etc. in the disposal. These items can cause clogs or potentially even burn out the motor.
5. Look for Yard Leaks
If you see standing water in your yard, you may simply assume it is from the last time you used your sprinkler system. However, if that pool of water does not go away, that is a sign you could have a leaking sewer line or pipeline. Call a professional at the first sign of trouble so that you can minimize any potential damage to your plumbing system as well as the structural integrity of your home.
Speaking of your sprinkler system, make sure you clear the sprinkler heads of any debris — not only the first time you turn it on but also periodically afterward. This will help reduce the chances that a clog could harm the system. Also, double-check to make sure all of the heads are down before you mow the lawn so you don’t accidentally clip one with the blade.
6. The Washing Machine
Active kids during the summer means additional use of the washing machine due to dirt and grass stains. Before you start putting those extra demands on the appliance, take some time to make sure it is in proper working order. Look for any ruptures or bulges in the hoses so you don’t run the risk of a flooded laundry room.
These are just a few of the ways that you can reduce the risk of having to deal with the stress and expense of plumbing emergencies in the summer. Contact your local plumber to learn more about how to keep your system working hassle-free.
Author Bio
Tom Mascari is the President of Mendel Plumbing & Heating. For 30 years, Mendel has developed a reputation for expert customer service and technical performance. They are a St. Charles, IL based company that provides plumbing, heating, cooling and electrical services to commercial and residential buildings in the Fox Valley area. Mendel also specializes in residential air duct sealing, remodeling and maintenance services.
Tags: plumbing
DIY: Plumbing Repair Tips For Homeowners
While many people dread DIY plumbing projects, a lot of the projects are actually easy and do not take a great deal of time. Here are some home plumbing repairs that you can do on your own with just a few basic tools.
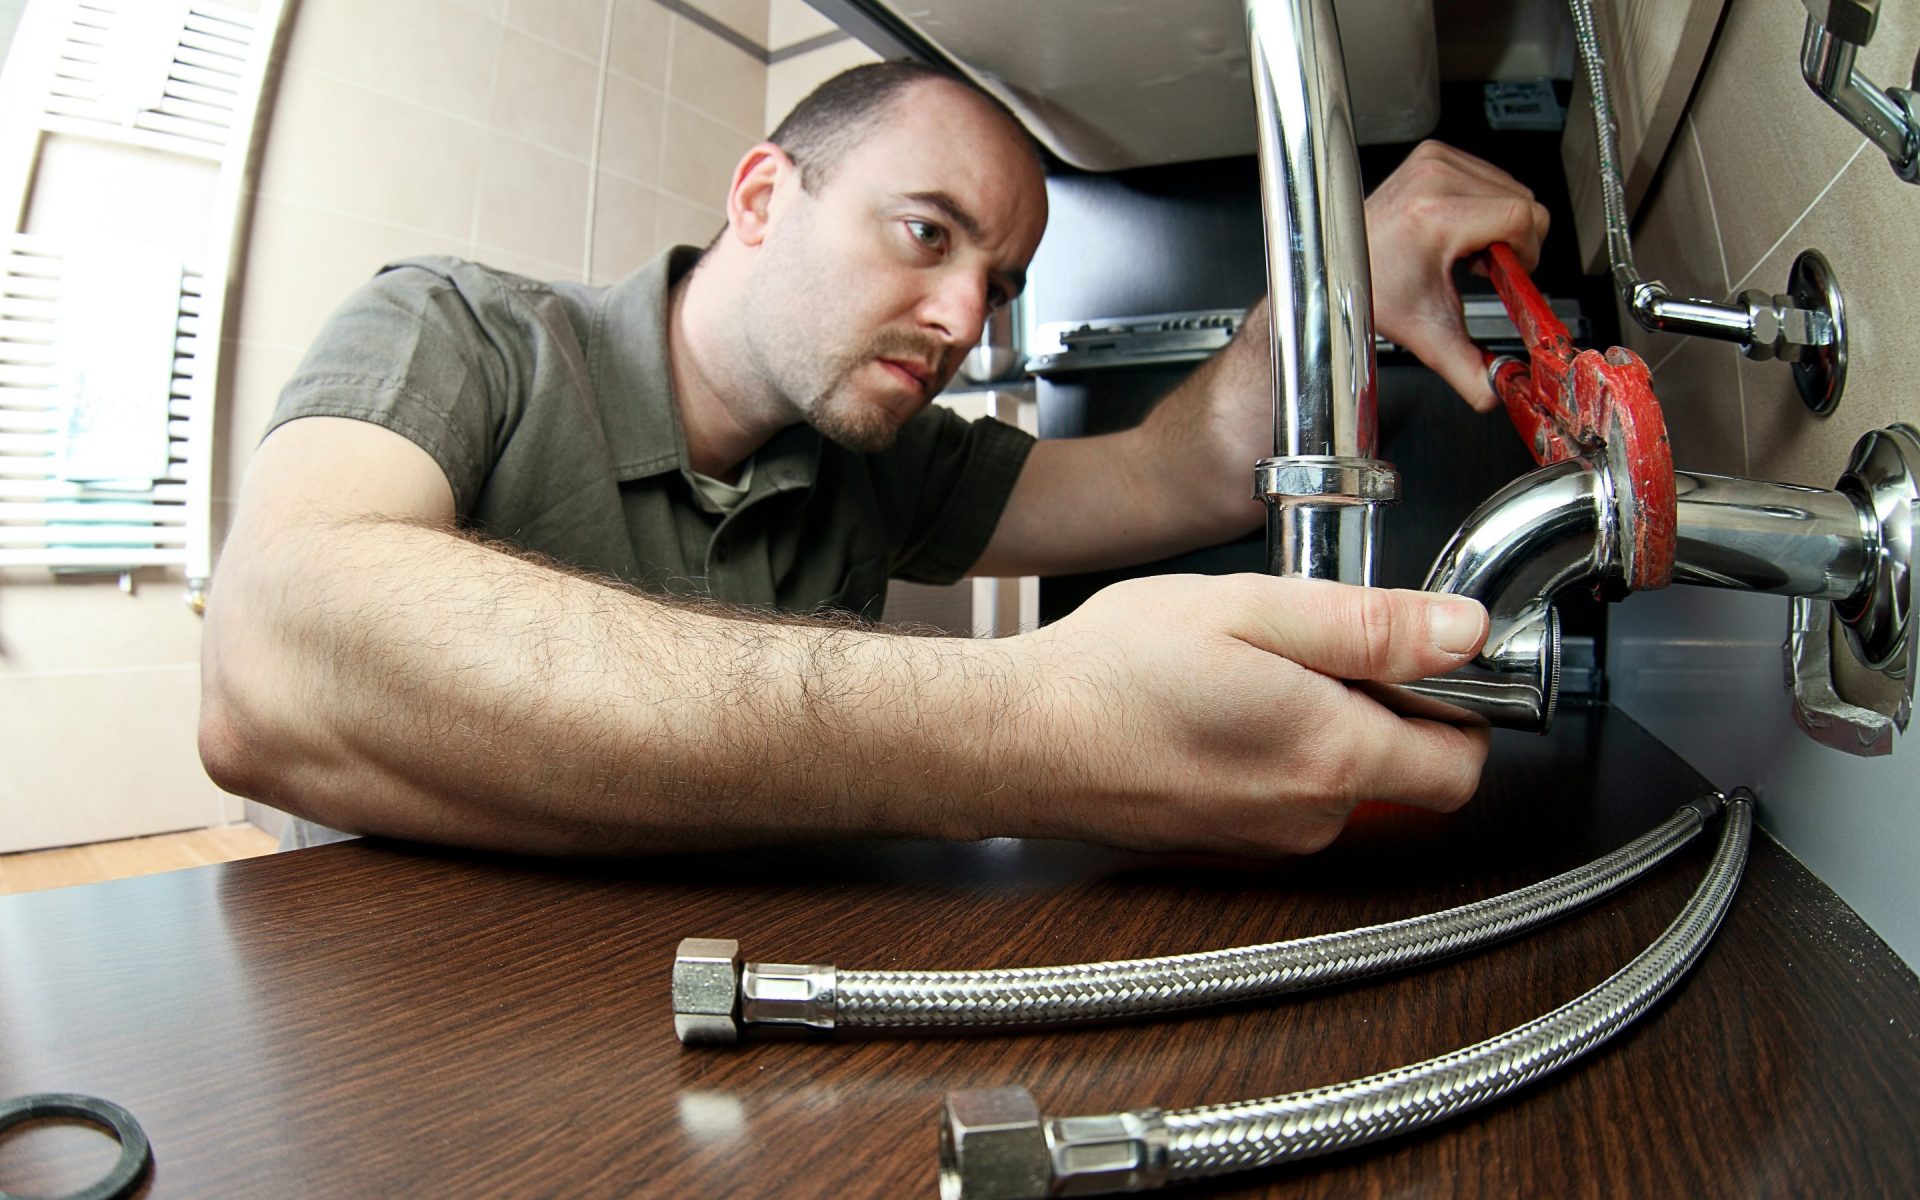
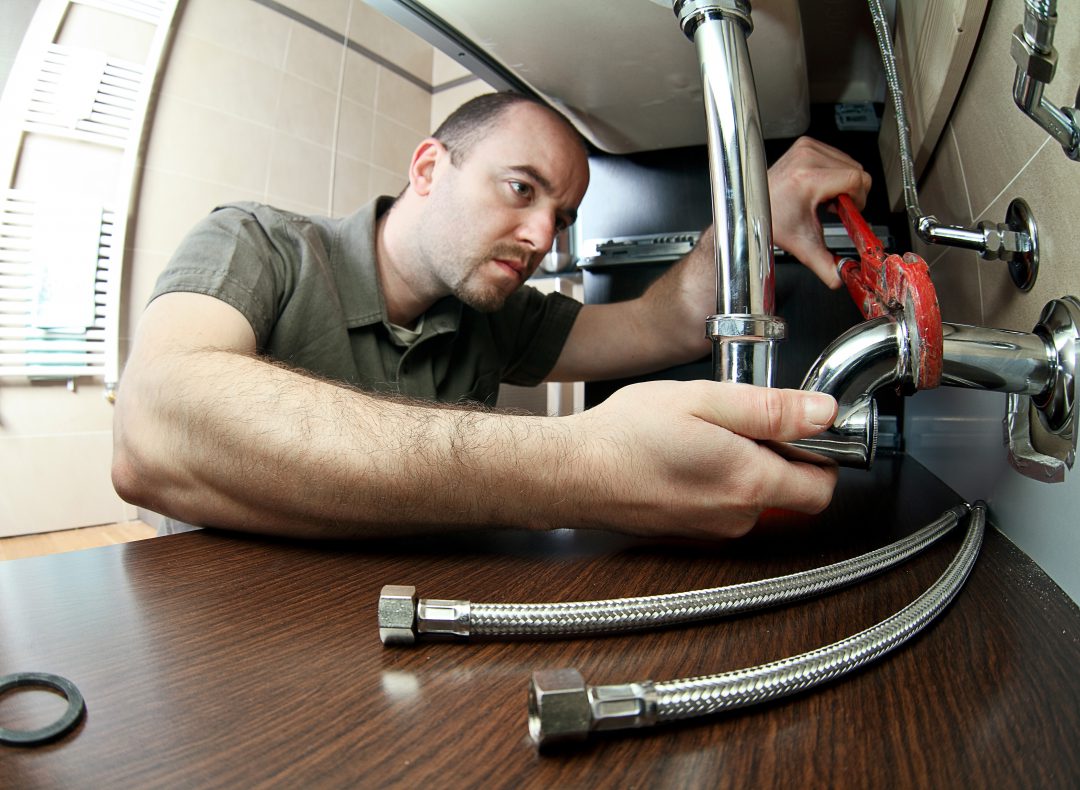
Garbage Disposal Repair
One of the most common plumbing repair jobs is fixing a garbage disposal. If yours is making a humming noise but not working properly, follow these steps. This is a fairly simple fix, but make sure that the unit is turned off before you start.
Step 1: Use a flashlight to see if there is any debris clogging the unit.
Step 2: Grab some needle nose pliers to remove as much of the obstruction as possible.
Step 3: Get underneath the sink and use an Allen wrench to turn on the disposal. To do so, all you should have to do is insert the wrench into the bottom of the unit and turn. Once the disposal is on, any remaining debris should be freed to the point that it either goes down the unit or you can pull it out with the pliers.
Toilet Repair
Most people have an issue with their toilet at one time or another. The easiest problem to fix is a toilet that does not stop running. You may be able to jiggle the handle a little bit to loosen the chain and keep water from running out of the tank. If that doesn’t work, you’ll probably need to change the flapper valve. Here’s how to do it:
Step 1: Shut off the water to the toilet. You should see a knob at the base of the unit. Then, flush the toilet so that the tank empties.
Step 2: Take off the tank lid and check the flapper at the bottom of the tank. This is the part that keeps water from entering the bowl. If it is cracked or worn, take it out and bring it with you to the hardware store to make sure you find the right replacement.
Step 3: Replace the old flapper with the new one. Before you do, however, check the valve seat to make sure there aren’t any rough edges. If there are, use an emery cloth to smooth them. This will help create a more watertight seal.
Leaking Showerhead
A leaking showerhead is not only annoying; it can also raise your water bill a great deal. Here’s how to fix a showerhead that is leaking at the base:
Step 1: Take a wrench and unscrew the showerhead from the wall.
Step 2: Wrap some plumber’s tape around the threads of the stem.
Step 3: Re-attach the showerhead and turn the water on. If you still notice a leak, take the head off again and add a little more tape. If this still doesn’t work, then you may either need to call a plumber or buy a new showerhead.
Faucet Repair
Today’s faucets are relatively easy to fix as long as you know some basic information. For this particular example we’re going to use a traditional faucet that has two handles — one for hot water and one for cold water.
Step 1: You will want to have a screwdriver handy as well as a small Allen wrench. Look at where the water is coming from and then turn off the water supply. You should see a shut-off valve underneath the sink. If you don’t see one, then you may have to close your home’s main water valve.
Step 2: Once the water is turned off, open the faucet to relieve pressure. Cover your drain hole with a strainer or a rag so that you don’t run the risk of losing any small parts.
Step 3: Unscrew each handle. You may first need to pry off the decorative cap on each side.
Step 4: Take your wrench and remove the nut on the hot and cold side. Remove the stem and set it aside, making a note of which one goes on the hot side and which goes with the cold side.
Step 5: You should then see an O-ring, which sits on top of a seat washer. The washer is probably the culprit causing the leak because it has worn out.
Step 6: Replace each seat washer. It’s the part that is held in place with a brass screw that is upside-down. Take the old ones with you to the hardware store to make sure you get the right replacements.
Step 7: Use plumber’s grease to coat the replacement seat washers and insert them into the sink. Re-assemble the handles and the leak should be fixed.
If you have any problems with any of these projects, call your local plumber.
Author Bio
Patricia Bonacorda is the President of Spartan Plumbing a plumbing and HVAC Company. For over 50 years, they have assisted apartment and multi family homes. Spartan Plumbing is a licensed, bonded and insured business that has provided professional plumbing, heating and air conditioning services throughout the DC Region.
Tags: faucet repair, garbage disposal, leaking faucet, leaking showerhead, plumbing, repair, toilet repair
Garage Remodeling: Hiring A Professional Or Doing It Yourself
When it comes to your garage, taking on a renovation project is more than a great way to update your home’s exterior — it’s a great way to add to its value. According to Remodeling Magazine, adding on a garage provides an average 69.3% return on investment for homeowners, and replacing the garage door can yield as much as 83.7% in resale value. That’s why the question is less about whether or not you should update your garage and more about how. So what is the best way to remodel your garage? Should you hire a professional to take on the project or should you go at it alone? Is updating the garage a good do-it-yourself project or is it best left to the professionals? To help answer these questions, here’s a look at the differences between these two options. When you’re trying to decide how to take on a garage project, here’s what you need to know:
1. Hiring a Professional — More Convenience but More Costs
Hiring a professional to handle your garage renovation means putting the project in the hands of someone who specializes in the job. This gives you more confidence that the end result will meet your expectations and more convenience as you can leave the work to someone else. As Ann Reagan says at Porch.com, “If you don’t know a stud from a socket, hiring a professional is the way to go. Your contractor can handle all aspects of your garage remodeling project, hiring subcontractors as needed for things like plumbing and electrical.” You won’t have to deal with the stress of learning new skills and potentially messing things up, and you’ll know everything from electrical work to wall demolition are done the way you want. Laura Gaskill of Houzz says, “Because of the precision required, installing a new garage door is best left to the pros. A professional will have the most experience at fitting and installing your garage door.”

One disadvantage to hiring a professional is that it is usually more expensive. So if you think you are savvy enough to know how to take on this kind of project, you could save a bundle by skipping the costs of professional help. For some homeowners, the initial investment required to replace garage doors or make improvements to the garage space will be prohibitive and keep them from even starting the project to begin with.
2. Doing It Yourself — More Work but More Savings
Whether you’re already an experienced handyman or just interested in teaching yourself new skills, taking on a garage remodel yourself can be a highly profitable undertaking. You’ll cut costs, gain or improve your skills and, assuming that everything goes well, still wind up with an improvement you enjoy. Generally speaking, unless you’re a very seasoned DIYer, there are some tasks that you can assume will be too hard to tackle, however, like electrical work (which most building professionals call “the No. 1 no-go for homeowners to handle,” says HGTV), along with plumbing or removing insulation. That said, the less you spend on a renovation, the easier it is to recoup your costs, so doing work yourself can be highly advantageous.
Despite the potential savings, the problem with taking on a garage remodel is the same problem you’ll encounter with any home renovation you do yourself — the work takes a lot of skill, a lot of time and a lot of effort. What’s more, you will probably need to obtain particular permits, especially if you’re doing big projects, such as adding electrical wiring or knocking out walls. While contractors are adept at getting these permits, as well as knowing which ones are needed, amateurs can easily get stumped.
Ultimately, the choice of whether or not to take on a home improvement project — whether it’s the garage, a bathroom or the kitchen — is a personal decision. The best answer will depend on how much you’re willing to do yourself, as well as how much you’re willing to outsource. In either case, upgrading your garage’s doors, floors, shelving or layout can be a wonderful investment, so evaluate how and when you’ll get started soon!
Author Bio
Vicki Clary is the Marketing Director for the semi homebuilder, Curtis Homes (http://www.curtishomes.com). For over 50 years, Curtis has been providing premium homes and townhomes for Southern Maryland Communities.
Tags: garage
DIY – Prepare Your Home for Greater Efficiency Before Winter
The only thing that you may be dreading more than the cold weather that is coming soon is having to pay the high heating costs that come with it. Fortunately, there are several ways that you can save money on your bill, and many of them are easy to implement.
Of course, the most straightforward thing that you can do is to simply turn down your thermostat. The general consensus is that your heating costs will go down about 3 percent for every degree that it is turned down. One significant way that you can save money by doing this is to turn it down about 10 degrees when you are at work and when you go to sleep as doing so should decrease your heating bill by about 15 percent.
Another way to save money is to ensure that the warm air that is inside remains there. Walk around your house, and make sure that you do not feel any drafts coming in from the outside. The most likely sources will be around doors and windows. Make sure to check your attic as well as much of the house’s heat is lost through this area of the house.
Some people will hold a lit match or incense stick and see where it flickers. This is especially useful if it is not winter yet as it may be more difficult to determine where these drafts may be located without being able to feel the chilly air streaming in.
There are several ways that you can close up these drafty openings.
One of the simplest and most affordable ways is to use a draft stopper. These are cheap – and oftentimes cute – items that can be simply placed in front of cracks that are at the bottom of places like doors and windows. They come in a variety of types and sizes.
A couple of other options include using weatherstripping or caulk. These are useful for taking care of any drafts not located next to the floor. You should consider replacing these forms of sealant every few years.
As much as you want to ensure that drafty openings are closed, you also want to make sure that you have not accidentally blocked vents that are bringing the heat in. This is often done when carpets or pieces of furniture have accidentally been placed over or in front of these openings.
Many do not realize that their ceiling fans can simply be switched to a reverse direction, which redistributes the warm air that has risen to near the ceiling back into the lower portions of the room where you and your family and friends are.
Some people decide to install double- or triple-pane windows or storm windows in order to provide an extra buffer between the warm inside of your house and the frigid air that is outside. Although these can be expensive to install, they usually pay for themselves within a couple of years and make a lot of financial sense in the long term.
Another more costly item you can install that will quickly pay for itself is a smart thermostat. This can be programmed to turn the heat up or down at certain times of the day and to control the climate in individual rooms. The latter option is great if there are rooms that are rarely used as you do not want to be spending money heating these portions of your home.
Even if you do not have a smart thermostat, make sure that you close off unused rooms by closing the vents that enter those places or otherwise cutting them off from the heat supply.
Another important step in reducing your heating bills is making sure that your heating system has been maintained recently as clogged filters significantly decrease its efficiency and dramatically increase your bill. In general, filters should be cleaned every few months and replaced every few years.
Water heaters are another place where people can save money on their heating costs. This is especially true if it is still set at 140 degrees, which is usually what it was when it was installed. If you decrease this to a still comfortable 120 degrees, you can save up to 10 percent on your water heating costs for the year.
By taking advantage of these recommendations, you will surely have a more efficient home this coming winter.
Tags:
DIY – How to Properly Treat and Maintain your Wood Deck
Old and new decks require a certain amount of maintenance to ensure they hold up to weather abuse, such as rain, snow and direct sunlight. While sun damage produces a dry, weathered look, constant foot traffic also ages a deck’s appearance over time. Rain, dew and sprinklers cause water damage that leads to mold, mildew and rot. Spilled drinks, food and old leaves stain the wood and alter its appearance. With proper treatment and regular maintenance, you can make sure your deck looks good no matter what you or the weather throws at it.
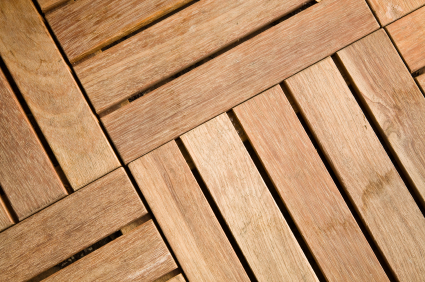
Testing New Decks Before Applying Finish
Before you apply finish to your new deck, test it with a few water drops. If the wood absorbs the water within a few seconds, it’s ready for finish. If you’re unsure whether or not to apply finish, check the finish’s moisture content requirement, and use an electronic moisture meter to test the wood’s moisture level. Protect pressure-treated wood with finish as soon as it dries to prevent sun and water damage and to maintain the deck’s new appearance. While pressure-treated wood holds up well to rot and insect damage, it does deteriorate over time without a weather-resistant finish.
Caring for Your Deck
Before you apply any finish, remove furniture, plants and other items from the area. If you can’t move certain deck or ground plants, soak them with water for protection against chemical deck cleaners. After cleaning and sanding, apply the finish out of direct sunlight, as the steady heat may cause uneven application and streaking.
1. Clean the deck.
After you move the furniture and plants, prep the deck for cleaning. Sweep the entire surface, making sure to clean any debris that’s caught between the deck boards. Avoid using bleach alone to clean the deck since it only removes mold and mildew stains without treating the wood’s deep fibers. Apply a regular deck cleaner to the surface, and rinse it clean with a hose. Pressure-wash the deck if it still looks dirty after using the cleaner. Wait two or three days for the deck to dry completely.
2. Sand and repair the deck.
Once the deck dries, sand down any weathered, raised or splintered areas, making sure to sand away any leftover stains or burn marks that can show through the finish. If the faucet near the deck leaks or the sprinkler heads need relocating, make the necessary repairs and adjustments. Perform one final sweep of the deck before moving on to the last step.
3. Finish the deck.
With the cleaning and sanding out of the way, make sure you apply the finish on a cloudy day or when the deck is out of direct sunlight. Make sure the deck doesn’t feel hot to the touch, as a hot deck could lead to failure of the finish. If the surface temperature exceeds 75 degrees, wait until it cools. Afterward, apply the finish according to the manufacturer’s directions. Wait until it dries before placing your items back on the deck.

Maintaining the New Finish
Depending on exposure levels, expect to refinish the deck every six months or so. Under normal conditions, the finish should hold up for a year or two if the deck was already in good condition. Some signs that it’s time to refinish your deck include:
The deck coloring turns gray.
The boards look weathered.
Stains set deep within the wood’s fibers.
Splinters and raised bumps form over the surface.
Even if you maintain your deck every day, you have to watch out for insect infestations, such as termites and carpenter bees. These insects burrow into the wood and leave piles of sawdust around the deck railings. Make sure to monitor for insects and take preventative measures to ensure your finished deck not only withstands the onslaught of sun and rain but also common wood-boring pests.
DIY – How to Replace Damaged or Missing Siding
Compared to other siding materials, vinyl siding is fairly prone to damage. Intense heat and cold can both degrade vinyl. Cold spells can cause brittleness, hairline cracks and full-on breakage. When one needs to repair or install smaller vinyl sections, it isn’t always cost-effective to employ a repair professional. This type of repair can cost several hundred dollars. Fortunately, small siding repairs are fairly simple and easy, even for people with little previous experience in this realm. Many people never perform their own repairs because they feel these projects are beyond their abilities. With a careful, methodical attitude, successful repairs are possible for people of all different skill levels. Before beginning any step in this process, gather all necessary tools and materials.
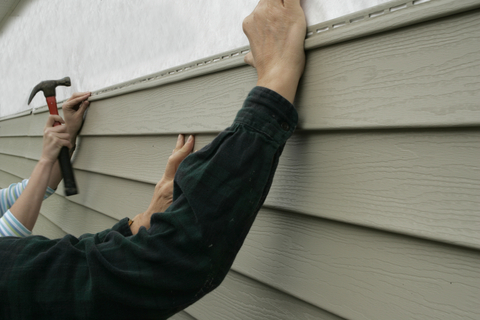
01. Secure Matching Vinyl Siding
Depending on individual circumstances, this step is quick or painfully slow. Obviously, some types of textures and colors are easier to match than others. If possible, it is wise to save leftover pieces of vinyl after every siding installation. With extra material on hand, one can save a lot of time and effort. Siding supply firms can use samples to find customers matching siding. If all else fails, some specialty firms will analyze siding, make distributor referrals and even provide options for replacing discontinued siding.
02. Fit Siding Together
One advantage of vinyl is its flexibility. Vinyl siding will flex and move with temperature variations. Pieces of vinyl siding interlock snugly to keep out the elements. Siding is attached to a dwelling by driving nails into holes in the nail hem. During this process, it is important not to drive in nails until they directly contact the nail hem. Without room to move and change with climactic conditions, vinyl siding won’t last.
Failing to leave a sufficient gap is one of the most common mistakes made by those new to installing vinyl. For a long-lasting installation, leave a 1/32″ space between nail heads and siding. This is roughly the same width as a standard U.S dime.
03. Unlock Damaged Vinyl With A Zip Tool
Before a person can install fresh siding, they obviously need to remove damaged sections. Zip tools are simple tools used to unlock siding for removal. To use the zip tool, simply insert the curved edge of the tool’s blade beneath the edge of the overlapping panel, hooking securely on the back lip of the bottom edge or buttlock. Pull the zip tool down while simultaneously moving the tool from the panel’s end. Continue this process as long as is needed to separate the entire length of the siding panel. Repeat this process along the top and bottom edges of the panel being replaced.
04. Remove Nails And Cut Out The Damaged Siding
After disconnecting the top and bottom of the siding panel, the panel will flap freely in the wind. Next, use a pry bar to pry loose the nails securing the strip above the damaged section. With tin snips, carefully cut out the damaged vinyl section. This is another step during which it is easy to make a critical error. Use caution and avoid cutting the whole panels adjacent to the damaged section.
05. Cut And Install The New Siding Section
This is another step that requires careful execution. When engaged in do-it-yourself projects, it is usually helpful to focus on accuracy instead of speed. It is certainly worth taking extra time in order to do the job right. For an eye-pleasing final product, it is particularly important to cut straight right angles. Using a layout square can ensure cleaner, straighter angles. To minimize the chances of having an accident, use a utility knife that has a sharp, new blade. The section of replacement vinyl should measure roughly three inches longer than the removed piece, providing 1.5 inches of overlapping material on both ends. To ensure a good fit, trim approximately two inches from the nail helm on either side of the replacement section. Next, slide the replacement vinyl section into place. The replacement’s buttlock will hook neatly into the lock at the top of the section below.
06. Nailing In The Replacement Siding
Spacing the nails approximately 12 inches apart, position them in the center of the appropriate holes in the nail hem. Nail them into place while remembering to leave a 1/32″ space between the nail heads and the siding. Always use galvanized nails with heads at least 5/16″ in diameter. Make sure the nail shanks are lengthy enough to sink at least 3/4″ into the framing. After nailing, simply take a zip tool and relock the topmost edge of the siding.
These are the essential steps for replacing damaged or missing siding. The more one prepares for this do-it-yourself job, the better one’s chances of executing the project without any hitches. While text instructions and illustrations are useful, it can serve well to watch online instructional videos covering this topic. Actually watching someone perform this task is helpful for avoiding common mistakes and problems. It is also sensible to ask advice from acquaintances that have replaced vinyl siding or performed similar home improvement tasks.
Tags: siding, vinyl siding