
DIY
Top HVAC System Efficiency Comparisons for Homeowners
In the list of must-have features in modern homes, a long-lasting and efficient HVAC system ranks up there alongside sturdy foundation and dependable roof. The home’s heating, ventilation and air conditioning system determines the home’s livability regardless of the time of year. Aside from altering indoor climate to cool it down or heat it up, the HVAC system plays an important role in preserving indoor air quality. However, efficiency is an aspect of the HVAC system that more homeowners are paying attention to. In this post, we wanted to spend some time sharing some research we performed on various HVAC efficiency ratings and data.
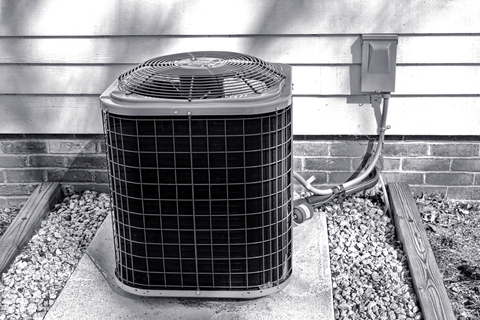
What an Efficient HVAC System can do for your Home
The primary function of the HVAC system is to maintain thermal comfort inside the home. In warmer climates, homeowners rely on the air conditioning system keep their homes comfortable. During the cold season, the heating system ensures that indoor temperatures can be maintained to comfortable and safe levels.
The ventilation part of the system promotes airflow to preserve air quality. It is also the part responsible for eliminating excess moisture to prevent mold development, the spread of airborne diseases, allergens and unpleasant odors.
Controlling indoor temperature also ensures preservation of heat and moisture-sensitive furnishings and accessories. Air conditioning and proper ventilation promote a healthy indoor environment.
Types of HVAC Systems
The design of the HVAC system will vary from one home to the next, depending on the homeowner’s requirements and preferences.
Window Unit
When space is limited or when the home’s design restricts retrofitting with air ducts, window units provide a solution. This enclosed unit includes an air cooling system, an exterior heat exchange and an interior heat exchange. Window units are practical options for smaller rooms, but these installations can interfere with the architectural style, create noise when operating and cause unsightly leaks.
The Split System
The split system consists of an outdoor unit containing the compressor and the condenser while the inside unit contains the evaporating coil. This centralized setup requires a motor blower to force the air to circulate. Most of today’s homes are designed for central air conditioning using the split design with duct work located in the ceiling, basement or attic.
Packaged Air Conditioning
A packaged HVAC system is a pre-assembled unit that can be used to control temperature and ventilate specific parts of the house but not the entire house. A typical packaged unit will have a capacity of 400 cubic feet per minute of airflow for every ton of refrigerant. A larger tonnage means larger capacity, but it will require the installation of duct work.
How to Choose HVAC Systems
A new HVAC system is a big-ticket purchase: The upfront costs are substantial whether it is an all-new installment or a replacement of an existing system. Choosing the right equipment will depend on many factors.
ASHRAE Standards
The American Society of Heating, Refrigerating and Air-Conditioning Engineers defined the standards for determining minimum ventilation rates, humidity and temperature ranges to make sure that enclosed spaces are fit for human occupancy. The HVAC industry uses the ASHRAE standard to recommend the type of equipment suitable to the given space. In residential buildings, the recommended rate of air change to maintain acceptable indoor air quality is .35 air changes per hour but not less than 15 cubic feet per minute for every occupant.
Home Features Affect HVAC Design
Clearly, the size of the home and its design features has an impact on the choice of HVAC system. A report from the Office of Energy Efficiency and Renewable Energy states that the type of HVAC equipment installed will have a significant effect on system efficiency and maintenance costs. The report emphasizes that differences in local climate will affect choice of equipment.
Load calculation takes into consideration the roof style, ceiling heights and type of insulation among other factors. An oversized system wastes energy but will also run inefficiently because the system will not operate at peak performance. Home renovation guru Bob Vila recommends that the capacity of the system should not exceed 25 percent of the calculated heating load.
Efficiency
For HVAC equipment, SEER or seasonal energy efficiency ratio is an indication of how much energy is utilized for cooling. Higher SEER numbers mean more efficient systems with many of the newer models ranging from 10 to 18 SEER. Currently, 13 SEER is the required minimum in most states. The heating seasonal performance factor or HSPF measures heating pump efficiency.
The DOE’s Energy Star Program provides an additional framework for assessing energy efficiency of HVAC and other equipment. The program mandates the inclusion of an Energy Star label on most appliances. It is the bright yellow label attached to the unit that outlines key features, an estimate of annual fuel usage based on normal use and possible savings based on national energy costs.
Investing in Quality pays Off
HVAC systems come in a wide range of designs, features and prices. Opting for a system that offers longer warranties with a track record for durability and dependability may pay off in the long run even if the initial costs are higher. For these systems, energy efficiency, lower maintenance costs and design features such as quiet operations may be worth the extra costs.
According to CNN.com, the average expected life of HVAC equipment are as follows:
HVAC components: 15 to 25 years
Furnace: 15 to 20 years
Heat pumps: 16 years
Air conditioning: 10 – 15 years
Thermostats: replace as the technology changes
Comparing HVAC Units
Choosing the right HVAC system for your home can be complicated given the range of choices available. The following table summarizes some of the essential features of the more popular HVAC brands.
| Lennox Collection | American Standard Platinum | Carrier Infinity Series | Trane | Rheem | |
| SEER | 25 | 21 | 21 | 20 | 17 |
| Noise generated by operation(decibels) | 59 | 55 | 65 | 72 | 71 |
| Compressor Parts & Warranty | 10-year limited warranty on compressor and other components, but some high-end models offer lifetime warranties. | 12-year warranty on compressor and 10 years on other parts. | 10-year warranty for the compressor and other parts although premium units may offer lifetime warranties. | 12-year warranty for the compressor and 10-year warranty on parts | 10-year unit replacement warranty and 10-year parts warranty. |
| Extra Features | Some models offer solar-ready capabilities and Wi-Fi enabled control features. | The AccuComfort technology in American Standard HVAC systems is set up to adjust in fractional increments instead of on and off. | Carrier units are weatherproofed with Weather Armor Ultra Protection to enhance durability and increase life span. | Weatherproofing is standard on outdoor units. Higher-end units offer Comfort Link communications technology that can be configured to optimize performance and provide smartphone management. | An onboard diagnostic system and fault history code is standard on some models. The system can be configured to send problem alerts to the thermostat. |
How HVAC Efficiency Results in Savings
An efficient HVAC system is an investment that pays back over time. The initial costs will be hefty because it will include equipment and installation costs. Installation expenses will vary depending on the type of installation, geographic location and other restrictions. At the outset, it is important to work with a licensed HVAC contractor experienced in installation and replacement.
To understand how a more efficient system results in savings, consider this hypothetical situation:
A homeowner is trying to decide between a 10-SEER unit and a 14-SEER unit. Based on Energy Star information, the 10-SEER that costs 1500 will result in utility bills of $125 per month. The 14-SEER unit will cost $2300, but utility bills will be reduced to $90 monthly. By spending $800 extra on a more efficient system, the monthly bill is reduced by $35, which means the 14-SEER unit pays for itself in about 23 months.
Other factors such as durability and routine maintenance requirements will also affect return on investment. However, the most important decision factor has to do with how the HVAC system enhances the homeowners’ quality of life and enjoyment of their property.
References:
http://www.consumer.ftc.gov/articles/0072-shopping-home-appliances-use-energyguide-label
http://www.grntch.com/images/ASHRAE_Standard62-01_04_.pdf
http://www.consumerreports.org/cro/central-air-conditioning/buying-guide.htm
http://money.cnn.com/galleries/2008/news/0810/gallery.how_long_things_last.toh/4.html
http://www.pdhonline.org/courses/m149/m149content.pdf
http://central-air-conditioning-units-review.toptenreviews.com/
http://www.bobvila.com/articles/39-choosing-an-hvac-system/#.U6M3WJRdVu5
http://www.nrel.gov/docs/fy12osti/52991.pdf
Tags: energy efficiency, HVAC










DIY – An Entryway Retiling Real Life Project
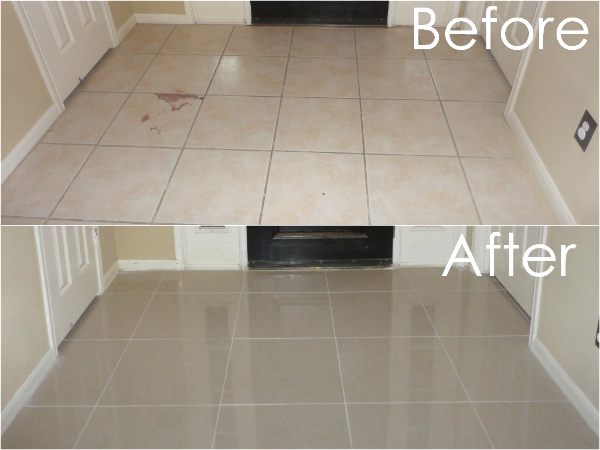
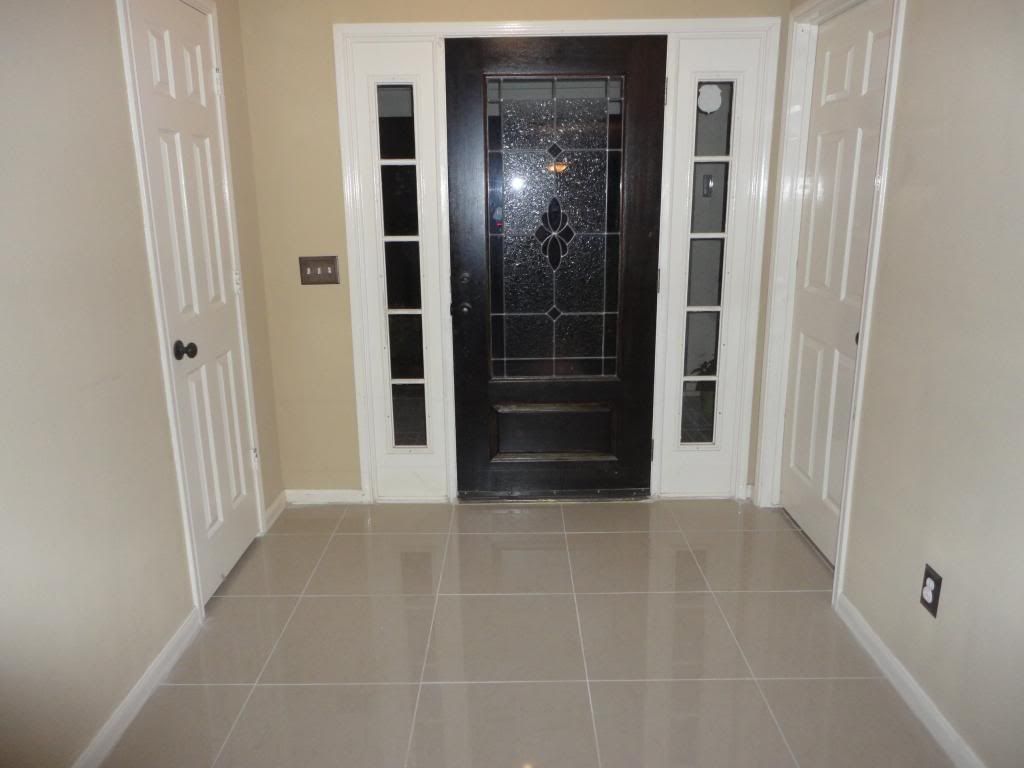
My family moved into our first home last December, and to say that we have a lot of projects on our to-do list would be an understatement. There are multiple projects in the works for almost every room in the house. Thank goodness it’s only a 1-story home.
Recently, we decided to give our entryway a makeover, starting with the tile. My husband grew up working with his uncle, who was a contractor specializing in floors. Lucky me, right?
The previous owners used some ceramic tile that was probably better suited for a mudroom. We wanted something a bit more glamorous and shiny. I picked out about 35 pieces of this 12×12 porcelain tile from Home Depot and a similarly light-colored grout and we got to work.
The whole thing took us about 2 days, which is impressive for us because we have a toddler and a baby living with us. We’re so happy with the results, and we wanted to share it with anyone who thought they might embark on a re-tiling project on their own. I’m here to tell you-you can do it. While it’s time consuming and meticulous work, it can easily be your next DIY project.
Materials:
Tile
Spacers
Thinset
Grout
Mixing bucket
Tools:
Tile removing tool
Wet saw
Trowel
Grout float
Paddle mixer
1. Break up the existing tile using a tile removing tool-this could be as simple as using a hammer or a hammer gun. As you work, be sure to aim the hammer gun (or hammer) at the grooves in the tile, it will help it to break easier.
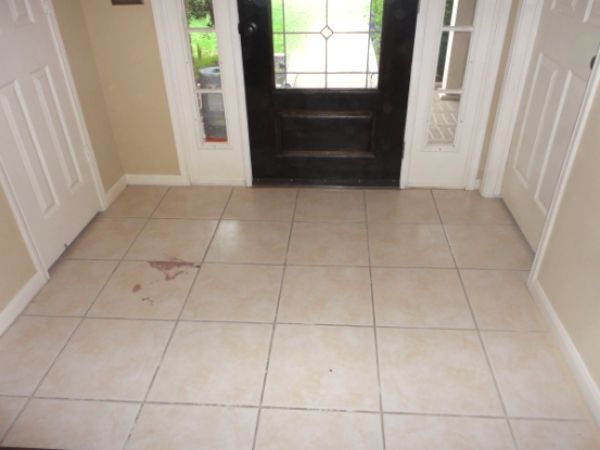
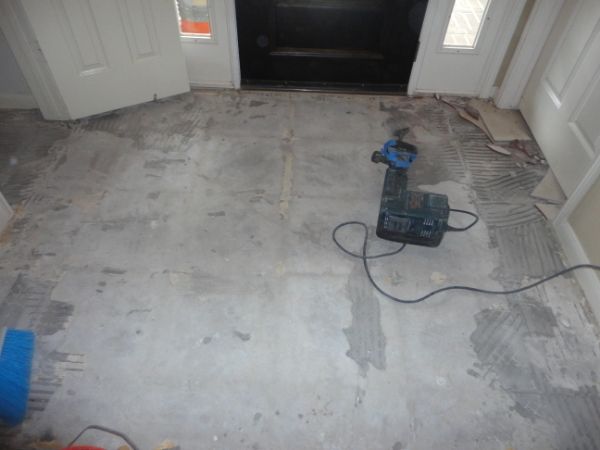
2. After you thoroughly clean the area, measure the area and lay out the tile in the design you want. You should make sure that the full tiles are in the main space, while the cut tiles should be along the wall or stairs. The less you have to cut, the better.
3. Mix the thinset using a paddle mixer and a bucket. Thinset is what you use to actually set the tile. Pour the thinset into the bucket and slowly add water until the consistency is similar to pancake mix. Let it sit for about 5 minutes and mix it again.
4. Set the whole tiles first. Spread the thinset using the smooth side of the trowel, and then spread it using the notched side. Once you’ve set the whole tiles, it’s time to set the rest. Spread out more thinset, as evenly as possible.
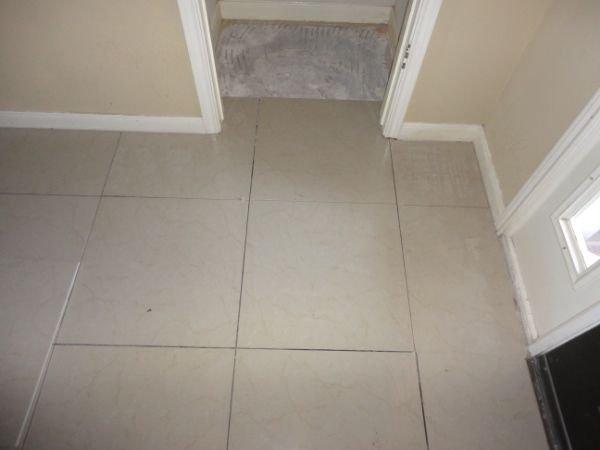
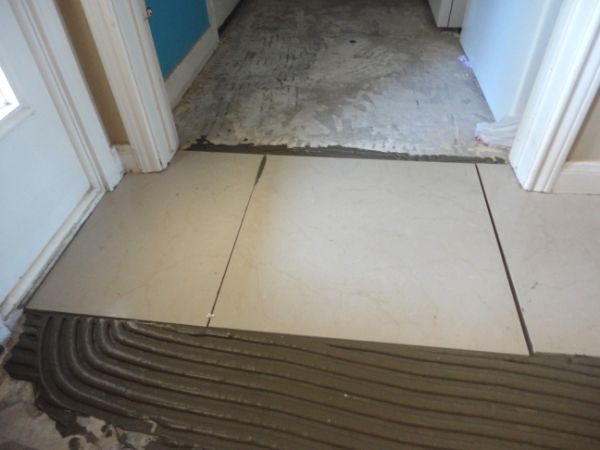
5. Using the spacers, set the remaining tiles and create your pattern. Since every tile will have a different design, pay attention to how they look in relation to one another. You’ll probably have to make more cuts as you get closer to the edges.
6. Once the thinset has dried and your tiles are set (this usually takes about 24 hours) you can apply a sealer. This is particularly important when working with natural stone, because it’s porous and can stain easily.
7. You probably already picked out your grout color-it should be a shade that complements your tile. Mix the grout with water (there should be directions on the bag) and spread it along the lines using the grout float. Don’t work the grout AGAINST the lines, but into the lines. Push it in and be sure that it fills in the lines.
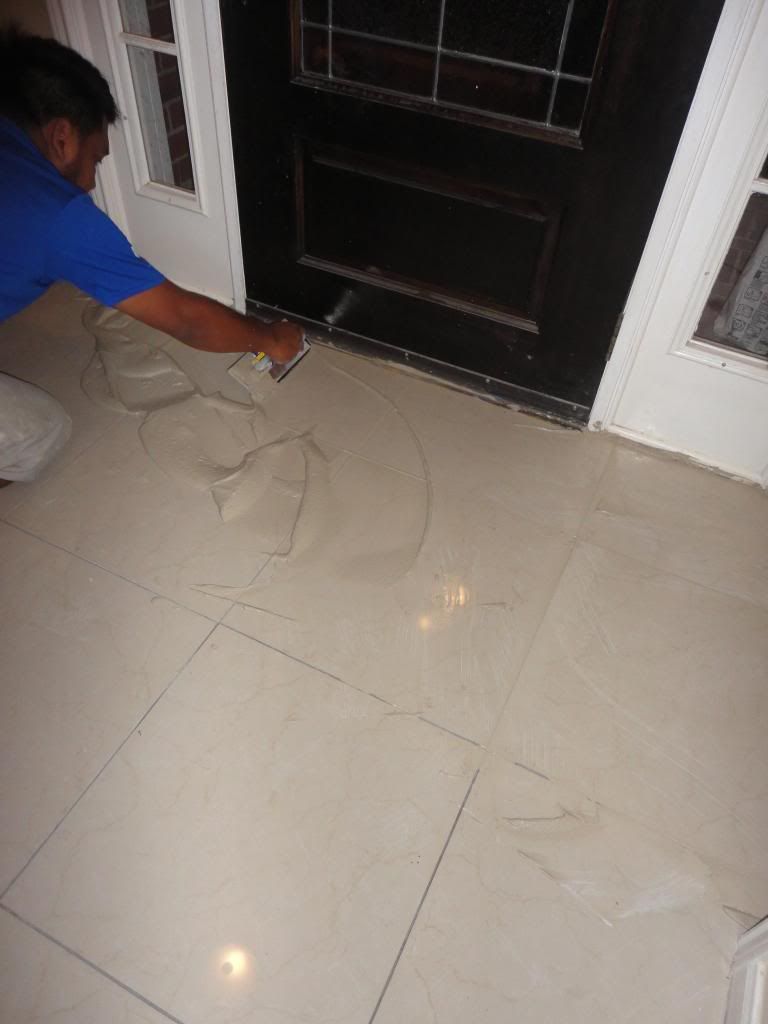
8. Once the grout starts to dry (it doesn’t take more than 30 minutes) you can wipe down the area with a wet sponge. The grout won’t FULLY be dry until the following day, but you can still clean the tiles.
Tags: ceramic tile, entryway, home improvement, retiling, tile
DIY – How to Install a Chain Link Fence
A chain link fence features a frame built from rails and posts. With time and patience along with the proper tools and materials, you can build a chain link fence around your home and yard.

Tools and Equipment
The caps are the sections that hold the fence’s structure together. Furthermore, after you install the frame, the installation process will require you to stretch the fence’s mesh across it. Before purchasing the fence materials, assess your current tool supply as you may need more items. The full tool list includes:
• Socket wrenches
• Post hole digger
• Pipe cutter or a hacksaw
• Pliers
• Rubber mallet
• Level
• Shovel
• Trowel
• Mason’s line
• Fence puller or a pull bar
• Plumb bob
• Line level
When you work on installation or assembly jobs that require you to use tools and equipment, be sure to wear safety glasses and work gloves for protection.
Material Details
Before visiting the home improvement store for your fence materials shopping spree, make a list of the products that you’ll need. Be sure to include:
• Pre-mixed concrete
• Gravel
• Chain link mesh
• Rails
• Posts
• Hinges
• Caps
• Brace bands
• Latches
• Tension bars and bands
• Tension wires or hog rings
• Tie wires
Fence Parts
Most home improvement stores sell mesh in rolls that are 4, 5 or 6 feet tall. Steel is the strongest material that you can buy, but manufacturers also make the mesh out of aluminum, which is lighter. The regular posts come in a 2-diameter size while the posts for your corner and end sections are available in a 2 3/8-inch size.
Installation Directions for the Posts and Rails
The first step is to dig holes for the posts. Make the holes three times wider than the diameter of the posts. Then, fill the holes with about 4 inches of gravel and compress it. Next, add 6 inches of concrete to the corner, gate and end posts. Check the alignment of the posts after every few shovelfuls of concrete. Once the holes are filled, set the posts into the wet concrete. With a level, make sure that they are straight.
To allow water to drain away from your posts, slope the concrete’s top sections. Permit the concrete to cure for several days before continuing your fence installation. Keep in mind that the holes for the line posts should not be filled with concrete. Also, do not set the line posts.
The next step is to connect the fence’s tension bands and gate hardware. You should slide the tension bands onto every corner, gate and end post. After you’ve added the tension bands, install the hinges and latch hardware. You’ll need the rubber mallet to set the end post caps. Also, slide a brace band over each post.
You’ll then be ready to install your fence’s looped, rail and end post caps. With your mallet, pound the looped caps into the line posts. Then, set the posts in the holes, but don’t fill them in yet. You’ll need to bolt a rail cap to the fence’s brace bands, and slide the rails through the looped caps. With your hacksaw, cut your fence’s rails to the proper size. After you’ve sized the rails, place them into the rail caps, and be sure to tighten the brace bands. Fill the line postholes with dirt. Once you have them full, pack them in until they are secure.
Chain Link Installation
For your fence’s chain link installation, you’ll need to unwind the mesh. The chain link will also require a tension bar. Be sure to slide the tension bar through the mesh’s links, which are at the end of the material. This step makes the end section of the fence inflexible. It will also create an attachment unit for the posts. Use your socket wrench to secure the tension bar into the tension bands. Then, pull the chain link mesh tight to prevent sagging. With a fence puller, stretch the mesh. The next step is to crank the fence puller until the fence’s mesh loops will not shift more than ¼-inch when you attempt to squeeze them together.
Be sure to insert the tension bar close enough to the tension bands for fastening. With your socket wrench, tighten the bolts on the bands. Then, repeat the hanging and stretching process along the rest of your fence. You’ll need your pliers to connect the mesh sections to the rails. Furthermore, you can complete the action by forming a hook out of one end of an aluminum tie wire. Loop the wire around the top section of the rail, and tie the wire to the mesh.
To finish your fence, run a wire through the mesh’s bottom loops. Be sure to tighten it around the end posts. Also, wrap it around itself a few times to complete the connection.
The Benefits of a Chain Link Fence
When you fence in your home and property, you’ll add a layer of protection. Furthermore, the enclosure will keep your children and pets inside your property and dissuade uninvited guests from entering.
Tags: chain link fence, fence
DIY – Easy Tips to Help Keep your Home a Little Safer
Home security can be the deciding factor in whether or not your home turf might be broken into by burglars. According to a recent Household Burglary report released by the U.S. Department of Justice, there were 2,845,500 completed burglaries in 2011. Of those completed burglaries only 44% of the break-ins were to homes that required the burglar to force his way into the home. These statistics suggest that you do have an effect on how likely an intruder will successfully enters your home. That being said, there are numerous methods to retrofit your, potentially safety deficient, home into a well-armed stronghold. Below we touch on some of the best practices to mitigate potential burglars who are looking for a quick and easy score.
Windows Part 1: Locks
Windows might be a weak link in your home’s security. Some burglars force their way into the home by lifting the window off the frame. You can prevent burglars from breaking into the house through your window by installing a window stop or by installing window locks. There are various types of locks that you can choose for your windows.
- The most reliable lock design is the key sash lock. This lock is mounted to the edge of the window and prevents anyone from opening the window until the key is used. You should not use this type of lock in occupied bedrooms because a missing key can trap the occupant in the room during an emergency.
- Hinged wedge locks are installed into the window stile. The lock will only allow the window to open as far as the lock was installed. This design allows the room to receive fresh air. The lock unlocks by pushing the wedge in as you open the window. This makes the lock far safer for occupants of the room.
Windows Part 2: Safety Window Tint
Many burglars break into locked windows by breaking the glass. You can increase the security of your window by applying window tint to the windows of your home. Window tint is a blend of metalized coatings and polyester. Safety grade window tint will hold the glass within the window frame after someone or something has attempted to shatter it. This makes it more difficult for an intruder to enter your home.
Doors Part 1: Install Steel Doors
If you have wood or plastic front, back, and garage doors, you may have a security problem. It is easy for even inexperienced thieves to bypass a wood or plastic door with brute force. If you want to improve the security of your home, you might want to install a steel door.
Doors Part 2: Improve Sliding Doors
Like wood or plastic doors, sliding doors are vulnerable to intruders. Some thieves break into homes by popping the sliding door out of the frame. With sliding doors you have two options:
- Replace the sliding door with a regular steel door.
- Placing a metal poll or a 2×4 in the doors frame to ensure that intruders cannot pop the door out when you are not using the sliding door.
Install a Home Security System
You can improve the security of your home by installing a home security system. Home security systems are controlled from a control panel inside. When the system is on, motion detectors attached to windows and doors send signals to the control panel. When an intruder tries to break into your home an audible alarm will sound.
Homeowners can pay a monthly rate to be on a security network. When an intruder invades the home on a security network, an employee of the security company will call your home to make sure the alarm was not a false alarm. If no one answers, the police will be alerted to the possible disturbance. The police will then go to your home. One potential con is that the police will fine you after too many false alarms.
Revise or Improve Your Habits
Now that we have delved into how to retrofit your home, we must face the reality of our habits. Our habits are one of the more vital aspects of home safety. You can install metal doors, sturdy dead bolts, high tech security systems, and security window film, but those attempts to increase your home’s security will mean nothing if you never lock your doors and windows. By getting into the habit of securing your home, your home might be one of the 549,200 homes that burglaries failed to break into. Remember: spending a few moments securing your home will go a long way.
Tags: doors, home security, window tint, windows
DIY – 3 Great Landscaping Ideas You Can Do Yourself
Furnishing and decorating the home’s interior is an aspect of home ownership many people enjoy. However, while homeowners are busy creating style with unique design concepts inside their homes, they can easily forget about the home’s exterior. If you are a DIY (Do It Yourself) type, this article will point you in a few, very fun, outdoor landscaping directions, enjoy!
Get the Complete Landscaping Guide = 7,250 Landscaping Ideas for Your Home
Fortunately, you do not have to use professional landscapers to achieve a beautiful yard. Although landscape design may seem like a challenge, there are many easy projects you can complete yourself. These projects are all afforable but add a great deal of curb appeal. Plus, you will most likely have a lot of fun during this very educational process.
Natural Areas
Many homes have some sort of natural area in their home’s landscape. Natural areas can be incorporated in the front of the home or the backyard space. Natural areas are incredibly easy to install, too. If you have a group of trees located in the front or back of the home, creating a natural area will be much easier for you. You should first choose a group of 3 to 4 trees that are close together. Then, you will need to decide on a natural element to use as the area’s foundation. Most people will use pine straw or mulch because it is easy to install, affordable, and readily available. However, many homeowners are choosing pebbles or stone as the foundation base. This choice is completely up to you and the look you are hoping to achieve. You should spray a weedkiller down around the group of trees, first. Then, you can lay down your natural element as the base. The pine straw or mulch should be created in a circle space or an oval around the tree grouping. A thick layer should be applied. Once the base is created, you can choose to add other elements such as a few shrubs, flowers, or decorative accents. Many homeowners will add patio furniture such as a couple of Adirondack chairs so you can enjoy relaxing in your new natural area space.
Mailbox Flower Bed
Every home has a mailbox but not every homeowner chooses to decorate the space with beautiful flowers and plants. To get started creating a mailbox flower bed, simply dig out an area surrounding the mailbox. Although many homeowners will choose a small circle shape around the mailbox space, you can create a larger area that starts at the road and makes a shape similar to a semicircle. This will give you more space to add more elements but the choice is up to you. Once you have created the space and removed all the grass, make sure you spray some weedkiller. Purchase a few flowers and shrubs and place them in a few different ways to create a look that you find most appealing. You can arrange and rearrange these before planting them. For color, perrenials are best when choosing flowers so they will bloom each year. Phlox is an excellent perrenial because it is very easy to grow and enjoys the sun. Phlox also will spread to create a blanket over the mailbox flower bed area. Once you have the plants that you desire, go ahead and plant them. Then, you can spread mulch or pine straw around the flowers and plants. Make sure to water to establish roots.
Outdoor Living Spaces
Although many homeowners do not believe a comfortable outdoor living space is part of landscaping, it most certainly is. While many homes have a deck and patio, there are also other ways to add inexpensive spaces for enjoyment and entertainment. A firepit can easily be created in any home’s backyard. There are numerous firepits on the market but many homeowners are choosing to create their own. You should choose a space in the backyard or on the patio that will offer enough room for the firepit and a few chairs around it. You can purchase a few bricks or curved stones and stack them in a circle on the ground or patio. Many people will purchase aluminum rings to go in the center of the firepit but this is not actually necessary. Choosing to create a firepit like this will allow you the option of moving it later on. Once the firepit is constructed, you can purchase a few Adirondack chairs to encircle the firepit and then invite friends and family over for a great evening together.
Get the Complete Landscaping Guide = 7,250 Landscaping Ideas for Your Home
Tags: backyard, contemporary, landscaping
DIY – Mold Remediation and Water Damage Repair
Outdoors, mold is typically a good thing. Various molds break down dead foliage and fallen branches of trees and shrubs to return nutrients to the earth for new growth. Mold is not helpful when the tiny reproduction spores float in the air and enter into residences. In homes, particularly damp basements, bathrooms and areas where water has leaked, mold spores attach to wet surfaces and can begin to grow under certain conditions. The growth of mold spores indoors can create allergens, mycotoxins and other annoyances to humans. In some cases of mold spores growth indoors, residents may develop adverse health conditions.
Download the Full Home Mold Remediation DIY Guide Here!!
The United States Environmental Protection Agency has a comprehensive source of information about household mold, how to clean it up and prevent growth. The EPA offers good insight on when it is possible for a homeowner to take on a DIY mold removal project, and when to seek professional services to alleviate the problem.
Adverse Health Conditions
As mold spores grow in damp areas of a residence, they spread into areas which residents touch or inhale mold spores. Not everybody is allergic to mold spores, but individuals with allergies to other allergens such as dust and dander or suffer from asthma are usually allergic to mold and are more likely to have an asthma attack after inhaling mold spores. Exposure to mold spores may cause an individual to have symptoms of runny nose, skin dermatitis, red eyes and sneezing immediately or delayed. Mold allergy symptoms are much like the symptoms of hay fever. Sufferers must be tested to pinpoint the irritant a sufferer is actually allergic to before a medicinal course of treatment may be prescribed.
DIY Mold Cleaning Tips
Some mold cleanup chores may be too big for a homeowner to tackle on their own and a professional cleaning service should be contacted. When the moldy area is no bigger than a small throw rug, approximately 36 inches square, cleanup is a simple do-it-yourself job by following a few simple suggestions.
1. Use detergent and water to scrub mold off a hard surface such as concrete, vinyl or finished wood.
2. Dry the cleaned area completely.
3. Do not paint moldy surfaces until thoroughly clean and dry.
4. Wear protective gloves, clothing, goggles and N-95 respirator while cleaning a moldy surface. An N-95 respirator looks like a paper dust mask with a cartridge trap that captures airborne mold spores, keeping them from entering nasal and mouth airways. Protective clothing, gloves and goggles protect skin and eyes from mold spores as well as cleaning solution splashes.
5. Ceiling tiles and carpet are porous and may need disposed when they are covered with mold. Mold spores fill the cavities or the porous material and are nearly impossible to clean thoroughly.
Professional cleaners or restoration specialists should be consulted to clean expensive or heirloom quality items such as oriental rugs or carpeting, antiques, collectibles and upholstered furniture. Specialists in cleaning moldy items are listed in a phone or online directory under fire or water damage, carpet, rug and upholstery cleaners, furniture restoration and mold remediation.
Water Damage
An Ounce of Prevention Is Worth a Pound of Cure
It is not realistic to think mold and mold spores can be stopped from entering our homes, but it is possible to minimize their adverse affects. Keep moisture levels low in a dwelling with the use of an air conditioner for a high moisture area like a basement or a central unit for the whole house. An air conditioner may be a cooling or heating unit, too,providing temperature control for the living environment.
The most common mistake homeowners make is cleaning areas covered in mold, but not correcting the condition which was conducive for mold spores to attach and grow. A leak in plumbing, precipitation resulting in roof or basement leaks create a perfect environment for airborne mold to grow. If a structure problem is not fixed and leakage continues, a cleaned area will spawn more mold growth, continuing the cycle of adverse health conditions.
Prevention of mold growth is best accomplished by keeping water leaks from occurring. The next best prevention step is taking immediate action when a water leak happens,ideally in the first 48 hours of a leak or spillage.
Prevention Steps
Keep foundation grounds sloped away from building.
Decrease indoor humidity with a dehumidifier or cooling/heating air conditioner.
Stoves, ovens, heaters and clothes dryers produce water vapor which increases indoor humidity. These appliances should be vented to the outside of a residence to keep indoor environments healthy.
Use a fan or open a window while showering to release warm air vapors to the outside of the closed bathing area. Exercise this caution in the kitchen, too, while cooking or washing dishes.
Summary
A mold remediation is a job well done when all mold spores are washed away from an area affected by water leakage or excessive dampness. AND the cause of the dampness is fixed. Mold may cause discoloration or mar a finish, but visible mold can be cleansed from a non-porous surface with a solution of detergent and water. After mold has been removed, the cleansed area should not show any significant water damage or new mold growth. In most situations, residents will be able to reoccupy remediated areas and have no recurring health problems.
Download a full homeowners guide to mold remediation here!
Tags: mold, mold remediation, water damage
Essential Elements That Make for a Great Greenhouse
Gardeners love to dream of having a greenhouse that will extend the growing season. Seedlings can be started when the spring weather is unpredictable and temperature swings prevent soil from warming sufficiently in the garden plot. Basic greenhouse models offer an affordable starting point for the at-home gardener. There are many “How-To Guides for Greenhouses” available online, but here are some must haves when it comes to building your own!
STANDARD GREENHOUSE ATTRIBUTES
=-=-=-=-=-=-=-=-=-=-=-=-=-=-=-=
Every greenhouse requires the shopper to make some choices that are appropriate for the use and location of the garden greenhouse. Following these initial selections, the gardener can enhance the greenhouse with each passing year.
• Wall material – Double, or triple, thickness of various materials will offer the necessary insulation against heat loss. Gardeners are happiest when the best possible wall composition is selected for the climate. Saving money on this feature could be expensive later.
• Floor composition – Every greenhouse expert has a different opinion about whether the floor should remain dirt, be a poured concrete slab or consist of wood planks, which would allow moisture to run through the boards.
• Size – Advice from current greenhouse owners includes the admonition to “buy large.” An estimate based on current needs will require replacement of the greenhouse in the next two years. During the first spring, the gardener might have unused space inside the greenhouse.
• Location – Gardeners know where the greenhouse will fit within the yard space. Deciduous trees must be considered since the shade in the yard will change as the weather warms in the spring. Observation of the light patterns will provide important information for the gardener’s final placement decision.
ESSENTIAL ELEMENTS FOR THE GREENHOUSE
=-=-=-=-=-=-=-=-=-=-=-=-=-=-=-=-=-=-=
Living conditions inside the greenhouse must be maintained at all times, regardless of the weather events outside. Advanced greenhouse features can be added to make the gardener look like a master gardener through the magic of technology.
• Fans for separate purposes – The air-circulating fan will run constantly to ensure that the air inside the greenhouse will not become stale, or stagnant. A heat-saver fan pulls the warmest air from the top of the greenhouse toward the plants to create an even temperature throughout the living space.
• Solar vent opener – Moderating the temperature is achieved with solar-powered openers on every vent around the greenhouse. As the temperature rises, the vents will open until the fans are able to cool the greenhouse. The setting sun triggers the vents to close and preserve heat through the night.
• Humidity dial – The amount of moisture in the air inside the greenhouse is an important factor in the health of the plants. Monitoring this level is essential for tropical plants inside the greenhouse.
• Soil analyzer – Probes are inserted in the plant soil to provide important information concerning the levels of light, pH content, moisture and soil nutrients. Readings from this analyzer tells the gardener how to adjust light, fertilizer and water.
• Light meter – No batteries are needed for the photovoltaic cell in this sensor. Light intensity throughout the greenhouse can be measured to determine if a plant needs more shade or sun.
• Thermostat – In combination with a moisture resistant heater, the greenhouse thermostat will maintain the optimal climate to support plant life. Vents will be opened, or the heater will run to adjust the temperature if it leaves the set range.
• Start trays and heat mats – Soil temperature inside the greenhouse can be maintained while seeds are germinating. Moisture is held close to the soil by clear lids on each flat to allow the tender shoots to break through the surface. A probe inserted in the soil ensures that the soil is warm, but not too hot.
• Misting system – Automated misting at the proper time throughout the day provides sufficient moisture for young plants. Any gardener who is away all day will have better results when the misting system is available to help the plants in the greenhouse make it through warm spring days.
• Monitoring station – A wireless electronic monitor can be mounted inside the house when the greenhouse is within 300 feet. The radio-controlled clock will maintain perfect time against the U.S. atomic clock. Temperature and humidity readings are received from the sensors inside the greenhouse. Frequent checks of the greenhouse conditions provide peace of mind for the gardener.
ASSEMBLE THE BEST COMBINATION
=-=-=-=-=-=-=-=-=-=-=-=-=-=-=
Gardeners are dreamers of the highest order. Visions of row after row of healthy vegetables and flowers begin each year on the darkest winter days. Plans are drafted for spring projects before the gift wrap is stored away in January. Technology is advancing to support the dreams of perfect greenhouse conditions regardless of spring temperature swings. More information allows the gardener to make adjustments early to prevent loss of plants because certain areas of the greenhouse might be unnoticed through casual observation. A custom combination of these features can be assembled to address the highest priority challenges the gardener faces.
Download the Greenhouse Guide Here!!
Tags: backyard, bathroom remodeling, garden, gardening, greenhouse, home improvement
DIY – How to Fix Two Common Radiator Problems
Let’s look at how to resolve two common central heating problems – radiators that don’t get hot at the top and radiators which are cold in the middle and bottom.
Problem 1) Radiator cold at the top
When a radiator gets hot at the bottom, but doesn’t heat up at the top, this is almost always a sign that there is air in it. Hot water heats your radiators, but trapped air occupies space at the top of a radiator which is why this segment is not warming up. The solution to this is simply to bleed the radiator in question.
The first thing to do is to accurately assess the situation. Switch on your central heating, allow the radiators to warm up and then see which ones are suffering in this way. (An obvious point, but make sure they are all switched on when you do this.)
Before bleeding a radiator, switch the heating off and allow it to cool. The bleeding process often results in a bit of water escaping and you don’t want it to be scalding hot. Once the system is cool, you will almost certainly need a radiator key, although some radiators are bled with a conventional screwdriver, depending on the design. You should probably also use a rag or bit of cloth for any water which escapes.
At the top of the radiator, at one end or the other, there will be a valve. Open this with your radiator key or screwdriver. You will know it’s open by the hiss. Note that you don’t need to open it fully – just enough that the air is escaping. In fact, if you open it too much, it will take longer to close and more water will come out. You want to be able to react quickly. When water starts to appear (usually a dribble, but it depends on your radiator and how much you’ve opened the valve) it is time to close the valve as there is no more air to be released.
With many heating systems, you will then need to top up the pressure. Check the gauge on your boiler, which will normally indicate the correct zone and then use the filling loop to increase the pressure if necessary. There will be a lever or tap for the purpose, but consult your boiler’s user guide for instructions as to how to use it.
Problem 2) Radiator cold in the middle at the bottom
When this happens, it is usually a sign of ‘radiator sludge’. This not-so-technical-sounding term refers to an accumulation of rust and general dirt inside your system. Because of the way water flows inside a radiator, it will tend to build up at the bottom of the radiator in the middle.
There are two ways of removing it. The best way is to have the entire system professionally flushed, but you can also remove the radiator yourself to clear it out. This is a viable option if it seems like there’s only really one radiator that’s suffering from the problem. Before you start, be warned that this can be a messy job, so put down old sheets and towels and maybe get a bucket ready as well.
First, turn off the valves to isolate the radiator. Turn the thermostatic radiator valve off first and then the lockshield valve, which is typically the one under a plastic cover. You will need to use an adjustable wrench for the latter, turning it clockwise, but make a note of how much it has turned as you will need to reset it to the same place when you put the radiator back on.
After that, using two adjustable wrenches, loosen the thermostatic valve and you can then open the bleed valve with your radiator key (or screwdriver, depending on the radiator). Make sure you have a bowl or bucket positioned below the now-undone thermostatic valve because opening the bleed valve breaks the vacuum and causes the water (and much of the sludge) in the radiator to start flowing out.
Repeat the process with the lockshield valve and then tilt the radiator to remove excess water. After closing the bleed valve, you can then remove the radiator from the wall and take it outside where you can flush it through using a hosepipe. Having done this, you can reattach the radiator by doing the reverse of the above steps.
Aelheating specialise in radiators and provide solutions to everyday problems that occur with radiators. Aelheatings designer radiators brighten up households and are affordable accessory for any household.
Tags: radiators
DIY – How to Refinish Kitchen Cabinets with Paint or Woodstain
Your kitchen: it’s where you start your day, prepare your family’s meals, and enjoy some quality conversation at dinner time. Even if you’re not exactly a culinary aficionado, the kitchen is one of the most important room’s in the house with its aesthetics depending heavily upon the appearance of cabinetry. Dark, dull, and dingy cabinets disrupt the room’s aura, making it an unpleasant space to spend your time.
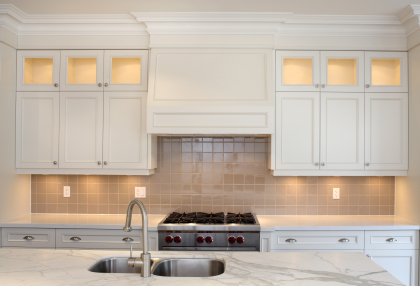
If you think the only way to rectify this plight is through a messy and costly renovation, you’re very much mistaken; cabinets can be quite easily refinished to achieve a like-new look without hiring a contractor. The best part? It’s something you can do yourself with some basic tools and a little patience.
Tools and Materials
-Phillips/flathead screwdriver
-Sandpaper (60, 120, 150, 220, 400 grit)
-Trisodium phosphate
-Paint stripper
-Metal scraper
-Primer
-Paint (color of choice)
-Stain/gel stain
-Polyurethane sealant
-Tape/drop cloths
-Various brushes (1″-4″), rags for wiping stain
-Wood grain tool
Note that not all methods of refinishing will require all tools listed above. In all situations, begin by removing all cabinet hardware and placing doors and drawers on a clean, dry work surface. Also, mask off and cover all areas that you wish to keep clean.
Let’s look at the first–most traditional method–of refinishing wood cabinets.
Complete Refinish
These following steps will explain how to completely refinish kitchen cabinets by stripping away all of the old finish and applying a new finish. If your cabinets are still in very good shape and showcasing that authentic wood grain is of chief importance, this is the way to go.
Begin by applying your paint stripper of choice and following the manufacturer’s instructions. Citristrip is a quality, environmentally-sound product, as it doesn’t contain harmful chemicals. After letting the product sit on the old finish (generally at least half to a full hour), begin scraping the old finish until it’s completely removed. Alternatively, you can (painstakingly) sand down the old finish with coarse grit sandpaper, although this can prove messy and extremely time consuming. Once complete, wash the surfaces with a trisodium phosphate (TSP) cleaner and allow to dry thoroughly.
Now it’s time to begin applying the stain. Using even brush strokes, uniformly apply the stain, wiping down the wood occasionally to remove any buildup. Once the stain is no longer tacky, you can remove burrs by gently sanding with 220 grit sandpaper. Repeat this process until the desired shade is achieved.
To complete the process, apply 2 coats of a polyurethane sealant and lightly wet sand with 400 grit sandpaper.
Painted Finish
Maybe you’re not a fan of the wood used in your cabinets or you simply desire a specific color that really sets off the decor in your kitchen; in any case, painting your cabinets is a simple and cost-effective way to breathe into them new life. Since paint will largely hide the wood grain, it isn’t necessary to strip the old finish, saving a considerable amount of time.
The main preparatory step in this method is washing down the existing surfaces with a TSP cleaner; not only does this remove waxes and oils, which inhibit adhesion of the new paint, but it slightly scuffs the surface, promoting adhesion.
Once dry, begin by applying primer to the surface. One coat should be adequate as it doesn’t need to completely conceal the old finish. Once dry, sand with 220 grit sandpaper before applying as many finish coats of paint as necessary to achieve the desired color. Finish by lightly sanding with 400 grit sandpaper.
Faux Wood Grain
Either your cabinets are in poor shape and/or you don’t want to completely strip the old finish; no matter the case, you still want the appearance of wood grain. Fortunately, this only takes a few more steps than painting your cabinets. Begin by following all steps included in the painting section; just be cognizant in your finish coat color choice. Pick a color that’s similar to the stain variety you desire.
Once the solid color has been dried and sanded, apply gel stain with a brush. Instead of wiping with a cloth, though, brush a wood grain tool across the surface to produce the appearance of wood grain. After this has dried, finish by applying a polyurethane sealant and wet sanding with 400 grit sandpaper.
Tags: cabinet ideas, cabinets, home improvement, kitchen cabinet pictures, paint, wood, wood stain
DIY – How to Refinish / Resurface Exposed Brick in Your Home
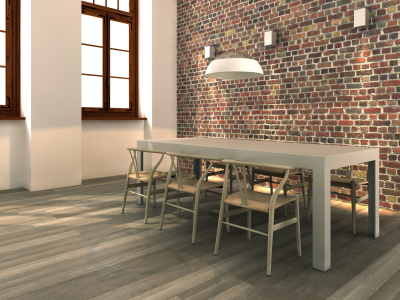
People have loved the look of brick inside the home for decades now. The two most common DIY in-home brick projects are exposed brick and faux brick projects.
Exposed brick in your home can be part of a wall or used to create a fireplace surround. This material is both durable and attractive, but the finish can be compromised by cracking mortar and stains. Paint may also start to crack and peel. If you have exposed brick that is becoming unsightly, then there are many ways for you can refinish or resurface it.
Tools Needed
The tools used for refinishing or resurfacing brick can be found at any home improvement store. Basic tools needed for this task include gloves, a face mask, an angle grinder, a heat gun, a scraper, a putty knife, a paint sprayer, and paint brushes. You will also need a wire brush and eye protection.
Clean the Brick
Brick that looks dirty can easily be refinished by simple cleaning. White crystals that form on the brick is a form of Efflorescence. This chalky white coating leaches to the surface of the mortar in the form of mineral salts. There are many ways you can clean the brick to restore it to its original appearance.
The easiest way to clean efflorescence from brick is to mix a solution of water and vinegar into a spray bottle. Lightly spray the brick with the solution and let is set for a few minutes. If the efflorescence on the brick is thick in places, then scrubbing with a stiff bristle brush may be necessary. You may also mix a solution of 10 percent diluted muriatic acid to spray on the brick.
Stains that appear on exposed brick can be cleaned using a solution of water and oxalic acid. Mix up to 10 parts water with one part acid in container and pour it into a spray bottle. If you have copper fittings on the brick, then water drips can cause bluish stains. You can clean bluish stains on any exposed brick by mixing a four parts of talc with one part of ammonium chloride. A thick paste can be made by using a small amount of ammonia. Apply the paste to the stains on the brick and brush it off once the paste is dry. Make sure to wear eye protection and gloves when working with any type of chemicals.
Stripping
Old paint that shows signs of peeling and cracking can be stripped from the brick. Stripping is a way to restore your brick to its original appearance. You can strip paint from exposed brick with a commercial paint stripper. This is a chemical product that softens old paint. A scraper is then used to remove all old paint from the surface of the brick. Another option to strip paint is to use a heat gun. Paint can be taken off of the brick using a wire brush or a putty knife.
The use of chemical paint strippers creates fumes and will require a face mask or respirator is the brick is located inside. Paint strippers are also flammable. If you choose to use a heat gun, then old paint will give off fumes as it begins to melt.
Repoint the Brick
Cracks in the mortar of a brick wall can be repaired using a process called repointing. You need to have an angle grinder to complete this task. The angle grinder is used to grind away any cracked mortar on a brick wall. Mortar should be ground down to a depth of one-half to three-quarters of an inch. Clean out mortar joints with compressed air and a metal brush.
Mix a batch of mortar in a bucket using a power drill with a paddle attachment. Spray a water into your mortar joints to dampen the existing mortar. This will help the new mortar to stick. Apply the mortar into the joint by using a pointing trowel. Repoint vertical sections first and then move to horizontal areas of the wall. A striking tool then needs to be used to create a smooth looking mortar joint. Allow the mortar to dry and cure for at least two days before applying a masonry sealer.
Painting / Sealing / Staining
The easiest way to resurface brick is to use Portland cement-based paint, latex paint or stain or a silicone sealant. The stain and sealant options can give you the look that you often find in a modern city row-home. Applying paint or stain that is designed to resist moisture penetration is a good option for brick walls in a basement. The use of paint that allows water vapor to escape will prevent most water issues with your brick. If you choose to paint a brick wall, then make sure to repair all defects first. This includes any cracks and staining that is on the brick. Clean the brick thoroughly to ensure the new paint will stick to the brick. A paint brush or a paint sprayer can then be used to apply paint to any exposed brick. You can apply a brown and red colored paint to create the look of new bricks. Another option is to use gray paint on your existing mortar joints.
Tags: angle grinder, contemporary, exposed brick, heat gun, paint sprayer, putty knife
DIY – How to Install Laminate Flooring
The following DIY article on how to install laminate flooring was written by a contractor friend of ours. Follow the directions closely and you should have a beautiful new laminate floor in your home in no time!
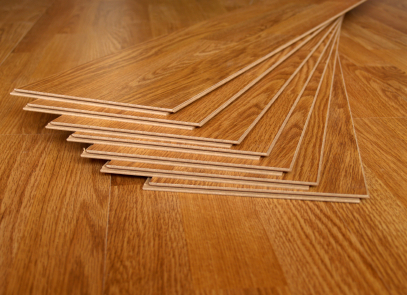
Installing laminate flooring begins with having, buying or renting the tools necessary for doing the complete job. Tools that you will need include a hand saw, utility knife, measuring tape, tapping block, miter saw, hammer, spacers, pry bar, and vapor barrier paper. If you have all of these tools / materials, the job will be easy and take no time at all. Laminate flooring is perfect for rooms with high traffic or low traffic. The laminate that is available today is durable and comes in different wood grains and colors. Some people choose to leave the old flooring down and install on top of the old. This is fine if the old flooring is the roll out plastic or vinyl style. Hard wood is often too expensive for some people and maintenance can be extensive. According to many, laminate wood floors look just as good when complete and are less expensive and easier to maintain. Solid wood floors may be difficult to install where laminate is easy for the homeowner to do as a DIY project.
Step One:
Use your measuring tape to measure the square footage of the room you are working. This will tell you how much laminate to purchase as well as vapor barrier paper. When measuring, make sure to remove any baseboards so you can measure edge to edge. Add in for closets and other small areas of the room.
Step Two:
When purchasing your laminate flooring, always add in 20-25% more in case of mistakes and areas you may have measured wrong. Sometimes laminate flooring may have a piece with a chip that you may not want to use. You may also want to purchase this extra in case of damage later that you want to replace or repair. Open the boxes and allow the flooring to sit for a couple of days to avoid buckling of the new laminate.
Step Three:
Remove all furniture, and baseboards from the room. Sweep the area and remove any dirt or trash that is on the floor. The crow bar may come in handy when removing molding from floors or up walls. Before you begin installing the flooring, make sure to go through the flooring to check for any pieces that may have damage.
Step Four:
Roll out vapor barrier on the section that you will be working on. The vapor barrier is plastic and foam. This should go on top of the sub floor. Use your utility knife to cut the paper. Smooth out all wrinkles in the barrier and pull up against the walls. Do not overlap foam because this may make the floor uneven.
Step Five:
Choose the wall that is most prominent. Begin laying the boards leaving 5/16th of an inch at the wall. This will allow for expanding and contracting of the floor during heat and cold. Applying a spacer between wood and floor will keep you consistent throughout the whole room. Begin with a groove side at the wall.
Step Six:
After the first board is set, apply one board after another by snapping the boards in place. Be careful not to press too hard or break the groove. A rubber mallet or you are tapping block and hammer will help push the pieces together tightly. Tap gently so that you do not break the edge of the board. Continue attaching boards together until you complete your first row. If the distance is too short to the wall, you may need to cut a board to fit. Leave the 5/16th for the spacer at the wall.
Step Seven:
Continue to add row after row by connecting tongue and groove. If you are looking for a scatter in the boards, begin by laying the next row at the wall you finished the first row. Continue this process until all boards are laying tightly and covering the whole floor. If any floor is angle cut, use the miter saw to cut the correct angle in the boards.
Step Eight:
After all of the boards are down, you can begin replacing all molding around the walls. Begin with one edge and work around the room. Make sure to get the correct pieces in the correct places before beginning to apply them. Remove spacers and add molding. Tack into place using tiny nails and hammer.
Step Nine:
Walk around the whole room and make sure all of the boards are together tightly. While inspecting boards for a snug fit, check to see if there are any chips or cracks in the boards. If there are cracks or spaces, you can repair these with colored caulk.
Step Ten:
Replace furniture and enjoy your new laminate flooring. Enjoy the pride that comes with knowing you did the installation yourself. Purchase a good broom to clean the floor.
There are different types of laminate flooring to choose. Some have wood grain like real hard wood floor; some have the stone or granite appearance. The laminate comes in a popular collection of colors and styles. They are very durable and easy to care for and clean. These floors do best in homes because they can take wear and tear more than original hard wood floors. Check out the many types of laminate online before making your final selection on the style you wish to put in your house. Laminate flooring has improved tremendously over the years.
Tags: laminate, molding, plastic flooring, sub-floor, vapor barrier, vinyl, wood
DIY – How to Install Ceramic, Porcelain or Glass Tile Flooring
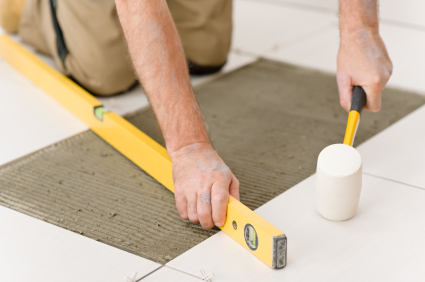
Ceramic, porcelain or glass tile floors are an upgrade over linoleum, vinyl and even carpet. Durable and attractive, they add value to your home. Purchasing the supplies and tiles is surprisingly affordable, but the price of installation can more than double the cost of the project. However, you can probably handle this project on your own to reduce the overall expense.
Tools Needed
The right tools make any job easier. Make sure your tools are in good condition, and have everything assembled before you start the project.
• Razor knife for cutting cement board
• Cement board, drill and screws to stabilize a wood floor
• Grinder and floor leveler if you are working on a slab
• Tile cutter – An electric wet tile cutter will make the project go faster, but a manual cutter is more portable and affordable
• Tile snips – for taking off tiny pieces of tile
• Tile and spacers for grout lines
• Tape measure
• Masking tape
• Pencil and permanent maker
• Chalk line
• Mastic
• Grooved trowel
• Shop towels
• Grout
• Grout float
• Sealer
• Sponges
Remove Room Fixtures
Whether you are installing the tile in a foyer, bathroom or kitchen, there will be fixtures to remove. These include the baseboard, base cabinets, toilet and sink. You may decide to work around base cabinets in the kitchen, but take a look at the area around the dishwasher first. Make sure that you will still be able to remove the dishwasher and replace it after the cement board and tile add nearly an inch of height to the floor. It is more work to pull fixtures first, but your floor will look better and the tile installation will go faster.
Install Cement Board or Prepare Slab
If you are working on a slab, start by making sure it is perfectly level and smooth. Use a three-foot level set on edge and slide it across the floor to pinpoint high and low spots. Grind down the high areas and use a filler to bring up the low spots. When you are installing tile on a wood floor, the concern is that the bounce and flex in the floor will cause the tiles to crack. Stabilize the floor by covering the entire surface with cement board. Use the largest pieces possible to minimize seams and eliminate any bounce in the floor.
Take measurements of the room and transfer them to graph paper. Decide how the cement boards will be installed to minimize seams. Cut the boards with a razor knife by scoring one side and then turning the board to cut the other. Lay the boards down at one time to be sure they fit nicely. Once the cuts are perfected and the boards are ready, put some construction adhesive on the back of the boards to help lock them to the floor. With the floors in place, secure them with special cement-board screws.
Mark the Center
Tiles are laid from the center of the floor to the perimeter. Measure exterior walls to find the center point. With a friend helping, snap a chalk line between the center points on opposing walls. If one wall is longer than the other, then measure in an equal distance from the common end wall. Repeat the process on the adjacent walls. The center point is where the lines intersect, and this is where you will start laying tiles.
Create the Grid
Using your tape measure and chalk line, create a grid on the floor using one-foot intervals. This will help you keep the tiles straight and perfect as you set them in place. The chalk will wear off as you work, so you may want to use the permanent marker to highlight at least a few of the lines.
Follow the Directions for Installation
Whether you are working with porcelain, glass, ceramic or natural stone tile, every tile will come with specific directions regarding what type of mastic you should use. It will also tell you what size notch the trowel should have. Follow these directions for proper installation and to avoid cracks later.
Dry Run
Lay as many whole tiles as you can in the room to see how it looks. This is your opportunity to make minor changes or alter the entire pattern. This step is vital to ensure that you are pleased with how the tile will look once the installation is compete.
Install the Whole Tiles
It’s important to spread the mastic in small sections at a time. Mastic hardens quickly, and spreading too much will lead to problems. Spread enough to comfortably put the first four tiles in place. Spread more once those tiles are in position. Place spacers along the long edges of the tiles so they are standing up. There should be two spacers on each side of the tile with one at the top and another at the bottom to ensure straight lines. Work with the whole tiles around the entire room. Once the solid tiles are in place, you are ready to start cutting the edge tiles.
Cutting Tiles
When it’s time to cut tiles, it’s important to remember the old adage about measuring twice and cutting once. Measure the space to be covered, and then transfer it to the tile. Double-check both measurements. Make sure your tile is marked so that the piece going in place will have the cut edge along the wall.
If you are working with an electric saw, you may want to use masking tape when cutting the tiles. Put the masking tape across the tile in the general area for the cut. Make your measurements and then mark the tape using the permanent marker. The mark will not wash off the tape when you run the wet saw, and the tile is less likely to crack or chip with the tape.
Grouting Tiles
Once the tiles are in place and have set according to manufacturer’s directions, you are ready to start grouting. Use the grout recommended by the manufacturer because some tiles require sanded grout and others, like marble, need unsanded grout. Pre-mixed grout is convenient for most homeowners, but professionals prefer to mix their own to achieve the perfect consistency. A good rule of thumb is that the grout should have the consistency of smooth peanut butter or mashed potatoes. It should be soft enough to work with and push into the joints, but firm enough to roll into a ball.
Spread the grout over the floors, and use the float to push it down into joints. If you are working with mosaic glass tiles, the grout will cover the entire surface. Floors with larger tiles should see the grout confined to the area right around seams to make cleaning the floor easier later. After the grout has been worked into the seams, allow it to set according to manufacturer’s directions. You will return later to clean the grout off the tiles with a damp rag.
You will take great pride in your tile floor, and your floor will look fantastic longer if you take the time to seal the tiles and the grout. Sealer protects the floor from stains and helps grout retain its beautiful color. It only takes a few minutes, and it will make the floor easier to maintain in the coming years. Its an investment in your time, labor and product.
Tags: cement board, ceramic tile, cutting tiles, glass tile, grout, natural stone, porcelain, tile, tools