DIY – How to Refinish / Resurface Exposed Brick in Your Home

People have loved the look of brick inside the home for decades now. The two most common DIY in-home brick projects are exposed brick and faux brick projects.

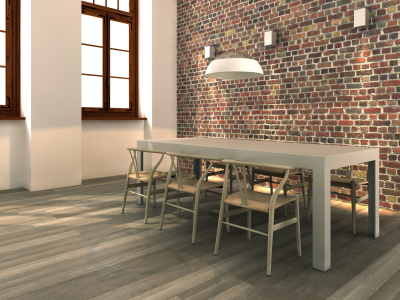
Exposed brick in your home can be part of a wall or used to create a fireplace surround. This material is both durable and attractive, but the finish can be compromised by cracking mortar and stains. Paint may also start to crack and peel. If you have exposed brick that is becoming unsightly, then there are many ways for you can refinish or resurface it.
iStock_000009323110_ExtraSmall

Tools Needed
The tools used for refinishing or resurfacing brick can be found at any home improvement store. Basic tools needed for this task include gloves, a face mask, an angle grinder, a heat gun, a scraper, a putty knife, a paint sprayer, and paint brushes. You will also need a wire brush and eye protection.

Clean the Brick
Brick that looks dirty can easily be refinished by simple cleaning. White crystals that form on the brick is a form of Efflorescence. This chalky white coating leaches to the surface of the mortar in the form of mineral salts. There are many ways you can clean the brick to restore it to its original appearance.

The easiest way to clean efflorescence from brick is to mix a solution of water and vinegar into a spray bottle. Lightly spray the brick with the solution and let is set for a few minutes. If the efflorescence on the brick is thick in places, then scrubbing with a stiff bristle brush may be necessary. You may also mix a solution of 10 percent diluted muriatic acid to spray on the brick.

Stains that appear on exposed brick can be cleaned using a solution of water and oxalic acid. Mix up to 10 parts water with one part acid in container and pour it into a spray bottle. If you have copper fittings on the brick, then water drips can cause bluish stains. You can clean bluish stains on any exposed brick by mixing a four parts of talc with one part of ammonium chloride. A thick paste can be made by using a small amount of ammonia. Apply the paste to the stains on the brick and brush it off once the paste is dry. Make sure to wear eye protection and gloves when working with any type of chemicals.

Stripping
Old paint that shows signs of peeling and cracking can be stripped from the brick. Stripping is a way to restore your brick to its original appearance. You can strip paint from exposed brick with a commercial paint stripper. This is a chemical product that softens old paint. A scraper is then used to remove all old paint from the surface of the brick. Another option to strip paint is to use a heat gun. Paint can be taken off of the brick using a wire brush or a putty knife.

The use of chemical paint strippers creates fumes and will require a face mask or respirator is the brick is located inside. Paint strippers are also flammable. If you choose to use a heat gun, then old paint will give off fumes as it begins to melt.

Repoint the Brick
Cracks in the mortar of a brick wall can be repaired using a process called repointing. You need to have an angle grinder to complete this task. The angle grinder is used to grind away any cracked mortar on a brick wall. Mortar should be ground down to a depth of one-half to three-quarters of an inch. Clean out mortar joints with compressed air and a metal brush.

Mix a batch of mortar in a bucket using a power drill with a paddle attachment. Spray a water into your mortar joints to dampen the existing mortar. This will help the new mortar to stick. Apply the mortar into the joint by using a pointing trowel. Repoint vertical sections first and then move to horizontal areas of the wall. A striking tool then needs to be used to create a smooth looking mortar joint. Allow the mortar to dry and cure for at least two days before applying a masonry sealer.

Painting / Sealing / Staining
The easiest way to resurface brick is to use Portland cement-based paint, latex paint or stain or a silicone sealant. The stain and sealant options can give you the look that you often find in a modern city row-home. Applying paint or stain that is designed to resist moisture penetration is a good option for brick walls in a basement. The use of paint that allows water vapor to escape will prevent most water issues with your brick. If you choose to paint a brick wall, then make sure to repair all defects first. This includes any cracks and staining that is on the brick. Clean the brick thoroughly to ensure the new paint will stick to the brick. A paint brush or a paint sprayer can then be used to apply paint to any exposed brick. You can apply a brown and red colored paint to create the look of new bricks. Another option is to use gray paint on your existing mortar joints.

The Average Cost of an Exterior House Painting Project

Changing the color and curb appeal of your home’s exterior can be done by applying a new coat of paint. New paint for your home can be applied by a professional or as a do-it-yourself (DIY) project. The cost to paint the exterior of your home is based on factors that include the cost of labor and the tools that are required. In this post we will more closely take a look at the average cost of doing this project on your own.

The Average Cost of Hiring Professionals

Professional house painters are a good option for homeowners who lack the skill or the time that is necessary to paint the exterior of their home. The average cost of hiring a professional exterior house painter is in the range of $3,000 to $8,000 or more based on the size of the home and other factors. That average price typically includes the coverage of tools, supplies etc. no fuss, no worries and typically an excellent finished project, if you hire professional painting contractors, obviously. If you skimp on this, your home may end up looking quite a bit worse than what you had hoped for, because the quality of the finished product is usually in the preparation.

Do-It-Yourself Project – The Average Cost

Painting the exterior of your home by yourself “can” save you money on the cost of labor. However, you will need to have the time available to complete the project and a handful of tools and other helpful items (see scaffolding below, that’s the tough one).

If done on your own, paint will typically cost between $25 and $50 per gallon. Primer will be needed for the project and will cost between $10 and $15 or more per gallon. The average size home in the USA requires between 6-12 gallons of each. If you decide that hiring a painter to paint your home is too expensive, then the project can be done by yourself. Paints with primer already included in them can be purchased, but are on the higher side of that cost per gallon previously mentioned. On average, a homeowner can do the exterior paint project on their own for around $1,000, after all supplies are purchased / rented.

Matching paint colors can be an issue for homeowners. There are products out there available to assist with matching current colors up with new colors (see here).

Renting / Borrowing Tools

Many tools that you need to paint the exterior of your home can be found or rented from a home improvement store in your area.  Look to see if the tools you need are available from friends, family members, or neighbors. Lets review some of the necessities:

Pressure Washer

One special tool you will need is a pressure washer. This tool can typically be rented at a cost of $50 to $70 for each day of use. You can also purchase a decent pressure washer for under $300. The pressure washer will easily remove dirt and grime from existing siding. This step is essential for a professional finish. Keep in mind that a pressure washer can be used in the future for things like deck, patio, siding, brick resurfacing and more. If you are DIY buff, a pressure washer is a healthy investment.

Paint Sprayer

The use of a paint sprayer will make the painting process go much faster. You will also keep your arms and hands from aching by not using a paint brush or roller. A decent paint sprayer costs about $70 each day. If you are renting the paint sprayer, be sure to have already pressure washed the exterior prior to renting and you either want to complete the trim work painting (or taping / coverage of non-painted areas) prior to or after the paint sprayer is rented.

Scaffolding

The use of scaffolding is a great way to ensure you can easily reach high areas. You may want to rent a scaffolding system if your home is more than one story, as a ladder may not meet your needs. The rental of a scaffolding unit is typically based on its size and can be between $15 to $50 per day. For most homes, a base scaffolding set will do the trick.

Heat Gun

A heat gun will run between $40 and $75 or more depending on the model being purchased and it is not needed in most cases. On most homes, old layers of paint can be removed cleanly with a pressure washer and scraper. A heat gun is needed in situations where multiple layers of older paint exists on the surface. As paint is layered, varying heights on the paint surface (from older, lasting paint) can cause an uneven look, which can define a homes age too much. As sun hits uneven paint, it will show slight shadows which really show the blemishes of the exterior. A heat gun may be necessary if you are truly looking to add a pure, even professional and new looking paint job to you house.

Paint Scraper

A paint scraper can be used in combination with a heat gun to remove old paint. This tool can be found for a price range of $8 to $25 at a home improvement store. In almost all scenarios, this will be a necessary tool and it is likely that you will use a paint scraper multiple times in the future. So it is never really a bad investment.

Putty Knife

Old caulk and paint that cannot be easily removed with a scraper will require a putty knife. This tool is inexpensive and can be found starting at about $5. You can also use this tool in combination with a heat gun.

Sander

Sanding the exterior of your home is needed to remove old paint and allow new paint to stick properly. There are a variety of types of sanders available pretty much anywhere. The best choice for exterior sanding is a pole sander. This tool will require sheets of sandpaper that cost between $3 and $10 per package. Areas that are hard to reach as well as corner / edge spots of the house will require sanding by hand. The purchase of a pole sander will cost about $15.

Metal Brush

Areas you cannot thoroughly cover with a sander or sandpaper will require a metal brush. The bristles of the brush are wire and used to loosen paint that is thick or hard to remove. A metal brush can be purchased at a hardware store for around $10.

Painting Tape

Areas that do not require paint typically need to be covered with either tape, or a combination of tape and plastic (for larger areas of course). The average house exterior may require as much as a $25 worth of tape and usually varying sizes should be purchased. 3/4 of an inch to 1 and 1/2 inch tape varieties should be on hand. In fact, if you spend a healthy amount of time properly applying tape and plastic covering to non-painted areas, you can usually save a substantial amount of time on the overall project, because it will allow you more liberal use of the paint sprayer (hint – this makes for an easier job).