DIY
Spotless Spring Cleaning: Useful Ways to Remove Junk and Tidy Up Your Home
We all know how stressful spring cleaning can be. Cluttered up items get left to sit around and gather up space during freezing winters, while dust and dirt accumulate throughout our homes. Then, when we’re finally ready to enjoy that warmer weather, we’re left with the problem of having to move a heap of items out just to enjoy our own living space.
However, it doesn’t have to be as challenging as previously believed. Lugging around multiple furniture pieces with no strategy can undoubtedly take up hours of your time. You don’t have to be a junk removal Philadelphia expert to know a few simple tricks that aid in your spring cleaning endeavors. Read on to learn more modern tactics that can save you time and energy in making your home more hygienic.
Categorize that Clutter

Think back to those days in the classroom, when you were able to score highly on your most difficult tests. Did you study with your notes easily arranged for you to access them? Or did you spend an excessive amount of time trying to find your class notes, wasting precious hours, and not knowing what to do?
We’ll guess that it was closer to the first scenario. Organization is everything, especially when it comes to spring cleaning. Removing junk from your home is done more effectively when you can arrange your rooms from most to least messy. Each home is different depending on the architecture and the number of people living there. Still, you can typically recognize the most disorderly rooms if they have an excess amount of junk on–or in–these pieces of furniture:
- Tables
- Drawers
- Closets
- Cabinets
- Dressers
Make sure to mark rooms that have extreme clutter in these areas at the top of your list. It’ll help you when dividing up which rooms are worth more of your time when you start your spring cleaning project.
Getting through the Garage
We mentioned separating your more essential rooms, so don’t forget about the all-important garage. It may have been used as a “winter storage” area, which means that it’s now the perfect time (and weather) to clear out that mess. For starters, moving the least needed items out of that smaller area, and onto a larger outdoor section like the driveway, will let you maneuver around in a more effortless way.
This step will give you enough space to separate items that you wish to keep, donate, or throw away. Moving that junk out of the garage will also make those hard-to-reach areas easier to sweep so that you can clean that built-up dust and make for a more hygienic place.
What About Windows?
Do you remember the last time you cleaned your windows? If you can’t, then spring cleaning might be a perfect time. Windows are also an important part of every home, and cleaning them is a multi-purpose job.
For starters, make sure that you’ve appropriately separated your window by taking off its screen (if it has one) and washing it with soap and water. You’ll be able to wash your window itself with glass cleaner, and either a microfiber cloth or a soft rag. If you’re able to, vacuum up the dust in your window track–the tiny space behind your window sill that holds it in place and prevents any windy breeze from coming in. Lastly, make sure to give your window sills and frames a proper cleaning. You can use disposable wipes for easy, affordable sanitizing.
 Sweep and Save
Going for the latest cleaning product sold online, which promises a state-of-the-art and carefree experience, can sound enticing. However, these items with enhanced digital features can often come at a high cost and don’t perform much better than what you can find at your everyday store.
When it comes to making your home more sanitary in time for spring, you don’t need a smart cleaning gadget that costs hundreds of dollars. All-purpose cleaning products such as spray mops (usually $50) or disposable dusters (typically $20 or under) are your best bet when looking for items that can wipe down surfaces cleanly and effectively. Floors, counters, and shelves can be kept in well-ordered shape for an affordable price.
Spring cleaning can seem frustrating, but it’s also a rejuvenating time for the home. With these suggestions, you’ll be ready to start having your home look more dazzling than ever. And this newfound ease and efficiency will be just in time to enjoy that beautifully warm weather.
Tags: cleaning, contemporary, eco-friendly, energy efficiency, home improvement, windows
Some of the Most Common Plumbing Emergencies
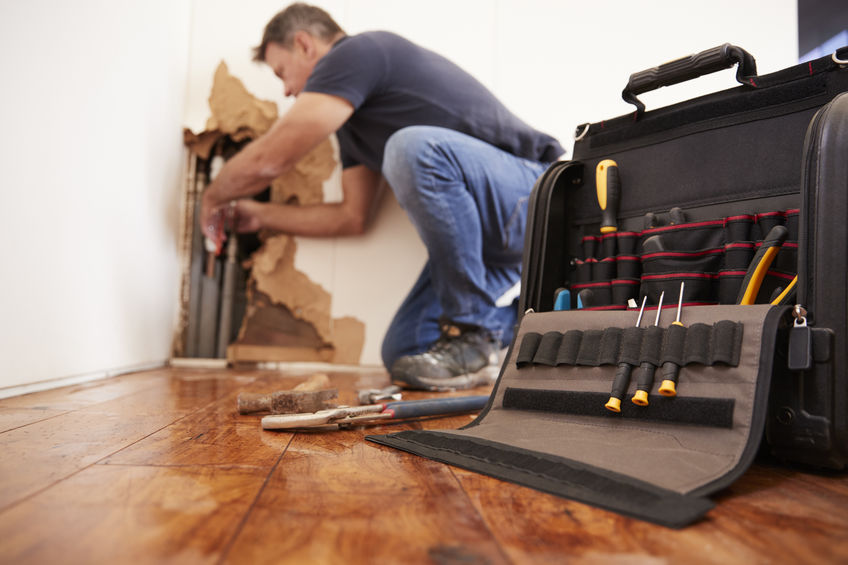
As a smart homeowner, you need to know about some of the most common plumbing breakdowns that create emergencies around the house. It will help you be mentally and technically prepared to face the situation and not panic if you suspect a particular plumbing issue.
Let us look at the most common ones:
1. Faucet Leaks
The dripping sound of the faucet can be irritating and can take away your sleep. Faucet leaks are the most common plumbing problems, especially once the plumbing system or the fixtures age. Though they may not seem like an emergency at first, however, a leaky faucet can waste gallons of precious water as well as damage your home.
2. A Clogged Sink or Shower Drain
Clogged drains in the bathroom or kitchen can be distressing when the water collects or floods the rooms. It can be a big emergency for the family. As soon as you notice the water is draining slowly, take it as a warning sign not to be ignored if clogged drains are to be avoided by all means.
3. Clogged Toilets
Toilet clogs can create serious issues around the homes and are again a very common problem. Since the toilet fixtures are used more than the other plumbing fixtures, they often wear out. You can handle minor clogs with a plunger but if the problem recurs often, or refuses to settle, call for professional help.
4. Water Heater Issues
Another problem that comes up often is the shock of cold water when you turn on the shower expecting hot water. The problem can occur mainly due to some electrical fault, heater issue, or cracks or pipe burst. You will need to get in touch with your utility company at the earliest and resolve the hot water issue.
Water heater leak is another most common plumbing emergency that occurs, especially after years of use. The drips from the heater or the pipe joints can be seen as a puddle below the leaking point on the pipe. The water heater leaks, apart from creating a messy and wet floor, also unnecessarily increase your water bills due to the wasted water. So before the problem increases, it is smart to get the same inspected and repaired. It may range from replacing a valve, pipe to the entire heater.
5. Frozen or Burst Pipes
Frozen pipes are very frequent problems during winter. If your water supply stops suddenly during winters, the issue likely is that of frozen pipes. You will need to locate the section and try to resolve it by applying a hot towel or with the help of the hairdryer. You must remember that you do not use any flame for heating the frozen section since the pipes can burst. Pipes can also develop cracks or burst due to when the water expands or freezes rapidly. A burst pipe is a plumbing emergency that needs to be handled immediately by a denver plumbing contractor.
6. Faulty Toilet Flush
The valve of the flush button can stop functioning, creating constant running water in your toilet. It can waste a large amount of water as well as increase your water bills manifold. It ]needs to be inspected and repaired soon, to stop the dripping noise and the water wastage.
7. Washing Machine Hose Leaks
It is again a common problem that can arise at any time as the washing machine hose tends to crack or develop leaks over the years. You should inspect it for mold and dust too.
8. Garbage Disposal Block
The device helps to keep the kitchen sink unclogged. However, it can get clogged and stop functioning and will need to be repaired asap.
9. Sewer System Malfunctioning
Sewer malfunctioning can be quite a nightmare as the system can throw the sewer back into the home and will need to be repaired immediately to stop your home from turning into a garbage dump.
10. Gas Pipe Leak
This also is a common household problem that needs immediate attention as it can be very dangerous if not resolved at the earliest. You should call for professional help without losing any time and get the gas pipe repaired.
Tags: bathroom, bathroom remodeling, eco-friendly, energy efficiency, home improvement, leaking faucet, plumbing, repair
Paving Your Driveway for a Long-Lasting Effect

While your driveway may look like an unexciting part of your building, it is actually among the important elements of the landscape. You may be wondering, why? That is because it is being used on a daily basis and it is fundamental in the creation of curb appeal for your home.
The resale value of your property will increase if your driveway is attractive. Well, that is if you intend on selling. But before then, it is the first thing you will see each time you get back home. Paving the driveway of any building makes the exterior appear safe and neat. However, the landscaping needs to be carefully planned to bring about a long-lasting effect.
As a homeowner, you need to know what is involved in paving your driveway. This will enable you to make the right decision and protect you from contractors who just want to earn quick cash. If you also need to repave the driveway, it will be easier to know what to expect from a driveway repair service if you have a basic understanding of what it entails.
When Can a Driveway Be Paved?
A driveway can be paved two years after the property has been built. This period of waiting will allow the ground to settle properly, thereby, providing a strong base which is essential when paving the driveway. On the contrary, if the property is not a new one or older than two years, all you need to do is choose a suitable season for the paving.
The ideal paving condition is when the weather is relatively warm and dry. If the weather is too wet, the base gravel will wash out quickly. And that base is needed for the asphalt to set in if you are using asphalt paving. Different materials are used to pave driveways. Keep reading so you can know which one suits you.
Types of Paving Materials

The most common materials people use when paving driveways are asphalt, poured concrete, gravel, and pavers. Before settling for a type of paving material, you need to know that every driveway will degenerate with time, but some will require face lifting faster than others. However, this depends on the weather conditions in your area, how often the driveway is being used, and if the paving was properly done.
We will be discussing each type of paving material; including its pros and cons.
Asphalt
Asphalt paving combines stone, sand, and gravel with asphalt cement (a liquid petroleum product). This mixture is unbelievably stinky and very hot. Asphalt is commonly used in areas that require snow removal during snowy periods. It is also a suitable option if you are on a strict budget.
Pros
- It is economical
- It is not likely to crack due to frost heaves
- Asphalt makes it easy to remove snow
- Re-layering is possible when it gets worn or damaged
Cons
- It is prone to cracking when sealed improperly
- It requires routine sealing, every 3 – 5 years
Poured Concrete
Concrete is gotten from a mixture of rocks, sand, and stone with cement and water. Concrete paving can be customized to suit different architectural styles.
Pros
- It is long-lasting and can be maintained with ease
- Various decorations can be made on it, including stamping and staining
- It can be used to form various geometric shapes, giving your house a custom look
Cons
- The site and frames need to be prepared properly before pouring the concrete
- Roots of nearby trees can crack the concrete over time
Gravel
There are 2 types: crushed granite and traditional gravel. Crushed granite has a finer texture and it is very stable. Traditional gravel is usually used in rural areas.
Pros
- It has a variety of colors
- Minimal maintenance is required besides weeding and regrading
- It allows water to seep back to the ground which makes it eco-friendly
- It resists cracking
Cons
- Some gravel may be lost when using a machine to remove snow
- When it gets loose, it will look messy
Pavers
They come in different styles: concrete, cobblestone, and brick. The concrete version is stronger than the poured concrete we mentioned earlier.
Pros
- If a piece goes bad, you can fix it without having to replace the entire driveway
- The concrete option is basically interlocking, and this makes for quick installation
Cons
- They are expensive
- Some designs and patterns can look outdated over time
- Roots of trees can damage pavers
Conclusion
The appearance of your driveway is very important. If it is stained and cracked, people will have a low impression of your home, whether your lawns are well trimmed or not. Hence, you need to choose the right paving material that will last for a long time.
Tags: concrete tiles, contemporary, eco-friendly, garage, home improvement, landscaping, patio
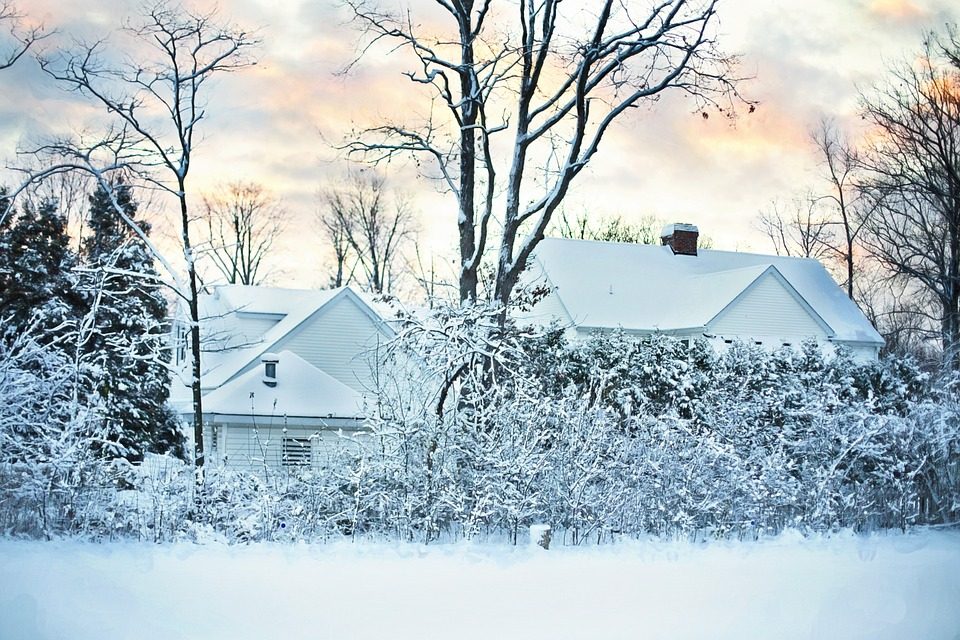
5 Ways to Enjoy Your Backyard in Winter
Many of us regard winter as the most wonderful time of the year. With Thanksgiving and Christmas to look forward to, spending time with our loved ones is key for keeping spirits up, especially in 2020. However, far too many homeowners neglect their backyard in the winter months, claiming that it is too dark or too cold to enjoy the outdoors. Whether you want to spend more time outdoors, or you’re thinking of selling your property, here are five ways to get your backyard ready for winter.

Add Lighting
As the winter months roll in, it starts to get darker earlier. If you enjoy being outdoors but don’t want to go inside when the sun goes down, adding lighting in your backyard is the way to go. Whether you opt for LED lights or solar, scattering them around will illuminate your outdoor space. Regardless of where you live in the country, it’s a good idea to purchase waterproof and rechargeable lights that will work in all weather conditions.
Add Color
When temperatures begin to fall and the colder weather sets in, many people notice a decline in their mental health as a result. Adding color to your backyard can make all the difference and help you enjoy your outdoor space. There are lots of winter plantings you can put in your backyard that will not only add a pop of color but help you think more positively. Although winter is notoriously known for its dull and drab weather, you will be surprised at the health benefits you can gain from adding a splash of color to your backyard.
Install Heating
If you’re hosting Christmas this year and having your family over to celebrate the festive season, spending time outdoors under the moon and stars with your loved ones can serve as the perfect backdrop for making everlasting memories. To keep warm and cozy once the sun goes down, having a patio heater near your seating area will help warm up cold guests. If you have enough space, adding a fire can be the perfect spot to gather around, drink hot beverages, and roast marshmallows.
Purchase Weatherproof Furniture
The last thing you want is to head out into your backyard to find your furniture ruined by the colder weather. With many parts of the US prone to severe storms, floods, and hurricanes, you need to invest in weatherproof furniture that will stand the test of time. Make sure you buy outdoor furniture that’s made from materials such as teak, steel, or polyresin wicker.
Add a Hot Tub
What better way to enjoy the festive season than by relaxing in your hot tub with your loved ones? It’s easy to see why hot tubs are so popular. Not only do they help you feel warmer and more relaxed throughout the winter, but there are numerous health benefits you can receive too, including relief from lower back pain and symptoms of arthritis.
If you have plenty of outdoor space, there are lots of ways you can transform your backyard, giving you more room to spend time with your loved ones. Executing any of the ideas listed above will help you make the most of your outdoor living space, regardless of the season.
Tags: backyard, contemporary, home improvement, landscaping, lighting, patio
How to Choose the Best Eco-Friendly Lighting Options on the Market

Choosing eco-friendly options is becoming increasingly important. As people are beginning to recognize and understand global warming, more and more people are doing what they can to save the environment before it’s too late. With that being said, simple switches and changes to the status quo have the ability to positively impact the environment. From conserving water, recycling, composting, etc., small changes can make a great impact, especially if more people make it a point to make these small changes in their everyday lives.
One of the easiest ways to make an eco-friendly change in everyday life is to switch to eco-friendly lighting. Most lighting systems use ample amounts of energy in order to illuminate a space. However, with modern technology, this doesn’t always have to be the case. In 2020, there are copious eco-friendly lighting options that will allow you to take part in saving the environment. This post will detail how to choose one of those eco-friendly lighting options.
Choosing the Eco-Friendly Lighting That is Right For You
Are you looking for ways to help save the planet, but don’t know where to start? Changing the lighting around your home or office may be the right place to start. Here are some tips and pointers to help you choose the best eco-friendly lighting that is right for you and your space.
Get to Know What Eco-Friendly Lighting Is
It’s important that you know exactly what eco-friendly lightning is so that you can make the most practical choice for your space. Eco-friendly laughing is any kind of lighting that is energy efficient or made from green materials. Some examples of eco-friendly lighting include:
- LED bulbs
- Lamps and lighting fixtures made from recycled or natural materials
- Light that comes from the utilization of solar panels
- The incorporation of natural lighting
The kind of eco-friendly lighting you choose will be based on where you are looking to install lighting/ alter your current lighting.
Think About Where You Are Installing These Lights

Where you are installing lighting fixtures is important when deciding which eco-friendly lighting option is right for your space. Are you installing eco-friendly lighting in your home? If so, where at? Are you installing it in every room, or simply in the living room or bedrooms? Or, are you looking to install eco-friendly lighting in your office? If you are looking for a more commercial location to install eco-friendly lighting you will need to determine if you are installing it both indoor and outdoor, and in which rooms specifically.
After you have thought about the general location of where you are installing eco-friendly lighting, you will need to think about what kind of lighting fixtures you are planning to install eco-friendly lighting into. Some options include ceiling lights, lamps, retrofit kits, and lights on a fan.
Do Your Research
Before you switch to any new form of eco-friendly lighting or make any purchases, make it a point to spend some time doing research. Once you have an idea of what you want, spend time researching the kind of lighting you like, some ways to do this include:
- Read facts online about the kind of lighting you are thinking about
- Read reviews online
- Talk to friends and family about what kind of eco-friendly lighting they use in their space
- Call an electrician or lighting manufacturer; perhaps an electrician in Marlton
Switch to Eco-Friendly Lighting Today
Lighting uses a lot of energy, and in addition to damaging the environment, lighting also hikes up your electric bill. However, what if there was a way to prevent both of these things? Eco-friendly lighting may be the solution you have been looking for. Keep these tips and pointers in mind as you plan ways to save the environment. As you explore eco-friendly lighting more in-depth, be sure to learn your options and think about what is practical for your unique situation.
Tags: average cost, contemporary, eco-friendly, energy efficiency, home improvement, lighting
How to Hook Your Buyer with the Right Photography
“A picture is worth a thousand words.” We have all heard this sentence at least once in our life, and yet it doesn’t ring more true than when it comes to Real Estate Photography. This article will tell you the best ways to hook a buyer with the perfect real estate photographer.

Today nothing is more popular than the internet, especially when it comes to buying certain things. Whether it be a new pair of shoes, a car, or even a home; it all starts online. Many sellers only post one or two photos of their home, which results in a lack of interest from potential buyers. Therefore, the property might sit on the market for months. Professional photographers take multiple high-quality photographs that lead to more showings of the property and faster pending sales. First impressions can be the difference between an interested buyer or a perfectly adequate home being passed over, which explains why having the right photographer is vital.
Now I bet you are wondering, “what exactly is real estate photography?” Individual companies hire expert photographers to capture the perfect essence in a home. They use certain angles and lighting to get the perfect shot every time. That way, when customers are browsing online and see a house that catches their eye, it is mostly because of real estate photography. First impressions stick with people forever, so having a striking photograph for the home at first glance is a must.
“How to tell if a photographer is an amateur or a professional?” If you have ever browsed online where lots of homeowners have tried to take photos to sell their home, the lighting is dark, angles are odd, and the photograph itself looks grainy, most likely taken with a smartphone camera. When you get a professional photographer, it changes everything. The angles they use to make the rooms look more substantial, the lighting is flawless and bright, and because they use professional equipment, it always optimizes the very best features of your home. For example, the company Home Shots has very professional photographers who have been providing fantastic real estate photography in San Francisco services for the last 5 years.
The last question I bet you have is, “how much does a professional photographer cost?” Depending on the company, it can range anywhere from a few hundred dollars up to a few thousand. The price depends on the location, size of the home, and how experienced the photographer. It will attract more potential buyers and add income to your pocket. With excellent photography, you can get multiple bidders on the house and make the price go up due to a bidding war. So, in the end, it is worth it to hire a professional photographer to make the property look as good as it can be. That way, you will have multiple interested parties and are more likely to sell the home quickly.
Even though hiring a professional real estate photographer will cost some investment, the return will outweigh the cost in the long run. You will have flawless photographs that show areas of the home that are well lit and look large (even if the space is tight and cramped), you will attract buyers more efficiently, and the best part is that you could sell the home reasonably fast. You get back what you put in when it comes to selling a home. If you take the time to make the house look appealing, hire the correct people to photograph it, and then list it on the appropriate markets, you will get a higher return on your investment. Like the famous quote states, “With high risk comes high reward.”
Tags: contemporary, home improvement, photography, real estate, selling your home
Quick Home Repair Tasks for the Weekend
Home repairs don’t need to all be extensive. Some aren’t that costly or time-consuming. These tasks are good to save up, add to a list, and then knock out one at a time over a quiet weekend. If you have a family, then pick a quiet time. Let the family know that you’ll be busy and not to disturb you unless it’s urgent. If you live alone, then it’s just a matter of planning the DIY work around other weekend activities.

So, what home repair or maintenance tasks should you get done? Here’s a short list to get you started.
Ordering and Replacing Filters
Filters are easy to forget all about. When this happens, they become clogged up and this can cause issues later.
In the case of your refrigerator, a blocked filter can cause it to become overworked and overheat. Eventually, this could cause a mechanical failure. Find reputable refrigerator water filters & replacements to ensure the filter is swapped out for a good one. It doesn’t take long to do either. Order a few days ahead to get the delivery so you’re ready when the next weekend rolls around again.
Also, don’t forget other filters used in your home. Water filtration systems need replacements too. AC units need them too, and it will get them ready for next spring.
Fixing Squeaky Doors
What you might think of as a squeaky door is really a squeaky door hinge. It usually won’t go away on its own, so it’s best to handle it yourself.
Get some WD-40 and apply it liberally on the hinges. The spray works best when moving the door to let the hinge take in the lubrication fully. If the DIY store is out of WD-40, then look for petroleum jelly instead. It’s a little messier though.
Use an old sheet below the door to catch any jelly or WD-40 that escapes the door hinge on the way to the floor.
Handle the Odorous Dishwasher
If the dishwasher isn’t cleaning as well as it used to, and it’s emitting an unpleasant odor too, it’s time to put a little time into it.
Old collected food remnants that have fallen to the bottom are what’s likely causing the bad smell. Remove them and clean any obvious areas where gunk has accumulated.
Then purchase a dishwasher cleaner and run this through a cycle or two on an otherwise empty machine. At the end of this, the machine should be playing nicely again. And while the cleaning cycle is running, there’s time to attend to something else.
Replacing Broken Roof Vents
Roof vents made from metal or plastic can become broken due to storm damage. The vents are usually nailed in place and once these are removed, they come free. The nails are situated below the shingles to avoid them rusting.
While a broken vent can be temporarily resolved using caulking, that will only last so long. There’s usually no effective way to fix a vent that’s seen its best days. Removing and fitting a replacement is the right move.
Get some help with someone holding the ladder to avoid having an accident. Many Americans every year hurt themselves using ladders at home; don’t be one of those. If in doubt, hire a handyperson to fix the roof vent for you.
Batch up tasks over a weekend to knock them out quickly. This will help you avoid getting bogged down with home maintenance and never getting caught up.
Tags: contemporary, eco-friendly, energy efficiency, home improvement
When Should You Replace Garage Door Springs?
Having a garage is ever so convenient! You’ve got a place to keep your car secure and have great storage space. If you’re into repairs and crafts, you probably spend there a lot of time. To some people, their garage is like their own kingdom.
But what if the gates to the kingdom stop guarding it as well as they used to? Most likely, the culprit is easy to detect, and it all comes down to a set of garage door springs. It’s a quiet hero of the whole garage door system, and if this part malfunctions, the best solution is to replace it. This article will give you answers regarding all things related to garage door springs. If you want to learn more, keep on reading!
Types of Garage Door Springs
Let’s start with the basics. Your garage is equipped with one of the following types of garage door spring systems:
- A torsion spring system uses one or two tightly wired springs, depending on the garage door size. The springs are placed on a steel shaft and run parallel to the door, serving as a counterbalance. It’s an option that’s generally considered to be safe and reliable.
- An extension spring system is made of two springs that are mounted on either side of the garage door track. When the garage door goes up or down, a mechanism of cables and pulleys extends and contracts them. Experts from A1 Garage point out that while this system is cheaper and easier to install, it’s less reliable and doesn’t last that long.
How Long Do Garage Door Springs Last?
Once again, it all comes down to the type of springs. Typically, extension springs have a life expectancy of 4 to 10 years or between 5,000 to 15,000 up-and-down cycles. Torsion springs are more durable, with the expected lifespan of 7 to 14 years or between 10,000 and 20,000 cycles.
Replacement: When and Why?
Now you know how durable each system is. Mechanical parts, such as garage door springs, undergo the wear and tear process, and there’s nothing you can do to stop it. At some point, you’ll have to replace them; otherwise, the excessive tension might be too much, and the springs will break. As a result, the door may come crashing down and seriously injure whoever will be underneath.
There’s a couple of factors that can indicate your garage door springs might be having some issues, and their lifespan might be coming to an end. These include:
- Imbalanced springs – this one is easier to detect than to correct. Your springs are likely out of balance when you notice your garage door is crooked, closes way too fast, and doesn’t open as smoothly as it used to. What’s more, your garage door may open and close on its own.
- Excessive noise – if your linear garage door opener starts making a sound while opening or closing doors, chances are the springs are beginning to wear down.
- Rust – if you see rust on the springs, it’s time to replace them. If you leave them as they are, they could potentially break at any time.
Garage Door Springs Replacement Cost
Again, the cost depends on the type of your garage door springs. Obviously, if you decide to do it by yourself, you’ll have to pay for the springs and any additional tools that can make your task easier. However, it’s a dangerous task, and it would be best if you considered hiring a professional to do it for you.
That being said, a professional replacement cost will vary from $120 for a single extension to $350 for a double torsion. Keep in mind that experts advise replacing both springs, even if only one is broken or damaged. This way is more cost-efficient, and the garage door is more balanced.
How Much Time Will It Take?
Garage door springs have a relatively long lifespan, compared with the time needed for them to be replaced. An expert should be able to do it within 30 minutes to 1 hour. If you want to replace them on your own, keep in mind it can take you more time, especially if you’ve never done this before, and you’re not familiar with all the tools needed to get the task done.
The Bottom Line
Just like any part of your house, your garage door needs to be properly maintained in order to serve its function. In case you notice any wear and tear, or you suspect that the springs’ lifespan might be nearing an end, consider replacing the springs before they break. If they’re broken already, don’t wait! If you’re not comfortable with doing the repairs yourself, hire a professional. A team of garage door experts will have the experience, skills, and tools to do the job safely.
Tags: average cost, garage, garage doors, home improvement, repair
How to Sell a House During a Pandemic
The current pandemic has changed life as we know it. Right now, if you want to sell your home, you will have to approach it in a completely different way. Depending on whether you need to isolate, you may not even be able to welcome viewers to your property. The good news is that it can still be listed on the open market, and as long as the price is right, you’ll find a buyer.

Staging the Property
Staging a property makes it more attractive to buyers. However, you might not want professional stagers traipsing around your home at this time. Strangers are potential disease vectors, and any new furniture brought into your home could be infected with the virus.
One way to avoid being infected is to use a virtual staging company.
What is virtual staging? Virtual stagers use software to remodel your rooms virtually. This is especially effective if your home is slightly dated or has a bespoke look your buyers might not appreciate. It’s also cheaper than a traditional staging company, so it’s definitely worth considering.
Virtual Viewings
Viewings can be done virtually, too. Instead of inviting buyers into your home, you can let them view it all via a virtual 3-D tour. It’s not quite as good as an actual tour, but it does let buyers see the layout of each room, so they can decide whether the property meets their requirements. If they decide to take it further, you can then offer them a virtual viewing via video link.
Use software such as Facetime to show people around your home. You can do this yourself or ask the realtor to do it for you. Viewers can request a closer look at anything of interest and you or the realtor are on hand to answer questions. It’s a great way of showing off your home without risking infection.
Open Weekends
Instead of booking regular viewings as normal, organize an open house event and get it over and done within a couple of days. Open house viewings tend to be popular, and when organized in advance, they can generate a nice buzz of interest in the property.
The great thing about an open house event is that viewing slots can be booked by appointment and social distancing measures adhered to. Your realtor can show viewers around, with everyone wearing masks and using handwash stations at each entrance.
If you prefer not to be involved, you can stay somewhere else for the weekend, such as in a hotel. This ensures you are not coming into contact with multiple strangers.
Extra Hygiene Measures
It’s vital that extra hygiene measures are adopted when you are conducting viewings or showing realtors around your home.
- Make sure everyone wears face masks and takes off their shoes before they enter the property.
- Maintain social distancing at all times.
- Ask visitors to use hand sanitizer before touching anything
- Once visitors have left, wipe down all door handles and surfaces, to minimize the risk of infection
Follow the protocols above and you can keep yourself and your family safe while selling your home.
Tags: contemporary, home sales, real estate, staging
Top Tips to Help Prep Your Home for Winter Storm Season
While they are words that most people don’t want to hear, the fact of the matter is, winter is coming. In just a matter of months much of the country will be into the winter season and with it comes the strong and rather harsh winter storms. Everyone is well aware of how much damage a strong summer storm can do, but the reality is that winter storms can be just as fierce, bringing with them high winds, ice, snow, hail, and plummeting temperatures that can do a real number on the exterior of your home. This is exactly why it’s important to prepare in advance.
So, let’s dive right in and look at the steps you can take now in order to prepare your home for winter storm season.
Repair Any Existing Damage
A great place to start is by repairing any existing damage. Perhaps the exterior suffered damage during the summer storm season, such as roof damage, issues with the gutters, a cracked window, siding damage and so forth. As Advantage Construction points out, these damaged areas no longer have the same strength and integrity, which means they are going to have a real hard time standing up to the winter.
Fixing these sorts of problems will help prevent water leaks in the home, heat loss, and prevent a small issue from getting bigger and therefore more expensive to repair.
Secure Loose Items Outdoors
You’ll also want to do a walk around the perimeter of the house and the yard looking for any loose items that could potentially be tossed around in the wind. This can include things like outdoor furniture, toys, planters, and so forth. These items should either be secured, tied down or stored indoors until spring.
Trim Branches that Overhang the House
Again, it’s all about looking for potential issues and any large branches that are overhanging the house, or even close to the house can pose a potential problem. It’s best to trim them back now and eliminate the risk completely. At the same time, any dead branches should also be trimmed so that they don’t fall off and cause damage.
Clean Out the Gutters
Making sure water is able to flow and drain away from the home and the foundation will be another important step in prepping your home. This is the time to inspect the gutters, clean out any debris or build-up, and make sure the water can flow freely.
Make Sure Windows and Doors Are Weather-Sealed
Your windows and doors can act as a huge heat loss in the winter, allowing for drafts and the warm interior air to escape. The good news is that there’s an easy solution, and that’s to caulk and weather-strip the windows and doors. This will provide a tight seal and thereby eliminate that energy loss.
Your Home is Ready for Winter Storm Season
Using these tips will help you to prepare your home for winter storm season no matter how cold and fierce it gets.
Tags: backyard, contemporary, eco-friendly, energy efficiency, home improvement, landscaping, roofing
DIY Carpet Cleaning – 3 Precautions If You’re a Pet Owner
Having a pet at home brings so much joy that you simply can’t compare it to anything else in the world. But with all the joy, also come so many responsibilities. If you are a pet owner, you probably already know how hard it is to keep up with all the extra work around the house. Creating a safe environment for your furry friend while having a clean house, especially carpets, won’t be as hard as it sounds, as long as you are cautious. Knowing what to use and what precautions to take is crucial because pets (especially dogs and cats) spend such a long time on the carpet. These three are the basics that all pet owners need to check out:
Stay Safe With Carpet Cleaning Products
Knowing the good and bad ingredients in pet carpet cleaners is so important. Check out the labels each time you’re buying cleaning products. The safest place to shop is a pet store, after getting advice from your vet. There is a wide range of pet-safe cleaners to shop from, always opt for the most natural, bio-friendly option. Cleaning with pet-safe products is one of those DIY projects that you don’t need a pro for and do so much good for the entire family including the pets. Some of the ingredients you have to stay away from are ammonia, formaldehyde, pesticides, chlorine, sodium hydroxide and more.
If you are not really sure how to do all of this safely yourself, then you might want to consider a professional carpet cleaning service. Make sure to do your research to find the right fit for your needs. It’s best to opt for a service that uses pet-friendly products and has experience with cleaning carpets from homes of pet owners.

Say No To Regular Carpet Shampoos, Powders, And Dry Shampoos
Carpet shampoos, powders and dry shampoos can cause a range of problems for your pet. If you’re planning on cleaning your carpets, make sure to avoid these types of products. Let’s start with the powders and dry shampoos. One of the biggest ‘no’s’, aside from the possible harmful ingredients, is that they leave a residue in the carpet, which is very hard to completely remove. In other words, your pets will inhale all those bad ingredients and strong scents as well. Powders and dry shampoos have a smell that can easily cause irritation and do more harm than good. This is how skin, eye, and respiratory conditions occur.
Regular carpet shampoos can be so tricky because they are often based on chemicals that are harmful to you and the pets. They tend to leave a sticky residue after cleaning, which only makes things worse. No matter how hard you clean, there will still be shampoo left on the fibres. Dirt, dust, urine, will adhere and cause a buildup. Your carpets will not only remain dirty, but your pets will be inhaling all of the dust and dirt while laying on them. This can, unfortunately, cause a range of problems, especially issues with the respiratory system, skin irritation, allergies and more.

Water Is Safe
Water is the safest ingredient when it comes to carpet cleaning in a house with pets. Now, the main question is how to get a clean carpet using only water. This is one of those precautions that might cost you, but it will be a great investment for everyone in your home. If you want to be very safe with the choices you make and want to avoid using any chemicals on the carpet, try a wet/dry vacuum.
Buying a wet/dry vacuum can be costly, thankfully there are many different options on the market to consider these days. If you first want to try it out, you can rent one, then decide whether it’s the right fit for you. This device uses only water to clean the carpet, which makes it perfectly safe for your pets. Let’s not forget that it’s safe for the flooring as well. Eventually, if all of this sounds like it’s too much or you simply want to be 100% safe you can always turn to a professional cleaning service.

Conclusion
Keeping a pet happy and safe, while also having a clean home can be a bit challenging. But with the right information and precautions, your carpets will be clean and your furry friends will feel great. Using the right products and tools is important to prevent any health problems of your pet, including respiratory and digestive issues, eye irritation, allergies, skin irritation and more. You know what they say- ‘better safe, than sorry’.
These three precautions will help you understand how important it is to opt for natural alternatives and to stay away from chemicals. Make sure to keep your pet outside, in a different room or different house while you’re cleaning and 24 hours after you’re done, even when using safe products.

Tony is the CEO of Love Your Rug – Canada’s largest rug cleaning & restoration facility. Apart from successfully leading his team, Tony loves to share professional advice on how to give a fresh look to carpets, rugs and peoples homes. He is an industry leader and authority in area rug restoration.
Tags: carpet, cleaning, contemporary, eco-friendly, flooring, home improvement
Renovating Your Home on a Reasonable Budget
Many people dread the idea of home renovation, mainly due to the perceived high costs attached. But in many cases, the reality is not as grim as it seems. If you are dedicated enough, you can often find various financial shortcuts that can bring the project cost down to a very reasonable level. At the very least, starting your planning early on can allow you to take advantage of market fluctuations and grab some great deals. But more on that below.

Reusing and Recycling
One of the first things you’ll want to consider is whether you have an opportunity to reuse your currently available supplies and materials. This is not always as obvious as it seems, and it’s a good idea to have a professional at your side to guide you through the process. If you play your cards right, you can often save a lot of money on this. And that even factors in the price you’ll pay for the consulting services in the first place! Of course, not every professional on the market is the same. You’ll want to do some searching before committing to anyone – so let’s take a look at that aspect of your renovation.
Work with a Professional with a Modern Approach
Even though it may seem like an extra expense, working with a professional company for your renovation job can actually save you a lot of money. This is especially true if you’re planning a major remodeling of everything, with new furniture and the works. There are many ways an experienced, established professional can save you both time and money in the renovation process on top of what we described earlier. For example, staging is a major area that’s going through some significant changes in the last years, mostly due to the advance of digital staging as an established practice. The difference between physical and digital staging is beyond the scope of this article, so see the full article here for more details. And that’s just one example of what a properly equipped renovation specialist can do for you.
Scout for Sales
Some of the things you may want to use in your renovation job can often be purchased ahead of time, and don’t need to be bought right at the time of the renovation itself. This is admittedly something where availability of physical storage will be a major limiting factor for you, but if you can afford to invest in the right supplies and materials ahead of time and keep them stored for a while, this can work out great. Make sure that you coordinate this with your renovation partner, though, because you don’t want to find yourself with a bulk of materials that you have no use for.
As long as you keep these factors in mind, renovating your home can be a very pleasant and straightforward procedure. Remember the final result, too – that’s why you’re doing all of this in the first place. And when you feel like you’ve hit a hitch, don’t be afraid to bring it up with the renovation specialist that you’re using for the job.
Tags: contemporary, home improvement, recycling, remodeling