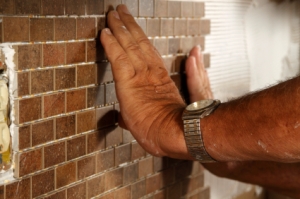
A new backsplash in your kitchen can do wonders for the room. Not only will it improve the appearance of your kitchen, but it will also serve to protect your walls and make cleanups easier.
Although you may need professional skills to install a wood, granite or stainless steel backsplash, ceramic or glass tile is relatively easy for even an inexperienced do-it-yourselfer to install.
You will need the following supplies:
· Tape measure
· Tile
· Tile adhesive or mastic
· Tile nippers
· Tile cutter or scriber
· Tile spacers, unless you use self-spacing tile
· Notched trowel
· Grout, either powdered or premixed
· Grout float
· Sponges
· Level
· Pencil
· Grout sealer
· Silicone
1. Get Ready for the Project
Measure the area you want to cover with tile. Multiply the length times the width of the space to determine the number of square feet involved in the project. Check the label on the box to find out how many square feet each box of tile will cover. Purchase 15 percent more tile than your calculations indicate you need to ensure that you have enough to repair mistakes or damage that may occur later. Keep the leftover tile after completing the job, and if possible, store a few pieces where they will have exposure to light similar to that in your kitchen. In that way, you can make a repair several years later if needed, and the repair will match the tile already on your wall. Protect your countertop with a layer of heavy cardboard before beginning your project.
2. Prepare the Surface
If there are electrical switches or outlets in the area, turn off their circuit breakers and remove the switch plates and outlet covers. Remove wallpaper from papered areas, scrape flaking or cracked paint and gently sand glossy paint on painted areas. Scrub and rinse the area thoroughly and let it dry completely.
3. Mark Guidelines
Mark the approximate center of your backsplash area with a pencil. Make a vertical line a few inches to the left or right of the center, from the top to the bottom of the area you will cover. Use a level to ensure that you make the line exactly vertical and straight.
4. Apply Mastic or Adhesive
Spread the tile mastic or adhesive on the wall with a notched trowel held at a 45-degree angle. Cover areas just large enough for about four tiles at a time.
5. Set the Tile
Leave a 1/8-inch gap between your countertop and the bottom of the tile, and set your first tile on the vertical line you made. Twist each tile slightly as you set it, pressing it firmly into place. Unless your tile has self-spacers to ensure uniformity of spacing between tiles, place tile spacers snugly alongside the set tiles. Set the spacers by standing them on end to make then easier to remove before grouting the area. Continue setting tile out from the beginning point, spreading more mastic or adhesive on small areas as you go. Clean the tile surface often to remove any adhesive while it is still wet.

6. Cut the Tile
Cut the tile to fit around corners and electrical outlets with a tile scriber, cutter or nippers.
A handheld scriber scores the tile so you can snap it on the edge of a straight surface to break the tile evenly. However, it can be difficult to make even breaks without damaging the tile unless you have had practice using the tool.
A tabletop tile cutter holds the tile firmly as you pull a cutter along a guide.
Use nippers to cut odd shapes by slowly and carefully nipping small bites out of the tile until you get the desired shape.
After cutting the tile, smooth cut edges with 60-grit sandpaper or a rubbing stone.
7. Let the Adhesive Dry
Allow plenty of time for the backsplash to dry according to the package instructions.
8. Apply Grouting
If you used spacers when setting the tile, remove them before applying the grout. Wear rubber gloves to work with grout because it is caustic. Refer to the manufacturer’s instructions to mix the grout unless you have the premixed variety. Hold a float at a 45-degree angle to spread grout on the tiled surface, working the grout into every space. You will get the best coverage by working diagonally to the grout lines. As you work, keep the surface of the tile as clean as possible.
9. Clean the Backsplash
Use a damp sponge to wipe the surface, and use your fingertip in a glove to clean the grout lines as soon as the grout feels firm. Waiting too long will make it difficult to remove the grout from the tile surface. Wipe the area again with a damp sponge. After the tile dries and appears hazy, use a clean cotton T-shirt or other soft rag to buff the tile vigorously.
10. Seal the Grout
Apply grout sealer from an aerosol can according to the directions on the can. The sealer will protect the color as well as prevent moisture from getting into the grout.
11. Fill Gaps
After the entire area is dry, run a generous bead of mildew-resistant silicone caulk all along the perimeter of the tiled area, smoothing it with your wet fingertip as you go. Remember to fill in the gap between your countertop and the bottom row of tiles.
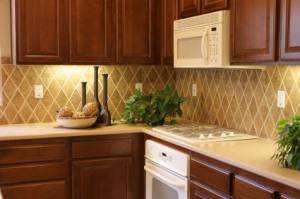
When complete, your new tile backsplash should look something like this:

Tags: backsplash, ceramic tile, kitchen, tile
