DIY Projects You Don’t Need a Pro For

8216770915_d99f7effce_b

If you’re itching to fix up your home, but don’t have the cash to pay a professional to do the work for you, fortunately, there are many projects homeowners can do themselves to improve their home’s value, look, and functionality. Don’t be afraid to get creative and get your hands dirty – these DIY projects really don’t need a pro, just a little time and effort.

Backsplash

Professionals typically charge around $60 per hour for labor costs to install a new backsplash. Although they make look very difficult to install, any homeowner can do it themselves with a little research and a few tutorial videos. The only tools and materials you need are a level, tile cutter, spacers, adhesive, grout, and of course, the tile. Intricate tiling or mosaics come with a mesh backing for easy installation, so don’t let the beautiful detailing scare you.

Outdoor Fire Pit

 If you own Raleigh real estate, you might want to enjoy some evenings outdoors in the warm summer season. An outdoor fire pit is one of the easiest projects to do yourself and a fairly inexpensive way to add a spot for outdoor entertainment.

You can purchase cement pavers from any major home improvement store, such as Home Depot or Lowes. Before you buy spend some time thinking about how large and how tall you want your fire pit to be. You might even try playing around with them at the store to get a better idea of how it might look. Once you’re home, you can wrap them around an old barbeque ring or place them freestanding. Small square pavers can be used for the bottom or flooring of the pit or you can use gravel or rock. Sand, cement, or mortar can help to fill in any gaps.

Refinish Wood Floors

If you have nice wood floors under those dirty carpets, it’s time to rip those old carpets out and refinish the beautiful wood underneath. While carpeting is preferred by most homeowners in the bedrooms, the look of wood floors in common areas is a popular trend. It’s rather simple to refinish them, too. Start by renting a walk-behind sander from your hardware or home improvement store – the type of sandpaper depends on the finish you currently have. Thick finishes or painted floors initially require coarse sandpaper. Every floor should be followed with a medium and fine paper to achieve a smooth finish; be sure to thoroughly clean up the dust with a vacuum and tack cloth. Next, choose between three finishes: polyurethane, varnish, or a penetrating sealer. Each has its own distinct look and various durability. Follow the instructions closely on the finish you choose.


DIY – An Entryway Retiling Real Life Project

 photo ce5a04e4-8498-48d0-bf1b-20eb59ace086_zpsb21a64da.png

My family moved into our first home last December, and to say that we have a lot of projects on our to-do list would be an understatement. There are multiple projects in the works for almost every room in the house. Thank goodness it’s only a 1-story home.

Recently, we decided to give our entryway a makeover, starting with the tile. My husband grew up working with his uncle, who was a contractor specializing in floors. Lucky me, right?

The previous owners used some ceramic tile that was probably better suited for a mudroom. We wanted something a bit more glamorous and shiny. I picked out about 35 pieces of this 12×12 porcelain tile from Home Depot and a similarly light-colored grout and we got to work.

The whole thing took us about 2 days, which is impressive for us because we have a toddler and a baby living with us. We’re so happy with the results, and we wanted to share it with anyone who thought they might embark on a re-tiling project on their own. I’m here to tell you-you can do it. While it’s time consuming and meticulous work, it can easily be your next DIY project.

Materials:
Tile
Spacers
Thinset
Grout
Mixing bucket

Tools:
Tile removing tool
Wet saw
Trowel
Grout float
Paddle mixer

1. Break up the existing tile using a tile removing tool-this could be as simple as using a hammer or a hammer gun. As you work, be sure to aim the hammer gun (or hammer) at the grooves in the tile, it will help it to break easier.

 photo DSC01851_zps022c7cbc.jpg

 photo DSC01866_zps3b12bb7c.jpg

2. After you thoroughly clean the area, measure the area and lay out the tile in the design you want. You should make sure that the full tiles are in the main space, while the cut tiles should be along the wall or stairs. The less you have to cut, the better.

3. Mix the thinset using a paddle mixer and a bucket. Thinset is what you use to actually set the tile. Pour the thinset into the bucket and slowly add water until the consistency is similar to pancake mix. Let it sit for about 5 minutes and mix it again.

4. Set the whole tiles first. Spread the thinset using the smooth side of the trowel, and then spread it using the notched side. Once you’ve set the whole tiles, it’s time to set the rest. Spread out more thinset, as evenly as possible.

 photo DSC01955_zps1319e964.jpg

 photo DSC01924_zpsad97e6f5.jpg

5. Using the spacers, set the remaining tiles and create your pattern. Since every tile will have a different design, pay attention to how they look in relation to one another. You’ll probably have to make more cuts as you get closer to the edges.

6. Once the thinset has dried and your tiles are set (this usually takes about 24 hours) you can apply a sealer. This is particularly important when working with natural stone, because it’s porous and can stain easily.

7. You probably already picked out your grout color-it should be a shade that complements your tile. Mix the grout with water (there should be directions on the bag) and spread it along the lines using the grout float. Don’t work the grout AGAINST the lines, but into the lines. Push it in and be sure that it fills in the lines.

 photo DSC01982_zps905ac68a.jpg

8. Once the grout starts to dry (it doesn’t take more than 30 minutes) you can wipe down the area with a wet sponge. The grout won’t FULLY be dry until the following day, but you can still clean the tiles.

 photo DSC01987_zpscb4752fb.jpg

3 Modern Tile Ideas Trending for Today’s Homeowners – Porcelain Wood, Painted Glass and Faux Stone

To change the look and feel of a home without spending huge money on renovations, homeowners are turning to tiles. From country to modern to chic, every type of design aesthetic can be updated with new tiles.

Porcelain Wood Tiles
Porcelain tiles that emulate wood grain are the newest trends available to homeowners (also known as “faux wood”). It has been building for a few years with tiles being introduced as a modern update to wood floors. Now, wood tiles come in different shapes and sizes. From walls to floors to ceilings, porcelain wood tiles are being used all over the home. Mixed wood tiles are the newest trends in wood. Light tiles that appear distressed and aged are popular. It can transform a kitchen or bath into a coastal-cottage inspired home design. It’s the new and improved shabby chic look.

iStock_000023034190_ExtraSmall

With the popularity of reclaimed wood, homeowners want that aged patina in their homes, but it can be difficult to find the perfect piece without scouring the countryside personally. Wood tile gives homeowners choices that they wouldn’t be able to find naturally. Colors of porcelain wood tiles range from faded-blue, weathered-gray and light brown to white, rust or tan. Weathered, peeling and distressed wood has hazards like paint chips, lead from old paint or splinters. With wood tile, homeowners get all the good attributes of weathered wood with none of the bad.

Painted Glass
Instead of glass mosaic tiles, homeowners now get a more ethereal tile choice for the bathroom or as a tile for the back splash in the kitchen. The back of the glass tile is painted with the color of choice. This gives the tile a shiny patina that fits in with polished kitchens. High-gloss counter tops and shiny appliances are a growing trend that allows the addition of these stunning pieces of glass. These glass tiles fit in with modern kitchen designs quite beautifully.

In the bathroom, these glass tiles can add to the feel of a seaside retreat. Popular color choices like blue, green or sand can make the homeowner feel like they are in a cottage by the sea. It gives an added dimension that can’t be matched with traditional tiles.

Faux Stone
Homeowners that might want the look of stone flooring without the disadvantages are turning to a ceramic alternative. Faux stone has the timeless appearance of traditional slate, travertine or sandstone flooring with none of the hassles.

Natural stone needs to be sealed against damage repeated through the life of the floor, and still after sealing, it is not completely resistant to chemicals or stains. Something as simple as lemon juice can stain a natural stone floor. Each natural stone tile might be a different color than the next. There’s no real uniformity to the color scheme of the tiles. For some homeowners, that can present a design problem.

Faux stone tiles are easier to install. They are stain-resistant without the constant sealing that natural stone requires. They cost less to buy and to install than natural stone. They are becoming a natural choice for homeowners who don’t want the fuss or expense of natural stone floors, walls or counter tops. Faux stone tiles can be used to create a floor or a wall with uniform color and design.

The Average Cost of a Bathroom Remodeling Project

Homeowners who undertake remodeling projects are typically altering either their kitchens or their bathrooms. As one of the most frequently occupied rooms in the house, bathrooms see a lot of wear and tear in a short amount of time. Toilets begin to leak, tiles loosen around bathtubs and showers, and mold forms in the flooring grout. Even with cost-reducing quick fixes over the years, these issues pile up until nothing will resolve them except a complete bathroom makeover.

iStock_000007365049_ExtraSmall
The difficulty with bathroom remodeling projects is that the room is one of the most complex and compact spaces in the entire house. With all that water in one small room, there are many opportunities to make costly choices and mistakes. The best way to keep the costs of a bathroom remodeling project in check is to start the process with a set budget and to make design choices based on needs that fit within those specifications.

How much does a bathroom remodel cost?
The average cost for a bathroom remodel varies greatly depending on the type of bathroom. Master bathrooms are generally more expensive, averaging approximately $16,000 nationwide, while non-master full bathrooms average closer to $11,000. This difference in cost is based largely on the upgrades added in a master bathroom.

Because a master bathroom is still considered a luxury, building or remodeling these spaces is generally more costly. Homeowners working on their master suites are more apt to include more expensive accessories that are frequently nonessential. For example, master bathrooms often feature larger-than-normal soaker tubs or separate spaces for bathtubs and showers. These features are not essential to the functionality of the bathroom space, but they are luxuries that many homeowners wish to include in their master suites. These types of add-ons will greatly increase the cost of a bathroom remodeling project.

iStock_000001183268_ExtraSmall

Another variant in determining the average cost of a bathroom remodel is the location of the home. Homeowners across the nation spend varying amounts of money on very similar remodeling projects. Pacific coast homeowners tend to spend the greatest amount of money, averaging nearly $1,000 more per project than anyone else in the country. Residents of the Mid-Atlantic and New England states spend the second most on their remodels, while the South Atlantic states are third on the list. The least expensive remodeling projects seem to be located in the Mountain region where the average remodeling project is nearly $6,000 less than those on the Pacific coast.

Despite with these regional disparities in remodeling costs, even greater differences exist between urban and rural projects. Homeowners in major cities, such as New York and San Francisco, frequently spend more than $20,000 on non-master full bathroom remodels. Similar projects in smaller metropolitan areas, such as Oklahoma City and Dallas, average closer to $7,000. These regional and location differences are based on the availability of materials and more importantly on the cost of labor.

What factors most influence the cost of a bathroom remodel?
The largest single cost in a bathroom remodeling project is labor for the contractor and crew that will be handling the project. The cost of labor usually amounts to around one-third of the entire budget of the remodel. This fee is nearly non-negotiable unless the homeowner does some of the work himself to cut costs. Therefore, if the budget of the remodeling project needs to be trimmed, the savings most likely will need to come from some of the luxuries and not from the labor budget.

Another costly factor in bathroom remodeling projects is the plumbing itself. If the bathroom project is mainly cosmetic, this may not be a large factor in the remodeling, but many bathrooms are altered because of leaking faucets or bathtubs. Correcting leaks and replacing bad pipes can be very time-consuming for the construction crew and plumber which will drive up the labor costs in addition to the fees for the new pipes. This can be especially true if the leaking pipe is difficult to find or if the house is older and features non-compliant types of pipes. These hidden costs can become budget-busting very quickly.

Beyond the cost of labor and plumbing, the other major expenses in a bathroom remodeling project mainly involve cosmetic choices. While it is necessary to place a floor, walls, and ceiling in the bathroom, the types of materials and their costs can vary widely to fit within any remodeling budget. For example, although radiant (heated) flooring that will keep feet warm on cold mornings is exceptionally comfortable and luxurious, it is not a necessary feature for a bathroom remodeling project. Therefore, radiant flooring is an added expense that will drive up the cost of the project rather than keep it within budget.

What are some common luxury features used in bathroom remodeling projects?
In addition to radiant flooring, there are several common luxury features that can take any bathroom remodeling project to another luxurious level. Many interior bathrooms that do not have windows are being given natural light through the addition of skylights. These features can flood a room with natural light during the day while also giving a romantic view of the moon and stars during the night.

Deep soaking bathtubs and rain-inspired shower heads are luxurious additions to many master bathroom remodeling projects. These powerful yet calming additions to cleanliness help to create an at-home spa atmosphere for any bathroom. In addition, many tubs and showers are surrounded by elaborately designed bathroom tile designs with stain-resistant grout that withstand the threat of mold while looking stylish and modern.

iStock_000017754415_ExtraSmall

No matter the budget of a bathroom remodeling project, there are many options and variables to help keep the costs reasonable while creating a functional and attractive space. We hope you enjoyed this post on the average cost of bathroom remodeling projects!

DIY – How to Install Ceramic, Porcelain or Glass Tile Flooring

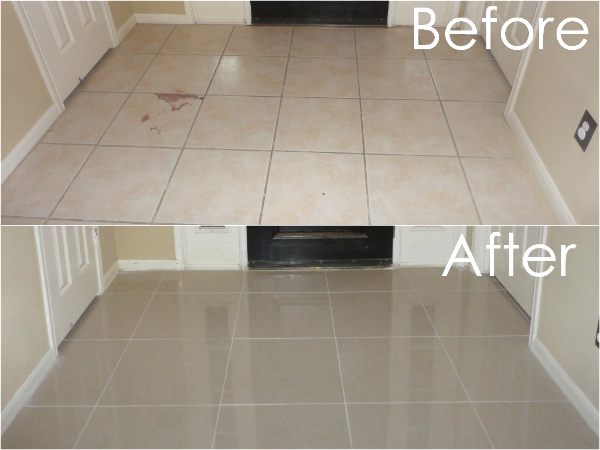
Ceramic, porcelain or glass tile floors are an upgrade over linoleum, vinyl and even carpet. Durable and attractive, they add value to your home. Purchasing the supplies and tiles is surprisingly affordable, but the price of installation can more than double the cost of the project. However, you can probably handle this project on your own to reduce the overall expense.

iStock_000015226125_ExtraSmall

Tools Needed
The right tools make any job easier. Make sure your tools are in good condition, and have everything assembled before you start the project.
• Razor knife for cutting cement board
• Cement board, drill and screws to stabilize a wood floor
• Grinder and floor leveler if you are working on a slab
• Tile cutter – An electric wet tile cutter will make the project go faster, but a manual cutter is more portable and affordable
• Tile snips – for taking off tiny pieces of tile
• Tile and spacers for grout lines
• Tape measure
• Masking tape
• Pencil and permanent maker
• Chalk line
• Mastic
• Grooved trowel
• Shop towels
• Grout
• Grout float
• Sealer
• Sponges

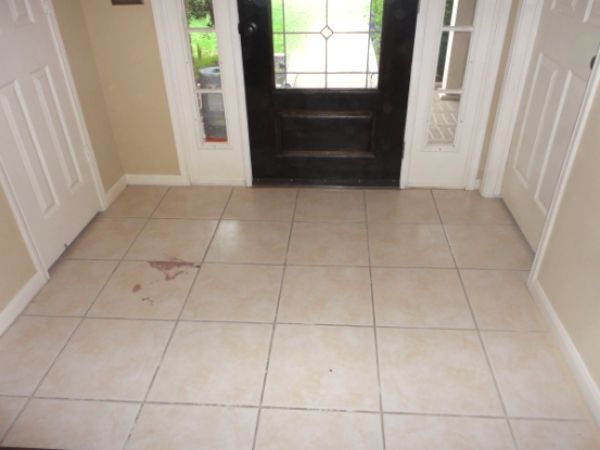
Remove Room Fixtures
Whether you are installing the tile in a foyer, bathroom or kitchen, there will be fixtures to remove. These include the baseboard, base cabinets, toilet and sink. You may decide to work around base cabinets in the kitchen, but take a look at the area around the dishwasher first. Make sure that you will still be able to remove the dishwasher and replace it after the cement board and tile add nearly an inch of height to the floor. It is more work to pull fixtures first, but your floor will look better and the tile installation will go faster.

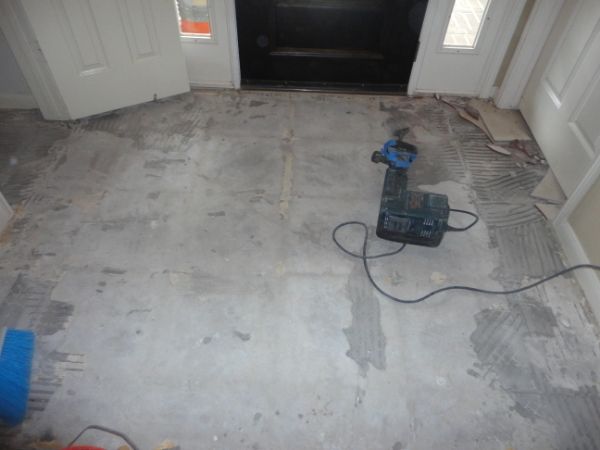
Install Cement Board or Prepare Slab
If you are working on a slab, start by making sure it is perfectly level and smooth. Use a three-foot level set on edge and slide it across the floor to pinpoint high and low spots. Grind down the high areas and use a filler to bring up the low spots. When you are installing tile on a wood floor, the concern is that the bounce and flex in the floor will cause the tiles to crack. Stabilize the floor by covering the entire surface with cement board. Use the largest pieces possible to minimize seams and eliminate any bounce in the floor.

Take measurements of the room and transfer them to graph paper. Decide how the cement boards will be installed to minimize seams. Cut the boards with a razor knife by scoring one side and then turning the board to cut the other. Lay the boards down at one time to be sure they fit nicely. Once the cuts are perfected and the boards are ready, put some construction adhesive on the back of the boards to help lock them to the floor. With the floors in place, secure them with special cement-board screws.

Mark the Center
Tiles are laid from the center of the floor to the perimeter. Measure exterior walls to find the center point. With a friend helping, snap a chalk line between the center points on opposing walls. If one wall is longer than the other, then measure in an equal distance from the common end wall. Repeat the process on the adjacent walls. The center point is where the lines intersect, and this is where you will start laying tiles.

Create the Grid
Using your tape measure and chalk line, create a grid on the floor using one-foot intervals. This will help you keep the tiles straight and perfect as you set them in place. The chalk will wear off as you work, so you may want to use the permanent marker to highlight at least a few of the lines.

Follow the Directions for Installation
Whether you are working with porcelain, glass, ceramic or natural stone tile, every tile will come with specific directions regarding what type of mastic you should use. It will also tell you what size notch the trowel should have. Follow these directions for proper installation and to avoid cracks later.

Dry Run
Lay as many whole tiles as you can in the room to see how it looks. This is your opportunity to make minor changes or alter the entire pattern. This step is vital to ensure that you are pleased with how the tile will look once the installation is compete.

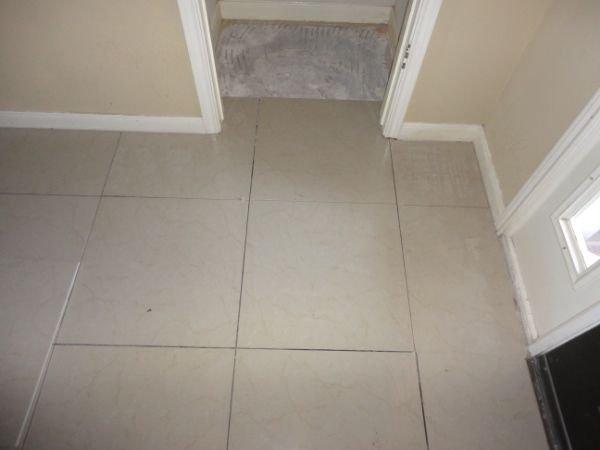
Install the Whole Tiles
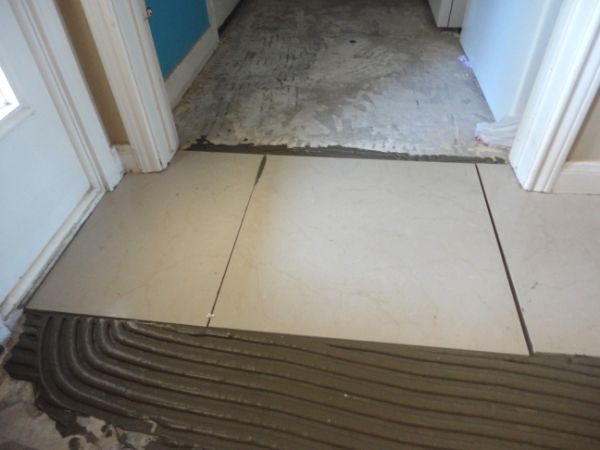
It’s important to spread the mastic in small sections at a time. Mastic hardens quickly, and spreading too much will lead to problems. Spread enough to comfortably put the first four tiles in place. Spread more once those tiles are in position. Place spacers along the long edges of the tiles so they are standing up. There should be two spacers on each side of the tile with one at the top and another at the bottom to ensure straight lines. Work with the whole tiles around the entire room. Once the solid tiles are in place, you are ready to start cutting the edge tiles.

Cutting Tiles
When it’s time to cut tiles, it’s important to remember the old adage about measuring twice and cutting once. Measure the space to be covered, and then transfer it to the tile. Double-check both measurements. Make sure your tile is marked so that the piece going in place will have the cut edge along the wall.

If you are working with an electric saw, you may want to use masking tape when cutting the tiles. Put the masking tape across the tile in the general area for the cut. Make your measurements and then mark the tape using the permanent marker. The mark will not wash off the tape when you run the wet saw, and the tile is less likely to crack or chip with the tape.

Grouting Tiles
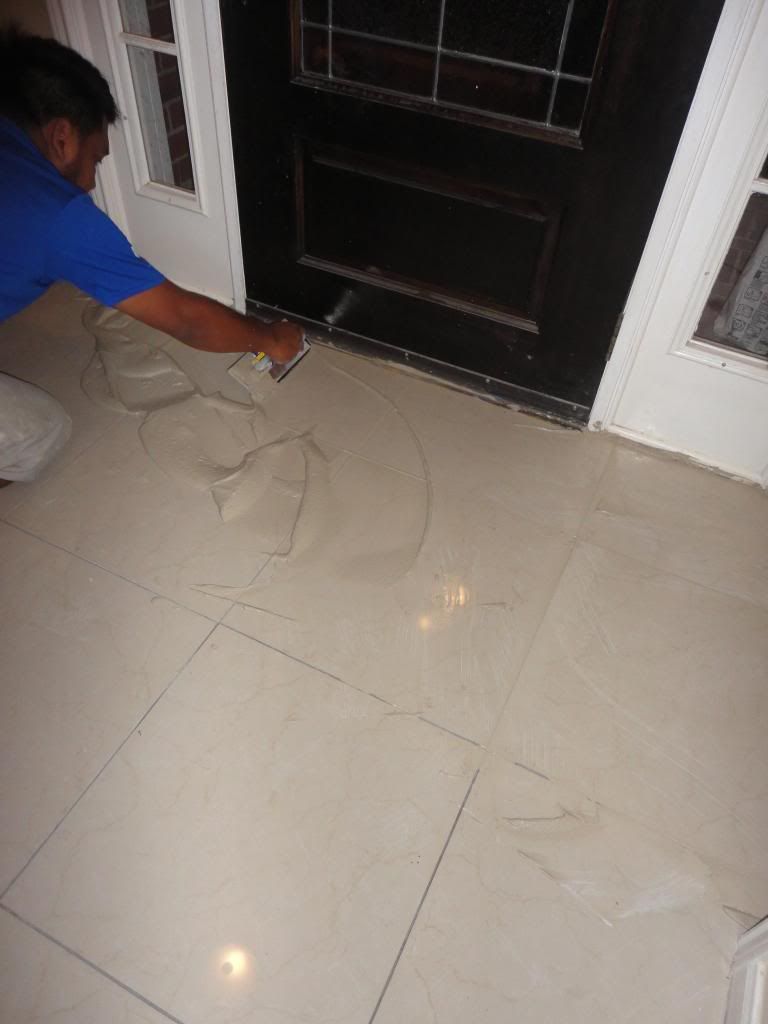
Once the tiles are in place and have set according to manufacturer’s directions, you are ready to start grouting. Use the grout recommended by the manufacturer because some tiles require sanded grout and others, like marble, need unsanded grout. Pre-mixed grout is convenient for most homeowners, but professionals prefer to mix their own to achieve the perfect consistency. A good rule of thumb is that the grout should have the consistency of smooth peanut butter or mashed potatoes. It should be soft enough to work with and push into the joints, but firm enough to roll into a ball.

Spread the grout over the floors, and use the float to push it down into joints. If you are working with mosaic glass tiles, the grout will cover the entire surface. Floors with larger tiles should see the grout confined to the area right around seams to make cleaning the floor easier later. After the grout has been worked into the seams, allow it to set according to manufacturer’s directions. You will return later to clean the grout off the tiles with a damp rag.

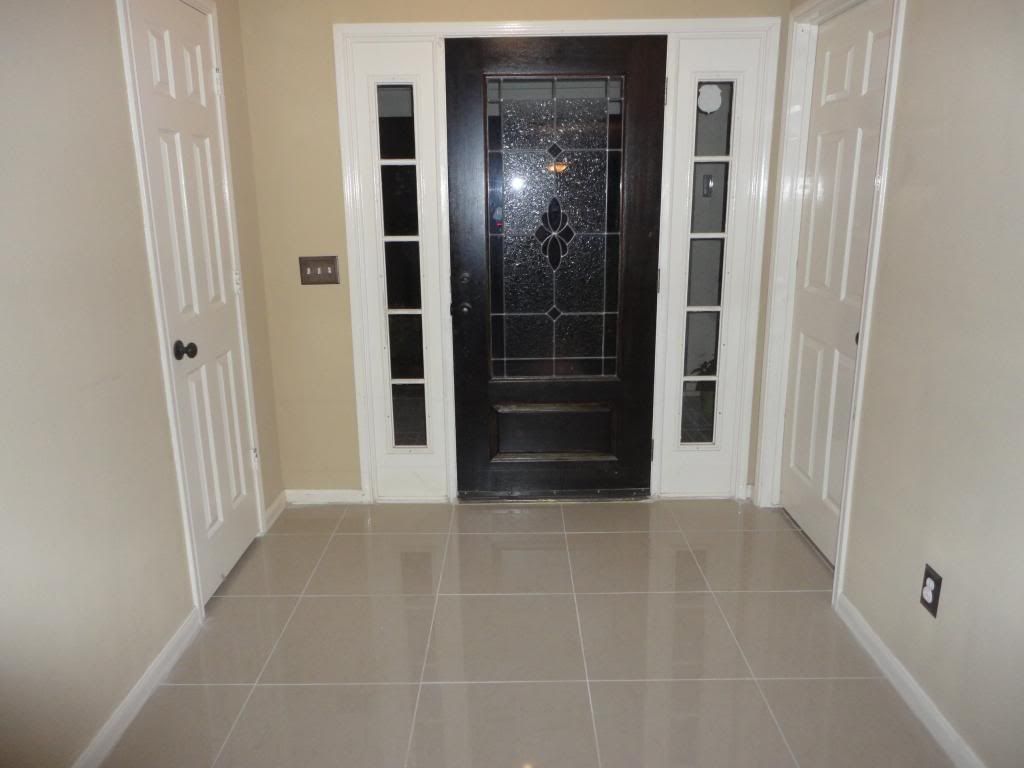
You will take great pride in your tile floor, and your floor will look fantastic longer if you take the time to seal the tiles and the grout. Sealer protects the floor from stains and helps grout retain its beautiful color. It only takes a few minutes, and it will make the floor easier to maintain in the coming years. Its an investment in your time, labor and product.

Bathroom Remodeling and Design Ideas and Pictures

As we love to do here at HomeOwnerIdeas.com we created this post for the homeowners who love to visualize design and remodeling ideas. Below you will find a wide variety of modern, contemporary, luxury, vintage etc. bathroom pictures that you can feel free to share with your remodeling contractor to get ideas for your new bathroom redesign. Enjoy!

The traditional modern bathroom these days often looks like the picture below. To best utilize space a glass shower is attached to a sunken bath tub. This bathroom also utilizes natural light. Tile, granite and wood cabinets tie the luxury feel together here.

iStock_000001676454_ExtraSmall

In this next modern bathroom design the homeowners wanted to incorporate more color in to the actual design, which is often most easy to do through the use of small glass or ceramic tiles.

iStock_000018000389_ExtraSmall

The luxury bathroom below uses every ounce of available natural light but also incorporates uniquely designed stainless steel raised plumbing features, custom window coverings, granite countertops, wood cabinetry and medium tile flooring.

iStock_000007953677_ExtraSmall

The next bathroom picture shows a design to make a smaller space look much larger. Carefully placed recessed lighting echoes off of the full tile walls in this bathroom while mixing in the natural light giving the bathroom an illusion of being much larger than it actually is.

iStock_000019504171_ExtraSmall

The following bathroom has a classic “natural look”. Large and small stone faced tile, natural wood cabinets and earthy colors complete the look for this bathroom.

iStock_000001129531_ExtraSmall1

Sometimes in cases like city condos or row houses, a homeowner only has a small space to work with. In this very small bathroom below you see a small bathroom still transformed into a luxury setting. Large tile can give the appearance of a larger space and a pedestal sink is always the best bet. The modern, narrow toilet also allows for greater floor space.

iStock_000003204725_ExtraSmall

This ultra-modern, super-contemporary bathroom has really been designed to “wow”. The large oval bathtub is a rare but stunning focal point while just past the tub is a walk-in shower with a single glass wall. To complete the contemporary look, the remodel included extra-large, over-sized tile on the floors and walls.

iStock_000017754415_ExtraSmall

Becoming more common these days is the tranquility of adding a fireplace to your bathroom. Nothing accentuates the peacefulness of a jacuzzi tub like a gas fireplace.

iStock_000001183268_ExtraSmall

Lately, many bathrooms include flat screen televisions. This country style bathroom seems to truly be a place to spend time.

iStock_000007365049_ExtraSmall

The bathroom picture below is quite a unique and artistic idea indeed. Natural but bright coloring and a wide open design with cabin shower mixed together with large tiles, small tiles, stone tiles and glass tiles.

iStock_000006903957_ExtraSmall

This bathroom features a sink that stems from the wall, small tile design and a large walk-in shower.

iStock_000002508627_ExtraSmall

This next picture gives the homeowners looking for contemporary children’s bathroom ideas plenty to think about. A citrus color designed is tied together by the orange tile.

iStock_000019856108_ExtraSmall

Finally we finish with an ultra-luxurious white toned bathroom. This space features custom cabinets, lots of marble and large jacuzzi tub. Mix in the large window and the small window and this bathroom will truly wake you up in the morning.

iStock_000015175813_ExtraSmall

We hope you enjoyed our collection of bathroom design and remodeling pictures and ideas. If you are looking for a contractor for your renovation project, use the form on the upper right hand corner of this page. Best of luck with your new bathroom!

DIY – How to Install a Tile Kitchen Backsplash

A new backsplash in your kitchen can do wonders for the room. Not only will it improve the appearance of your kitchen, but it will also serve to protect your walls and make cleanups easier.

Although you may need professional skills to install a wood, granite or stainless steel backsplash, ceramic or glass tile is relatively easy for even an inexperienced do-it-yourselfer to install.

You will need the following supplies:
· Tape measure
· Tile
· Tile adhesive or mastic
· Tile nippers
· Tile cutter or scriber
· Tile spacers, unless you use self-spacing tile
· Notched trowel
· Grout, either powdered or premixed
· Grout float
· Sponges
· Level
· Pencil
· Grout sealer
· Silicone

1. Get Ready for the Project
Measure the area you want to cover with tile. Multiply the length times the width of the space to determine the number of square feet involved in the project. Check the label on the box to find out how many square feet each box of tile will cover. Purchase 15 percent more tile than your calculations indicate you need to ensure that you have enough to repair mistakes or damage that may occur later. Keep the leftover tile after completing the job, and if possible, store a few pieces where they will have exposure to light similar to that in your kitchen. In that way, you can make a repair several years later if needed, and the repair will match the tile already on your wall. Protect your countertop with a layer of heavy cardboard before beginning your project.

2. Prepare the Surface
If there are electrical switches or outlets in the area, turn off their circuit breakers and remove the switch plates and outlet covers. Remove wallpaper from papered areas, scrape flaking or cracked paint and gently sand glossy paint on painted areas. Scrub and rinse the area thoroughly and let it dry completely.

3. Mark Guidelines
Mark the approximate center of your backsplash area with a pencil. Make a vertical line a few inches to the left or right of the center, from the top to the bottom of the area you will cover. Use a level to ensure that you make the line exactly vertical and straight.

4. Apply Mastic or Adhesive
Spread the tile mastic or adhesive on the wall with a notched trowel held at a 45-degree angle. Cover areas just large enough for about four tiles at a time.

5. Set the Tile
Leave a 1/8-inch gap between your countertop and the bottom of the tile, and set your first tile on the vertical line you made. Twist each tile slightly as you set it, pressing it firmly into place. Unless your tile has self-spacers to ensure uniformity of spacing between tiles, place tile spacers snugly alongside the set tiles. Set the spacers by standing them on end to make then easier to remove before grouting the area. Continue setting tile out from the beginning point, spreading more mastic or adhesive on small areas as you go. Clean the tile surface often to remove any adhesive while it is still wet.

istock_000007759551_extrasmall1
6. Cut the Tile
Cut the tile to fit around corners and electrical outlets with a tile scriber, cutter or nippers.

A handheld scriber scores the tile so you can snap it on the edge of a straight surface to break the tile evenly. However, it can be difficult to make even breaks without damaging the tile unless you have had practice using the tool.

A tabletop tile cutter holds the tile firmly as you pull a cutter along a guide.

Use nippers to cut odd shapes by slowly and carefully nipping small bites out of the tile until you get the desired shape.

After cutting the tile, smooth cut edges with 60-grit sandpaper or a rubbing stone.

7. Let the Adhesive Dry
Allow plenty of time for the backsplash to dry according to the package instructions.

8. Apply Grouting
If you used spacers when setting the tile, remove them before applying the grout. Wear rubber gloves to work with grout because it is caustic. Refer to the manufacturer’s instructions to mix the grout unless you have the premixed variety. Hold a float at a 45-degree angle to spread grout on the tiled surface, working the grout into every space. You will get the best coverage by working diagonally to the grout lines. As you work, keep the surface of the tile as clean as possible.

9. Clean the Backsplash
Use a damp sponge to wipe the surface, and use your fingertip in a glove to clean the grout lines as soon as the grout feels firm. Waiting too long will make it difficult to remove the grout from the tile surface. Wipe the area again with a damp sponge. After the tile dries and appears hazy, use a clean cotton T-shirt or other soft rag to buff the tile vigorously.

10. Seal the Grout
Apply grout sealer from an aerosol can according to the directions on the can. The sealer will protect the color as well as prevent moisture from getting into the grout.

11. Fill Gaps
After the entire area is dry, run a generous bead of mildew-resistant silicone caulk all along the perimeter of the tiled area, smoothing it with your wet fingertip as you go. Remember to fill in the gap between your countertop and the bottom row of tiles.

When complete, your new tile backsplash should look something like this:

istock_000002981369_extrasmall1

Kitchen Countertop Material Choices, Alternatives to Granite

The kitchen is the heart of your home and its appearance impacts the atmosphere of the other rooms around it. A kitchen that’s old and looks out-of-date can benefit from simple maintenance and renovation. One way in which to improve your kitchen’s look and functionality is with new kitchen countertop installation or replacement. With a variety of countertop materials to choose from other than granite, you can select one that complements the rest of your kitchen or changes its look altogether. Here are a few popular kitchen countertop ideas that might work for you.

Butcher Block
If you enjoy cooking, a butcher block counter can add to the convenience in your kitchen. A food prep area will always be ready for you with this style of countertop. Butcher block or wood countertops add a rustic touch to your kitchen. They’re easy to clean and care for, requiring period resealing to prevent water damage and stain penetration.

Natural Stone
Natural stone such as granite or soapstone creates classic appeal when used as your kitchen countertop surface. Soapstone is dark gray in color and found in both modern and historic homes. Naturally stain resistant, soapstone is often used for sinks too. The natural color variations found in granite make it a material that complements most any kitchen color scheme. Rated as the second hardest surface after diamonds, granite is a durable countertop surface that’s highly valued by home buyers.

Corian
Corian is a type of solid surface countertop. It’s made to the specifications of your kitchen and typically installed in one large piece. This seamless countertop material resists stains, which makes for easier cleaning. You can have a solid surface countertop made in most any color or pattern you desire. Scratches can easily be sanded out of the surface of Corian to keep it looking like-new.

Laminate
Laminate countertops are plastic-coated and cut to fit the measurements of your kitchen. This durable countertop can be made with a variety of colors and textures to complement your existing kitchen decor. Laminates are less expensive than many other types of countertops, making them an affordable option for home renovators on a budget. With laminates it’s important to be careful since it can be difficult to fix chips or cracks.

Ceramic Tile
Another inexpensive countertop choice is ceramic tile. This easily cleaned and maintained surface comes in a variety of textures, designs and colors. The ceramic tile you choose can become the focal point of your renovated kitchen or you can use it as a subtle complement to the current decor. Ceramic tile holds up well to use and when cared for properly can last for many years. This type of countertop surface goes well with most every decor.

The countertop you choose for your kitchen will be with you for many years to come. Consider your needs to help you choose the type of counter material that bests suits you in both appearance and function. Any of these popular kitchen countertop styles are certain to add to the beauty and value of your home.