Spotless Spring Cleaning: Useful Ways to Remove Junk and Tidy Up Your Home


We all know how stressful spring cleaning can be. Cluttered up items get left to sit around and gather up space during freezing winters, while dust and dirt accumulate throughout our homes. Then, when we’re finally ready to enjoy that warmer weather, we’re left with the problem of having to move a heap of items out just to enjoy our own living space.

However, it doesn’t have to be as challenging as previously believed. Lugging around multiple furniture pieces with no strategy can undoubtedly take up hours of your time. You don’t have to be a junk removal Philadelphia expert to know a few simple tricks that aid in your spring cleaning endeavors. Read on to learn more modern tactics that can save you time and energy in making your home more hygienic.

Categorize that Clutter

homeownerideas 1

Think back to those days in the classroom, when you were able to score highly on your most difficult tests. Did you study with your notes easily arranged for you to access them? Or did you spend an excessive amount of time trying to find your class notes, wasting precious hours, and not knowing what to do?

We’ll guess that it was closer to the first scenario. Organization is everything, especially when it comes to spring cleaning. Removing junk from your home is done more effectively when you can arrange your rooms from most to least messy. Each home is different depending on the architecture and the number of people living there. Still, you can typically recognize the most disorderly rooms if they have an excess amount of junk on–or in–these pieces of furniture:

  • Tables
  • Drawers
  • Closets
  • Cabinets
  • Dressers

Make sure to mark rooms that have extreme clutter in these areas at the top of your list. It’ll help you when dividing up which rooms are worth more of your time when you start your spring cleaning project.

Getting through the Garage

We mentioned separating your more essential rooms, so don’t forget about the all-important garage. It may have been used as a “winter storage” area, which means that it’s now the perfect time (and weather) to clear out that mess. For starters, moving the least needed items out of that smaller area, and onto a larger outdoor section like the driveway, will let you maneuver around in a more effortless way.

This step will give you enough space to separate items that you wish to keep, donate, or throw away. Moving that junk out of the garage will also make those hard-to-reach areas easier to sweep so that you can clean that built-up dust and make for a more hygienic place.

What About Windows?

Do you remember the last time you cleaned your windows? If you can’t, then spring cleaning might be a perfect time. Windows are also an important part of every home, and cleaning them is a multi-purpose job.

For starters, make sure that you’ve appropriately separated your window by taking off its screen (if it has one) and washing it with soap and water. You’ll be able to wash your window itself with glass cleaner, and either a microfiber cloth or a soft rag. If you’re able to, vacuum up the dust in your window track–the tiny space behind your window sill that holds it in place and prevents any windy breeze from coming in. Lastly, make sure to give your window sills and frames a proper cleaning. You can use disposable wipes for easy, affordable sanitizing.
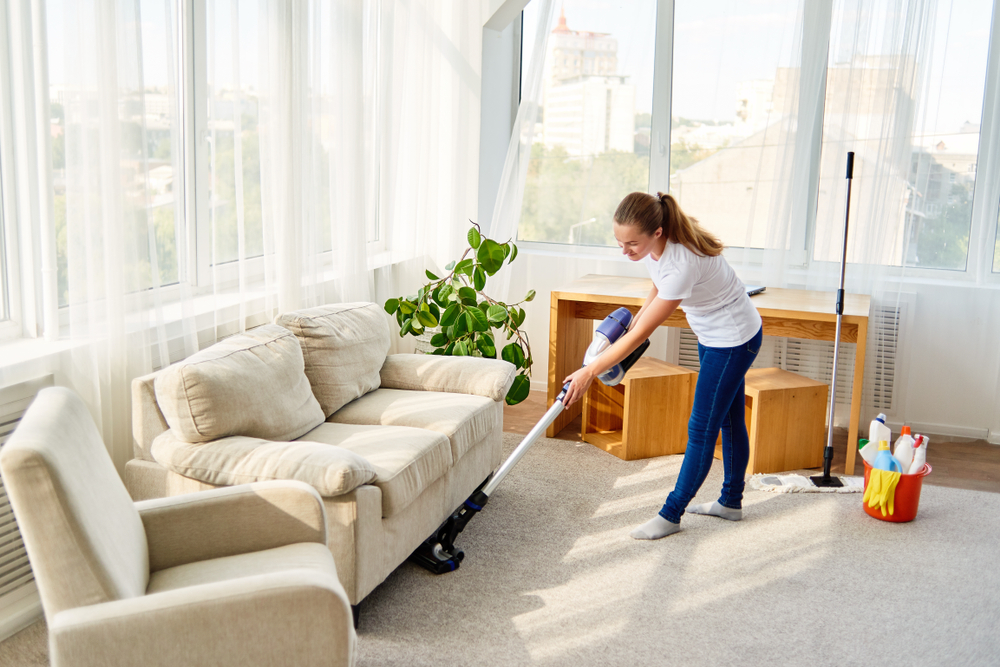
homeownerideas 2Sweep and Save

Going for the latest cleaning product sold online, which promises a state-of-the-art and carefree experience, can sound enticing. However, these items with enhanced digital features can often come at a high cost and don’t perform much better than what you can find at your everyday store.

When it comes to making your home more sanitary in time for spring, you don’t need a smart cleaning gadget that costs hundreds of dollars. All-purpose cleaning products such as spray mops (usually $50) or disposable dusters (typically $20 or under) are your best bet when looking for items that can wipe down surfaces cleanly and effectively. Floors, counters, and shelves can be kept in well-ordered shape for an affordable price.

Spring cleaning can seem frustrating, but it’s also a rejuvenating time for the home. With these suggestions, you’ll be ready to start having your home look more dazzling than ever. And this newfound ease and efficiency will be just in time to enjoy that beautifully warm weather.


Hiring Commercial Door & Installation Services

123
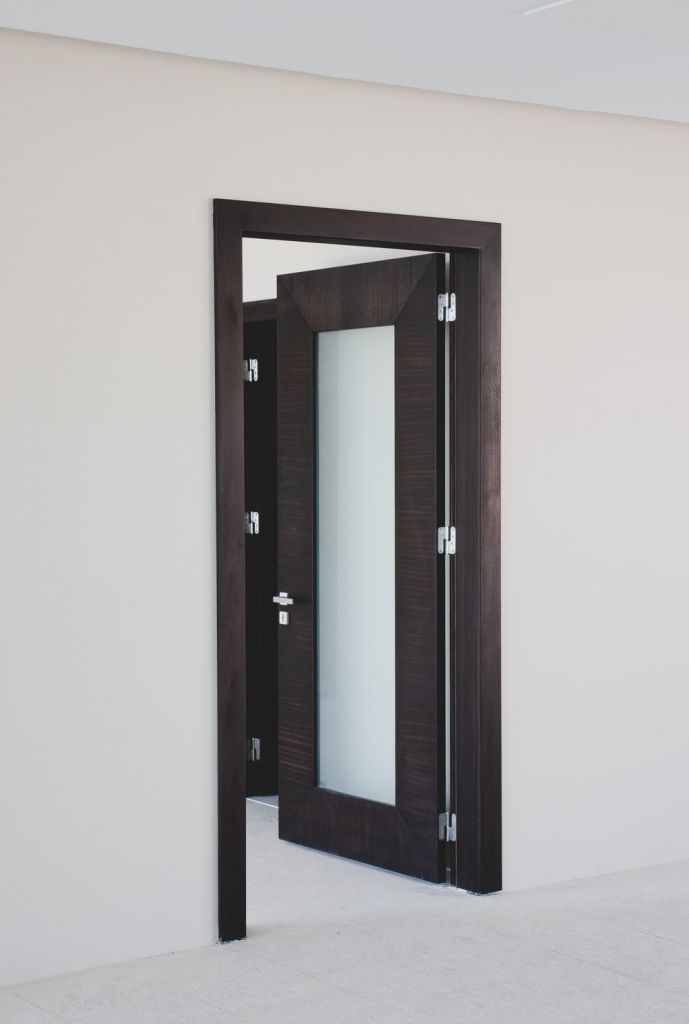
The perfect door can change your home’s entire style and look, not only to the interior but also to the exterior. Doors are extremely underrated when it comes to home design and many of us overlook the functionality of it as well as the visual aesthetic that it can add to a room.

There are loads of new styles, colors, and types available that home owners can invest in. Replacing old wooden doors with new models is not only beneficial to your home’s security but also to the overall property value.

Because it can be quite a complex installation process, one that requires handyman skills and techniques, you might want to consider hiring a professional to do the job for you. Especially if you are planning on renovating, replace a smaller door with a bigger one, or make space in a wall for a newer model.

Hiring the wrong company can result in a wonky installation where the unit isn’t evenly distributed, doesn’t provide optimum insulation, or is wrongly placed along the wall. Once it has been installed, there’s no going back. To help you find the perfect company for the job, here are a few things that you should consider before signing a contract.

MODEL OPTIONS AVAILABLE

Before you start shopping for doors, it’s best to consult a professional installation company to help you track down the perfect type and style for your home. You might only be looking at what the door looks like, but the fact of the matter is that a door needs to fulfill many other needs as well. If you aren’t aware of all these functions it needs to have, then it’s best to consult someone who knows.

Companies that only have one or two types of models available will always try to sell those to you for installation. Before booking an installation, request that they come to your home for a full-assessment. An expert company will have many different model options available for you to choose from.

Voice your home needs and assess whether they have something in their product range for you or whether they can order something. Perhaps you are looking for a specific wood, glass, or design. Maybe you want your door to add extra strength and security or allow natural lighting into the room. Regardless of your personal preferences, the more options the company has available the better.

QUALITY

If you are looking for quality Charlotte commercial doors then it’s important that you find a company that has quality options available. Quality usually comes down to what kind of materials are used in the creation and manufacturing of the model.

Evaluate every single part of the model by looking at the door handles, knobs, hinges, glass, iron, and other materials. You wouldn’t want to install an entire model only for it to deteriorate after the first rainstorm has hit. A door is our protection from the outside world, and just like windows and walls they should be durable and strong.

Consider how maintainable the unit also is by asking what maintenance measures you will have to take and how often. Some doors require an extra coating of certain protective layers in order for them to remain water and weather proof.

EXTRA SERVICES

It’s a great idea to find a company that is willing to provide extra maintenance and care services throughout the year. Especially if you are a very busy person who doesn’t have time to do maintenance around the home, it will be great to find a company that can provide after-installation services.

When you do experience some problems with the door a few weeks after installation, make sure that the company can provide one or two free check-ups and that they won’t charge a service fee for fixing a minor issue afterwards. Before you hire, read the company’s terms of service to avoid any disputes in the future.

124REVIEWS AND RECOMMENDATIONS

One of the best ways to find the perfect installation company is to check past reviews. When the majority of past reviews are positive, then you might have found a winner. With the internet becoming everyone’s number one source of information, many people aren’t scared to share their honest opinions about the services they’ve experienced. A quick google search will give you review results to research.

It’s important that the company’s client service is just as organized and friendly. In case there are any problems with the work delivered, you should feel comfortable enough to raise your concerns. You’ll be able to see online whether the company is able to resolve any bad reviews and complaints. This is also a great indication of the company’s professionalism and experience.

EXPERIENCE AND TRAINING

If you’ve ever attempted to install a door yourself, you’ll know that it requires a lot of skill, power tool handling, and an eye for detail. Many things can play a role in how to install the unit. Things like the wall’s material, the thickness of the wall, the door size, and the placement, all have an effect on how it should be installed.

It’s therefore important to hire a company that is experienced in installing doors in many different commercial properties in Charlotte. There’s a big difference between installing a double-sided front door and a smaller cabinet door.

COST AND PRICING

When your home’s safety is at stake, you shouldn’t compromise quality over price. But you shouldn’t pay for a service that is clearly overpriced. Request a clear quotation from the company that lists all installation services, labor costs, and the cost of the door itself.

Make sure that there aren’t any hidden costs or extra charges that might pop up once the installation process is under way. If you have a specific budget, ask that the company try to stick within that.

Hiring a Charlotte commercial door installation company will save you a lot of time and will ensure quality work.


Paving Your Driveway for a Long-Lasting Effect

Block paving is not only beautiful, but is incredibly practical and durable. We use materials that are spec… | Modern driveway, Patio pavers design, Driveway design

While your driveway may look like an unexciting part of your building, it is actually among the important elements of the landscape. You may be wondering, why? That is because it is being used on a daily basis and it is fundamental in the creation of curb appeal for your home.

The resale value of your property will increase if your driveway is attractive. Well, that is if you intend on selling. But before then, it is the first thing you will see each time you get back home. Paving the driveway of any building makes the exterior appear safe and neat. However, the landscaping needs to be carefully planned to bring about a long-lasting effect.

As a homeowner, you need to know what is involved in paving your driveway. This will enable you to make the right decision and protect you from contractors who just want to earn quick cash. If you also need to repave the driveway, it will be easier to know what to expect from a driveway repair service if you have a basic understanding of what it entails.

When Can a Driveway Be Paved?

A driveway can be paved two years after the property has been built. This period of waiting will allow the ground to settle properly, thereby, providing a strong base which is essential when paving the driveway. On the contrary, if the property is not a new one or older than two years, all you need to do is choose a suitable season for the paving.

The ideal paving condition is when the weather is relatively warm and dry. If the weather is too wet, the base gravel will wash out quickly. And that base is needed for the asphalt to set in if you are using asphalt paving. Different materials are used to pave driveways. Keep reading so you can know which one suits you.

Types of Paving Materials

What are driveway paving options? - Quora

The most common materials people use when paving driveways are asphalt, poured concrete, gravel, and pavers. Before settling for a type of paving material, you need to know that every driveway will degenerate with time, but some will require face lifting faster than others. However, this depends on the weather conditions in your area, how often the driveway is being used, and if the paving was properly done.

We will be discussing each type of paving material; including its pros and cons.

Asphalt

Asphalt paving combines stone, sand, and gravel with asphalt cement (a liquid petroleum product). This mixture is unbelievably stinky and very hot. Asphalt is commonly used in areas that require snow removal during snowy periods. It is also a suitable option if you are on a strict budget.

Pros

  1. It is economical
  2. It is not likely to crack due to frost heaves
  3. Asphalt makes it easy to remove snow
  4. Re-layering is possible when it gets worn or damaged

Cons

  1. It is prone to cracking when sealed improperly
  2. It requires routine sealing, every 3 – 5 years

Poured Concrete

Concrete is gotten from a mixture of rocks, sand, and stone with cement and water. Concrete paving can be customized to suit different architectural styles.

Pros

  1. It is long-lasting and can be maintained with ease
  2. Various decorations can be made on it, including stamping and staining
  3. It can be used to form various geometric shapes, giving your house a custom look

Cons

  1. The site and frames need to be prepared properly before pouring the concrete
  2. Roots of nearby trees can crack the concrete over time

Gravel

There are 2 types: crushed granite and traditional gravel. Crushed granite has a finer texture and it is very stable. Traditional gravel is usually used in rural areas.

Pros

  1. It has a variety of colors
  2. Minimal maintenance is required besides weeding and regrading
  3. It allows water to seep back to the ground which makes it eco-friendly
  4. It resists cracking

Cons

  1. Some gravel may be lost when using a machine to remove snow
  2. When it gets loose, it will look messy

Pavers

They come in different styles: concrete, cobblestone, and brick. The concrete version is stronger than the poured concrete we mentioned earlier.

Pros

  1. If a piece goes bad, you can fix it without having to replace the entire driveway
  2. The concrete option is basically interlocking, and this makes for quick installation

Cons

  1. They are expensive
  2. Some designs and patterns can look outdated over time
  3. Roots of trees can damage pavers

Conclusion

The appearance of your driveway is very important. If it is stained and cracked, people will have a low impression of your home, whether your lawns are well trimmed or not. Hence, you need to choose the right paving material that will last for a long time.


5 Ways to Enjoy Your Backyard in Winter


Many of us regard winter as the most wonderful time of the year. With Thanksgiving and Christmas to look forward to, spending time with our loved ones is key for keeping spirits up, especially in 2020. However, far too many homeowners neglect their backyard in the winter months, claiming that it is too dark or too cold to enjoy the outdoors. Whether you want to spend more time outdoors, or you’re thinking of selling your property, here are five ways to get your backyard ready for winter.

5 Ways to Enjoy Your Backyard in Winter

Add Lighting

As the winter months roll in, it starts to get darker earlier. If you enjoy being outdoors but don’t want to go inside when the sun goes down, adding lighting in your backyard is the way to go. Whether you opt for LED lights or solar, scattering them around will illuminate your outdoor space. Regardless of where you live in the country, it’s a good idea to purchase waterproof and rechargeable lights that will work in all weather conditions.

Add Color

When temperatures begin to fall and the colder weather sets in, many people notice a decline in their mental health as a result. Adding color to your backyard can make all the difference and help you enjoy your outdoor space. There are lots of winter plantings you can put in your backyard that will not only add a pop of color but help you think more positively. Although winter is notoriously known for its dull and drab weather, you will be surprised at the health benefits you can gain from adding a splash of color to your backyard.

Install Heating

If you’re hosting Christmas this year and having your family over to celebrate the festive season, spending time outdoors under the moon and stars with your loved ones can serve as the perfect backdrop for making everlasting memories. To keep warm and cozy once the sun goes down, having a patio heater near your seating area will help warm up cold guests. If you have enough space, adding a fire can be the perfect spot to gather around, drink hot beverages, and roast marshmallows.

Purchase Weatherproof Furniture

The last thing you want is to head out into your backyard to find your furniture ruined by the colder weather. With many parts of the US prone to severe storms, floods, and hurricanes, you need to invest in weatherproof furniture that will stand the test of time. Make sure you buy outdoor furniture that’s made from materials such as teak, steel, or polyresin wicker.

Add a Hot Tub

What better way to enjoy the festive season than by relaxing in your hot tub with your loved ones? It’s easy to see why hot tubs are so popular. Not only do they help you feel warmer and more relaxed throughout the winter, but there are numerous health benefits you can receive too, including relief from lower back pain and symptoms of arthritis.

If you have plenty of outdoor space, there are lots of ways you can transform your backyard, giving you more room to spend time with your loved ones. Executing any of the ideas listed above will help you make the most of your outdoor living space, regardless of the season.


How to Choose the Best Eco-Friendly Lighting Options on the Market

How to Choose the Best Eco-Friendly Lighting Options

Choosing eco-friendly options is becoming increasingly important. As people are beginning to recognize and understand global warming, more and more people are doing what they can to save the environment before it’s too late. With that being said, simple switches and changes to the status quo have the ability to positively impact the environment. From conserving water, recycling, composting, etc., small changes can make a great impact, especially if more people make it a point to make these small changes in their everyday lives.

One of the easiest ways to make an eco-friendly change in everyday life is to switch to eco-friendly lighting. Most lighting systems use ample amounts of energy in order to illuminate a space. However, with modern technology, this doesn’t always have to be the case. In 2020, there are copious eco-friendly lighting options that will allow you to take part in saving the environment. This post will detail how to choose one of those eco-friendly lighting options.

Choosing the Eco-Friendly Lighting That is Right For You

Are you looking for ways to help save the planet, but don’t know where to start? Changing the lighting around your home or office may be the right place to start. Here are some tips and pointers to help you choose the best eco-friendly lighting that is right for you and your space.

Get to Know What Eco-Friendly Lighting Is

It’s important that you know exactly what eco-friendly lightning is so that you can make the most practical choice for your space. Eco-friendly laughing is any kind of lighting that is energy efficient or made from green materials. Some examples of eco-friendly lighting include:

  • LED bulbs
  • Lamps and lighting fixtures made from recycled or natural materials
  • Light that comes from the utilization of solar panels
  • The incorporation of natural lighting

The kind of eco-friendly lighting you choose will be based on where you are looking to install lighting/ alter your current lighting.

Think About Where You Are Installing These Lights


How to Choose the Best Eco-Friendly Lighting Options

Where you are installing lighting fixtures is important when deciding which eco-friendly lighting option is right for your space. Are you installing eco-friendly lighting in your home? If so, where at? Are you installing it in every room, or simply in the living room or bedrooms? Or, are you looking to install eco-friendly lighting in your office? If you are looking for a more commercial location to install eco-friendly lighting you will need to determine if you are installing it both indoor and outdoor, and in which rooms specifically.

After you have thought about the general location of where you are installing eco-friendly lighting, you will need to think about what kind of lighting fixtures you are planning to install eco-friendly lighting into. Some options include ceiling lights, lamps, retrofit kits, and lights on a fan.

Do Your Research

Before you switch to any new form of eco-friendly lighting or make any purchases, make it a point to spend some time doing research. Once you have an idea of what you want, spend time researching the kind of lighting you like, some ways to do this include:

  • Read facts online about the kind of lighting you are thinking about
  • Read reviews online
  • Talk to friends and family about what kind of eco-friendly lighting they use in their space
  • Call an electrician or lighting manufacturer; perhaps an electrician in Marlton

Switch to Eco-Friendly Lighting Today

Lighting uses a lot of energy, and in addition to damaging the environment, lighting also hikes up your electric bill. However, what if there was a way to prevent both of these things? Eco-friendly lighting may be the solution you have been looking for. Keep these tips and pointers in mind as you plan ways to save the environment. As you explore eco-friendly lighting more in-depth, be sure to learn your options and think about what is practical for your unique situation.


How to Hook Your Buyer with the Right Photography


“A picture is worth a thousand words.” We have all heard this sentence at least once in our life, and yet it doesn’t ring more true than when it comes to Real Estate Photography. This article will tell you the best ways to hook a buyer with the perfect real estate photographer.

How to Hook Your Buyer with the Right Photography

Today nothing is more popular than the internet, especially when it comes to buying certain things. Whether it be a new pair of shoes, a car, or even a home; it all starts online. Many sellers only post one or two photos of their home, which results in a lack of interest from potential buyers. Therefore, the property might sit on the market for months. Professional photographers take multiple high-quality photographs that lead to more showings of the property and faster pending sales. First impressions can be the difference between an interested buyer or a perfectly adequate home being passed over, which explains why having the right photographer is vital.

Now I bet you are wondering, “what exactly is real estate photography?” Individual companies hire expert photographers to capture the perfect essence in a home. They use certain angles and lighting to get the perfect shot every time. That way, when customers are browsing online and see a house that catches their eye, it is mostly because of real estate photography. First impressions stick with people forever, so having a striking photograph for the home at first glance is a must.

“How to tell if a photographer is an amateur or a professional?” If you have ever browsed online where lots of homeowners have tried to take photos to sell their home, the lighting is dark, angles are odd, and the photograph itself looks grainy, most likely taken with a smartphone camera. When you get a professional photographer, it changes everything. The angles they use to make the rooms look more substantial, the lighting is flawless and bright, and because they use professional equipment, it always optimizes the very best features of your home. For example, the company Home Shots has very professional photographers who have been providing fantastic real estate photography in San Francisco services for the last 5 years.

The last question I bet you have is, “how much does a professional photographer cost?” Depending on the company, it can range anywhere from a few hundred dollars up to a few thousand. The price depends on the location, size of the home, and how experienced the photographer. It will attract more potential buyers and add income to your pocket. With excellent photography, you can get multiple bidders on the house and make the price go up due to a bidding war. So, in the end, it is worth it to hire a professional photographer to make the property look as good as it can be. That way, you will have multiple interested parties and are more likely to sell the home quickly.

Even though hiring a professional real estate photographer will cost some investment, the return will outweigh the cost in the long run. You will have flawless photographs that show areas of the home that are well lit and look large (even if the space is tight and cramped), you will attract buyers more efficiently, and the best part is that you could sell the home reasonably fast. You get back what you put in when it comes to selling a home. If you take the time to make the house look appealing, hire the correct people to photograph it, and then list it on the appropriate markets, you will get a higher return on your investment. Like the famous quote states, “With high risk comes high reward.”


Quick Home Repair Tasks for the Weekend


Home repairs don’t need to all be extensive. Some aren’t that costly or time-consuming. These tasks are good to save up, add to a list, and then knock out one at a time over a quiet weekend. If you have a family, then pick a quiet time. Let the family know that you’ll be busy and not to disturb you unless it’s urgent. If you live alone, then it’s just a matter of planning the DIY work around other weekend activities.

Quick Home Repair Tasks for the Weekend

So, what home repair or maintenance tasks should you get done? Here’s a short list to get you started.

Ordering and Replacing Filters

Filters are easy to forget all about. When this happens, they become clogged up and this can cause issues later.

In the case of your refrigerator, a blocked filter can cause it to become overworked and overheat. Eventually, this could cause a mechanical failure. Find reputable refrigerator water filters & replacements to ensure the filter is swapped out for a good one. It doesn’t take long to do either. Order a few days ahead to get the delivery so you’re ready when the next weekend rolls around again.

Also, don’t forget other filters used in your home. Water filtration systems need replacements too. AC units need them too, and it will get them ready for next spring.

Fixing Squeaky Doors

What you might think of as a squeaky door is really a squeaky door hinge. It usually won’t go away on its own, so it’s best to handle it yourself.

Get some WD-40 and apply it liberally on the hinges. The spray works best when moving the door to let the hinge take in the lubrication fully. If the DIY store is out of WD-40, then look for petroleum jelly instead. It’s a little messier though.

Use an old sheet below the door to catch any jelly or WD-40 that escapes the door hinge on the way to the floor.

Handle the Odorous Dishwasher

If the dishwasher isn’t cleaning as well as it used to, and it’s emitting an unpleasant odor too, it’s time to put a little time into it.

Old collected food remnants that have fallen to the bottom are what’s likely causing the bad smell. Remove them and clean any obvious areas where gunk has accumulated.

Then purchase a dishwasher cleaner and run this through a cycle or two on an otherwise empty machine. At the end of this, the machine should be playing nicely again. And while the cleaning cycle is running, there’s time to attend to something else.

Replacing Broken Roof Vents

Roof vents made from metal or plastic can become broken due to storm damage. The vents are usually nailed in place and once these are removed, they come free. The nails are situated below the shingles to avoid them rusting.

While a broken vent can be temporarily resolved using caulking, that will only last so long. There’s usually no effective way to fix a vent that’s seen its best days. Removing and fitting a replacement is the right move.

Get some help with someone holding the ladder to avoid having an accident. Many Americans every year hurt themselves using ladders at home; don’t be one of those. If in doubt, hire a handyperson to fix the roof vent for you.

Batch up tasks over a weekend to knock them out quickly. This will help you avoid getting bogged down with home maintenance and never getting caught up.


How to Sell a House During a Pandemic


The current pandemic has changed life as we know it. Right now, if you want to sell your home, you will have to approach it in a completely different way. Depending on whether you need to isolate, you may not even be able to welcome viewers to your property. The good news is that it can still be listed on the open market, and as long as the price is right, you’ll find a buyer.

How to Sell a House During a Pandemic

Staging the Property

Staging a property makes it more attractive to buyers. However, you might not want professional stagers traipsing around your home at this time. Strangers are potential disease vectors, and any new furniture brought into your home could be infected with the virus.

One way to avoid being infected is to use a virtual staging company.

What is virtual staging? Virtual stagers use software to remodel your rooms virtually. This is especially effective if your home is slightly dated or has a bespoke look your buyers might not appreciate. It’s also cheaper than a traditional staging company, so it’s definitely worth considering.

Virtual Viewings

Viewings can be done virtually, too. Instead of inviting buyers into your home, you can let them view it all via a virtual 3-D tour. It’s not quite as good as an actual tour, but it does let buyers see the layout of each room, so they can decide whether the property meets their requirements. If they decide to take it further, you can then offer them a virtual viewing via video link.

Use software such as Facetime to show people around your home. You can do this yourself or ask the realtor to do it for you. Viewers can request a closer look at anything of interest and you or the realtor are on hand to answer questions. It’s a great way of showing off your home without risking infection.

Open Weekends

Instead of booking regular viewings as normal, organize an open house event and get it over and done within a couple of days. Open house viewings tend to be popular, and when organized in advance, they can generate a nice buzz of interest in the property.

The great thing about an open house event is that viewing slots can be booked by appointment and social distancing measures adhered to. Your realtor can show viewers around, with everyone wearing masks and using handwash stations at each entrance.

If you prefer not to be involved, you can stay somewhere else for the weekend, such as in a hotel. This ensures you are not coming into contact with multiple strangers.

Extra Hygiene Measures

It’s vital that extra hygiene measures are adopted when you are conducting viewings or showing realtors around your home.

  • Make sure everyone wears face masks and takes off their shoes before they enter the property.
  • Maintain social distancing at all times.
  • Ask visitors to use hand sanitizer before touching anything
  • Once visitors have left, wipe down all door handles and surfaces, to minimize the risk of infection

Follow the protocols above and you can keep yourself and your family safe while selling your home.


Top Tips to Help Prep Your Home for Winter Storm Season


While they are words that most people don’t want to hear, the fact of the matter is, winter is coming. In just a matter of months much of the country will be into the winter season and with it comes the strong and rather harsh winter storms. Everyone is well aware of how much damage a strong summer storm can do, but the reality is that winter storms can be just as fierce, bringing with them high winds, ice, snow, hail, and plummeting temperatures that can do a real number on the exterior of your home. This is exactly why it’s important to prepare in advance.

Top Tips to Help Prep Your Home for Winter Storm Season

So, let’s dive right in and look at the steps you can take now in order to prepare your home for winter storm season.

Repair Any Existing Damage

A great place to start is by repairing any existing damage. Perhaps the exterior suffered damage during the summer storm season, such as roof damage, issues with the gutters, a cracked window, siding damage and so forth. As Advantage Construction points out, these damaged areas no longer have the same strength and integrity, which means they are going to have a real hard time standing up to the winter.

Fixing these sorts of problems will help prevent water leaks in the home, heat loss, and prevent a small issue from getting bigger and therefore more expensive to repair.

Secure Loose Items Outdoors

You’ll also want to do a walk around the perimeter of the house and the yard looking for any loose items that could potentially be tossed around in the wind. This can include things like outdoor furniture, toys, planters, and so forth. These items should either be secured, tied down or stored indoors until spring.

Trim Branches that Overhang the House

Again, it’s all about looking for potential issues and any large branches that are overhanging the house, or even close to the house can pose a potential problem. It’s best to trim them back now and eliminate the risk completely. At the same time, any dead branches should also be trimmed so that they don’t fall off and cause damage.

Clean Out the Gutters

Making sure water is able to flow and drain away from the home and the foundation will be another important step in prepping your home. This is the time to inspect the gutters, clean out any debris or build-up, and make sure the water can flow freely.

Make Sure Windows and Doors Are Weather-Sealed

Your windows and doors can act as a huge heat loss in the winter, allowing for drafts and the warm interior air to escape. The good news is that there’s an easy solution, and that’s to caulk and weather-strip the windows and doors. This will provide a tight seal and thereby eliminate that energy loss.

Your Home is Ready for Winter Storm Season

Using these tips will help you to prepare your home for winter storm season no matter how cold and fierce it gets.


DIY Carpet Cleaning – 3 Precautions If You’re a Pet Owner


Having a pet at home brings so much joy that you simply can’t compare it to anything else in the world. But with all the joy, also come so many responsibilities. If you are a pet owner, you probably already know how hard it is to keep up with all the extra work around the house. Creating a safe environment for your furry friend while having a clean house, especially carpets, won’t be as hard as it sounds, as long as you are cautious. Knowing what to use and what precautions to take is crucial because pets (especially dogs and cats) spend such a long time on the carpet. These three are the basics that all pet owners need to check out:

Stay Safe With Carpet Cleaning Products

Knowing the good and bad ingredients in pet carpet cleaners is so important. Check out the labels each time you’re buying cleaning products. The safest place to shop is a pet store, after getting advice from your vet. There is a wide range of pet-safe cleaners to shop from, always opt for the most natural, bio-friendly option. Cleaning with pet-safe products is one of those DIY projects that you don’t need a pro for and do so much good for the entire family including the pets. Some of the ingredients you have to stay away from are ammonia, formaldehyde, pesticides, chlorine, sodium hydroxide and more.

If you are not really sure how to do all of this safely yourself, then you might want to consider a professional carpet cleaning service. Make sure to do your research to find the right fit for your needs. It’s best to opt for a service that uses pet-friendly products and has experience with cleaning carpets from homes of pet owners.

Say No To Regular Carpet Shampoos, Powders, And Dry Shampoos

Carpet shampoos, powders and dry shampoos can cause a range of problems for your pet. If you’re planning on cleaning your carpets, make sure to avoid these types of products. Let’s start with the powders and dry shampoos. One of the biggest ‘no’s’, aside from the possible harmful ingredients, is that they leave a residue in the carpet, which is very hard to completely remove. In other words, your pets will inhale all those bad ingredients and strong scents as well. Powders and dry shampoos have a smell that can easily cause irritation and do more harm than good. This is how skin, eye, and respiratory conditions occur.

Regular carpet shampoos can be so tricky because they are often based on chemicals that are harmful to you and the pets. They tend to leave a sticky residue after cleaning, which only makes things worse. No matter how hard you clean, there will still be shampoo left on the fibres. Dirt, dust, urine, will adhere and cause a buildup. Your carpets will not only remain dirty, but your pets will be inhaling all of the dust and dirt while laying on them. This can, unfortunately, cause a range of problems, especially issues with the respiratory system, skin irritation, allergies and more.

Water Is Safe

Water is the safest ingredient when it comes to carpet cleaning in a house with pets. Now, the main question is how to get a clean carpet using only water. This is one of those precautions that might cost you, but it will be a great investment for everyone in your home. If you want to be very safe with the choices you make and want to avoid using any chemicals on the carpet, try a wet/dry vacuum.

Buying a wet/dry vacuum can be costly, thankfully there are many different options on the market to consider these days. If you first want to try it out, you can rent one, then decide whether it’s the right fit for you. This device uses only water to clean the carpet, which makes it perfectly safe for your pets. Let’s not forget that it’s safe for the flooring as well. Eventually, if all of this sounds like it’s too much or you simply want to be 100% safe you can always turn to a professional cleaning service.

Conclusion

Keeping a pet happy and safe, while also having a clean home can be a bit challenging. But with the right information and precautions, your carpets will be clean and your furry friends will feel great. Using the right products and tools is important to prevent any health problems of your pet, including respiratory and digestive issues, eye irritation, allergies, skin irritation and more. You know what they say- ‘better safe, than sorry’.

These three precautions will help you understand how important it is to opt for natural alternatives and to stay away from chemicals. Make sure to keep your pet outside, in a different room or different house while you’re cleaning and 24 hours after you’re done, even when using safe products.


Tony is the CEO of Love Your Rug – Canada’s largest rug cleaning & restoration facility. Apart from successfully leading his team, Tony loves to share professional advice on how to give a fresh look to carpets, rugs and peoples homes. He is an industry leader and authority in area rug restoration. 


Renovating Your Home on a Reasonable Budget


Many people dread the idea of home renovation, mainly due to the perceived high costs attached. But in many cases, the reality is not as grim as it seems. If you are dedicated enough, you can often find various financial shortcuts that can bring the project cost down to a very reasonable level. At the very least, starting your planning early on can allow you to take advantage of market fluctuations and grab some great deals. But more on that below.

Renovating Your Home on a Reasonable Budget

Reusing and Recycling

One of the first things you’ll want to consider is whether you have an opportunity to reuse your currently available supplies and materials. This is not always as obvious as it seems, and it’s a good idea to have a professional at your side to guide you through the process. If you play your cards right, you can often save a lot of money on this. And that even factors in the price you’ll pay for the consulting services in the first place! Of course, not every professional on the market is the same. You’ll want to do some searching before committing to anyone – so let’s take a look at that aspect of your renovation.

Work with a Professional with a Modern Approach

Even though it may seem like an extra expense, working with a professional company for your renovation job can actually save you a lot of money. This is especially true if you’re planning a major remodeling of everything, with new furniture and the works. There are many ways an experienced, established professional can save you both time and money in the renovation process on top of what we described earlier. For example, staging is a major area that’s going through some significant changes in the last years, mostly due to the advance of digital staging as an established practice. The difference between physical and digital staging is beyond the scope of this article, so see the full article here for more details. And that’s just one example of what a properly equipped renovation specialist can do for you.

Scout for Sales

Some of the things you may want to use in your renovation job can often be purchased ahead of time, and don’t need to be bought right at the time of the renovation itself. This is admittedly something where availability of physical storage will be a major limiting factor for you, but if you can afford to invest in the right supplies and materials ahead of time and keep them stored for a while, this can work out great. Make sure that you coordinate this with your renovation partner, though, because you don’t want to find yourself with a bulk of materials that you have no use for.

As long as you keep these factors in mind, renovating your home can be a very pleasant and straightforward procedure. Remember the final result, too – that’s why you’re doing all of this in the first place. And when you feel like you’ve hit a hitch, don’t be afraid to bring it up with the renovation specialist that you’re using for the job.


Your Kitchen Corner: Creating a Chic and Unique Kitchen


When a person who has worked hard wants to show off the fruits of their labor, they often do it by buying and owning an amazing house. If you’re one of those people, then it’s a good feeling to get recognized through the compliments we receive from our visitors. This kind of appreciation heartens us to give our home a touch up—minimal or extensive.

Most of the time, we often dwell in the kitchen for every particular hour of the day. We drink our morning drink in the coffee table next to the dining table where we eat our meals. We would always dine together with our families near the kitchen. The point is, we often spend more time in the kitchen than one would think. Because of that fact, we all should need to improve how our kitchen looks.

Shop Online

Because of the pandemic that’s putting a halt on our routine activities such as shopping, going online and buying straight out of the internet is the best choice today. From extensive options for product specifications to a wide range of prices, online shopping is the ultimate way to look for stuff during the pandemic. If you have a particular set of wants and needs, then all you need is to narrow down your choices on getting what you really what.

With that said, you can shop for almost anything online. And with “anything,” that includes all the stuff you need for your kitchen’s looks. Here are a few more things to your kitchen that you can get through shopping online.

     1.     Kitchen Cabinets

If you fancy storing spices and utensils in the kitchen cabinet rather than in the countertop, then don’t skip this section. When it comes to kitchen cabinets, the gallery you find on online listings would seem endless, so you have to cut to the chase and rely on recommendations.

Although you won’t be able to physically see the kitchen cabinet you want to buy, pictures will be provided so you can view every detail about it. Shopping online will help you save up on delivery fees. You won’t have to pay labor to move it inside your house. With ready to assemble kitchen cabinets, you’ll also save more money and time in installing them.

     2.     Kitchen Countertops

Coffee lovers would absolutely prefer countertops for their coffee machines. Brewing coffee is more agreeable when you have a pleasant countertop where you would place your favorite cup while waiting for your coffeemaker to finish its job.

A kitchen without a countertop is like a garden without flowers. Sounds absurd, right? Aside from brewing your favorite cup of coffee, a countertop is where you would want to start preparing meals. From chopping the raw ingredients down to garnishing your dish, the countertop is one busy area that you absolutely need.

     3.     Kitchenware

If you already have a good looking countertop, your kitchen wares should also follow suit. A particular section of your kitchen cabinet should be available for kitchenware. Though having plenty of colors inside your kitchen may look good for some, it can get a bit disorienting for some. Having the proper color combinations with your kitchen wares can give your eyes that refreshing feeling.

Customized Purchases

If you are into hands-on kitchen designing, you should get your kitchen customized by a reliable professional. Though you could hire someone to plot your own kitchen, your participation in deciding on the smallest details could be more satisfactory than giving it all to the builder.

From kitchen sinks to wall tiles, it’s your job to have a say on your personal preferences as the owner of the house. If you’re a fan for everything custom-made, there are actual customization shops for kitchen wares that you can check out. Having a place that you help design and conceive is one of the best places to stay in.

Get a Kitchen Remodeling Professional

It is necessary to look into the reputation of the contractor. You need to at least check the kitchen remodeling specialist’s profile as a prerequisite for this undertaking. Remember that your kitchen is your pride booster. You wouldn’t want to trust anyone out of the line.

For homeowners who spend most of their time in the workplace away from home, getting the job done by an expert with an excellent reputation is worthwhile. Giving your kitchen an upgrade demands you to invest a lot of time and money. Making sure that you get the best person to do the job makes sure those investments don’t go to waste.

Takeaway

As a hardworking person, it would only make sense to have a home that’s uniquely you. One of the best ways to make a house look good is by upgrading the kitchen. The tips above will help you get a good looking kitchen that doesn’t sacrifice quality and functionality over looks.


5 DIY Projects that Increase the Value of Your Home

Home improvement is the best thing to do if you want to upgrade your home. DIY projects can provide more appeal and value to your real estate, including houses for sale in North Vancouver. Having some home projects and home decorating can also ease your mind to make sure that the value of your home will not deteriorate. Home improvement projects can also allow you to Feng shui your home to get more positive energy to come in. IF you want to have a DIY home, you can just choose some easy DIY project to make the DIY home improvement to be fun and rewarding.

1. Renew Your Landscape and Curb Appeal

If you want your real estate looking polish, you need to go ahead and do some DIY outdoor to add more curb appeal to your surroundings. You can redecorate your front porch as well as your front door. Try to use chalk paint and get some designer tips online to transform your real estate facade. That will add more appeal to your home, and you don’t even have to hire anyone to get things done. You can always find more exterior designs online and go for DIY home improvement.

Another great idea to improve your landscape is to have a herb garden. You can have a modern house number planter using some pieces of wood from your barn. While you’re at it, redesign your barn door as well and make it look prettier. You can paint it with tree stumps design so that it will blend in perfectly to your garden.

2) Replace Carpet with Laminate Floors

Another essential thing to do when it comes to doing some DIY home projects is to replace your carpet floors with the laminated floors. It will change the overall look of your house, and it will surely look brand new. You don’t have to worry about reinstalling laminated floors by yourself. There are many video tutorials from YouTube that you can watch so that you will learn how it’s done. It will save you a lot of money by doing that.

After changing your floors, it’s about time also to repair essential items in the house. You can check your air conditioner to see if it needed service and repairs. You can also try to check your electric wires that may need more attention and have some electrical repair already. The last but not the least is your plumbing that may also need some plumbing repair to ensure that everything is running well within your real estate.

3) Add an Outdoor Space

A DIY patio is a great addition to make your real estate more sophisticated and cozy. Just add a patio umbrella and outdoor table to have your very own outdoor space. It’s great for your mental health as well as you’re family members because it can be the place for you to hang out with each other or just relax by yourself. You can also add a porch swing if you have kids so that they can also have their playground without the need to leave the real estate.

Having an outdoor space will add more appeal to your home. You don’t always have to stay indoors since you can still sit back and relax in your DIY patio. It will also be picture-perfect in case you’re planning to sell your real estate soon. The buyers will be enticed to seal the deal right away because it’s an ideal home. But you can also just keep it for your enjoyment.

4) Make a Home office

A home office is a good idea, especially because of Covid 19, people need home offices. It’s a perfect DIY home project so that you can have your workspace from your real estate. It will ensure productivity since you will get the feel of working from your own office. There are many design ideas that you can check online or just go for your design and avoid hiring interior designers.

You will need to decide about the coat of paint that you want to use for your DIY home office. It can be a simple task that you can tackle this weekend. Make sure to add storage space for relevant documents that you need for your home office. Have your contact paper and picture frame as well so that you will be comfortable in your workspace once it’s done.

5) Renovate Your Kitchen Cabinets

The kitchen cabinets are often neglected since it’s being used as food storage or just to keep some kitchen utensils for cooking. But it’s best if you will also spice up your kitchen by using some faux marble that will guarantee to spruce up your space in no time. Just decide what will be the new theme of your kitchen and align it with the cabinets to make your kitchen better looking.

Of course, saving money should also be prioritized when doing a DIY home project. That’s why you’re doing it yourself. You can check some IKEA hack, Lowes, or home depot so that you can compare the prices of the materials. Then you choose the most affordable yet with excellent quality materials so that you can make sure that your kitchen will look great for a long time.

Conclusion

These DIY projects will increase the value of your home without the need to spend too much. Since you can just buy the materials from a place that you can get it the cheapest, you no longer have to pay for the labor of doing the project. You’re real estate will surely increase the value since it will look as if it’s newly built as well as well maintained. It’s best to just research the materials that you will need and compare the prices from each store so that you will not end up paying more. Once you have everything that you need for your DIY project, you can go ahead and start working so that you can already see the results. It will give you a sense of accomplishment and feel proud about doing the DIY project that looks like a PRO made it.


What You Should Know About Wood Primer and How To Use It


Wood primer is a type of preparatory undercoat coating applied to wood, especially before applying paint to it. Wood primers are designed to increase the durability and longevity of a paint job and ensures improved adhesion of paints to a surface. It also protects the wood surfaces that you plan to paint over.

Primer is one of the important parts of the painting process. It also adds beauty and visual appeal to paint jobs by providing a polished, uniform, and smooth look to structures. Primer also ensures you use a lot less paint during the painting process.

When Should You Be Using Wood Primer?

This depends on the type of wood you plan to paint. If you are painting an unstained new wood, it is best to use a high-quality oil-based primer or a latex primer. If the wood is stained or painted, it is better to go for a stain-blocking primer. More weathered or old wood requires a high-quality oil-based or latex primer.

Why Does Wood Need A Primer?

Primers contain a blend of chemicals that dissolve onto the surface in order to hide any imperfections. Primers are also designed to ensure the wood receives the paint better in the way of improving and enhancing the existing surface. Primers have adhesive characteristics that ensure the paint absorbs and adheres well. A wood primer also assists with hiding small holes present in the wood and it helps to make knots and stains less visible. A primer will ensure that your paint looks better and lasts longer than it would without the primer.

Tips On How To Apply Primer To A Wood Surface

Before you get started, make sure to choose best wood primer which is well combined, and that you are using the correct technique to apply the primer. You can use either a spray, a roller, or a brush to apply a high-quality primer to your wooden surfaces. If you are looking for the easiest way to apply primer, choose one of the spray primers. With a spray primer, you will need to apply a number of coats to achieve good coverage. Brushing does take more effort and time, but the layers will be more even, consistent and thinner.

Every primer comes with its own set of instructions on how best to use and apply the product. However, here are the general steps on how to prepare and apply primer to a wooden surface:

– Clean the surface, ensuring there is no grease, dust, or grime on the wood.

– After thinning the primer properly, apply the product to the wood using a brush, roller, or spray.

– Allow the product to dry for at least 6 to 8 hours before you apply a polishing paste.

– Use a 180 sandpaper grit to sand over the putty. From here you can apply another primer coat.

Experts recommend using a fine-grit sandpaper to achieve an even surface between each coat.

From here your wood surface is now prepared and ready for a paint application.


How to Landscape around Trees


landscaping 2
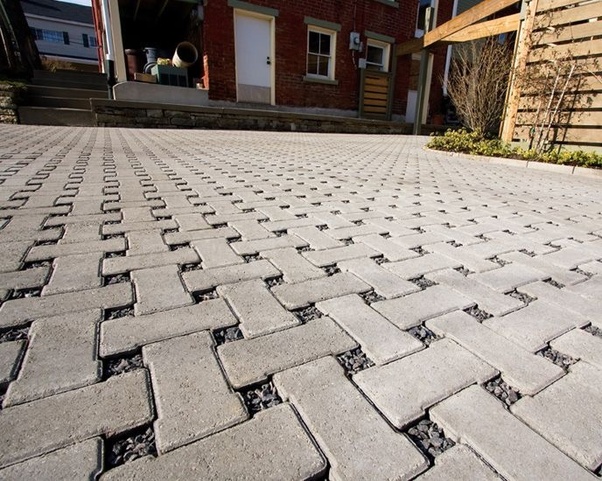
There are certain vital principles that you must keep in mind when you are planning to landscape an area that has trees else. The desired results may not be achieved, and your landscaping can go wrong. Therefore, let us look at some of the issues that you must keep in mind when landscaping around the trees.


  1. Simplicity is the key

If you are designing the landscape around a large, beautiful tree, keep the design simple. If you make the surrounding too complicated, the overall beauty of the tree can get lost. You can try planting simple ferns around the trees. Another good option can be creating a ground cover with periwinkle or the myrtle vine with tiny violet flowers. You can select other varieties that grow well in the shade and can complement the beauty of your tree.


  1. Coordinate colors

When you landscape around flowering trees, you must keep the color scheme in mind when planting the foliage around the trees.  Remember to plan your garden’s colors in different seasons to keep the landscape look like a work of art, a professional from nampa lawn & landscape pros can help you even with changing seasons and the peak blooming period.


  1. Keep in mind the lighting

Keeping in mind the light and shade zones around the trees is essential when you are creating the landscape as the level of light may not be uniform in all areas and all times during the day. Some trees like maple, magnolias may allow more light than evergreens. Place plants that grow well in shades closer to the tree, while those which need sunlight in the outer, sunnier areas will allow your plants to grow well around the trees.


  1. Challenges with thriving

Large trees, apart from less sunlight, also pose the challenges for the roots of foliage around it. These trees have long roots that go deep into the earth, and hence the plants and around these trees will always face stiff competition for water and nutrients and, therefore, will struggle to survive. Thus you have to select tough foliage that can survive under these conditions. Adding mulch around the plants can also help the roots of these plants will keep these new plants well hydrated even in the presence of the deep-rooted trees.


  1. Pay attention to the soil level

Many people create a raised soil level around the trees with a border to plant other things. However, the raised soil around the tree trunk often causes rotting in the bark of the tree and gives rise to infections and diseases that may attack the tree. It is better to create a border that leaves a gap from the tree trunk. If you wish to make a plant bed under the tree, it’s essential to remove the grass before adding fresh soil else. It will be difficult for the tree roots to get air and oxygen, and they may get clogged and will eventually start affecting the tree’s healthy growth.


  1. Take care of Tree Roots

When you are planning a landscape around the trees, it is important not to damage the tree roots while planting other plants. This should be done more carefully, especially for trees with shallow roots or those that have roots spread even above the ground. If you cut damage these roots during landscaping, the tree’s health may get affected. So dig the soil around the trees with utmost care.


  1. Use Stones & Rocks for Maintenance free landscaping

Though plans and lawn around a tree base may look beautiful, they will take regular maintenance. If you do not wish to spend a right amount of you time in maintaining your landscape, make use of bricks, stone and rocks around your trees, Keep the designing sustainable and do not layer the stones or rocks on a plastic sheet and this is will create a barrier for air and water and impact your trees and plants.


  1. Make it a focal point

Using the large beautiful trees as a focal point in your garden and creating landscape around it will give a unique personality to your landscape. If you have a large tree, instead of trimming it down, create the additions like a patio or seating area around it. This will give you a different texture to your landscape while retaining the beautiful trees.


Vinyl: Is It Really a Good Material for Fences?


Before we begin on the topic, let’s make it clear that whether a fencing material is actually good or not, largely depends on what purpose it serves. This is why chain-link fences are excellent options when protection or physical security against potential intruders is a primary concern, but they are not going to be the best for obvious reasons, if you have privacy concerns. Keeping that in mind, let’s now discuss vinyl and what purposes it’s good for as a fencing material.

Vinyl is It Really a Good Material for Fences

The Short Answer

Even with the point about specific use purposes in mind, vinyl cannot be considered as anything but one of the most all rounded fencing materials available for most people out there. So, the short answer is yes, vinyl is a great fencing material in general, and especially for private residences.

The Long Answer

The claim for vinyl being one of the best, if not the best fencing material available today is often made by companies that deal in vinyl fencing exclusively. However, that claim isn’t totally unfounded, because it just has too many advantages over almost every other fencing material we generally use. To shed more light on the kind of advantages we are discussing here, let’s get into the details.

Moderate Protection

The physical protection which a vinyl fence can offer is somewhat limited, as compared to its metallic and hardwood counterparts such as steel and cedar. In spite of that, high quality, thick vinyl fencing can also provide significant physical protection against potential break-in attempts. It may not be industrial grade protection, but as far as home invasion is concerned, thick vinyl fences can provide dependable protection.

Privacy

Make your vinyl fencing high enough and no one will ever be able to peek in while passing by. There are no gaps (unless you want gaps) in vinyl fencing, so privacy is guaranteed.

Design

While it used to be boringly white at one point in time, that is no longer a limitation. Pay a visit to Northlandfence.com if you want to choose from vinyl fencing options that come in a wide range of colors, designs and patterns. They even offer a non-prorated lifetime warranty on all their vinyl fencing products and installations.

Lifetime Investment?

Unlike any other material used for building fences, vinyl does not or rather cannot rot or rust. This technically makes vinyl fences a lifetime investment. This means that come rain, snow, ice or sunshine, your vinyl fences will remain unaffected by the weather for decades.

Zero Maintenance

Unless there’s intentional, natural or accidental trauma, vinyl also doesn’t get chipped, and it won’t peel away or develop cracks under normal circumstances. The color may or may not fade after a long time though, depending on the quality of the material itself.

It’s not just one aspect of the material that makes vinyl perfect, but it’s the combination of it all. If you take the time to do some of your own research, there is no other fencing material in the market that can cover so many fronts, especially at that price point.


5 Ways to Prepare for Home Damage and Disasters

1280px-FEMA_-_35411_-_Damaged_home_in_Colorado


One of the worries every homeowner has to deal with is suffering from a natural disaster or home damage. Storms, floods, fires, or other events beyond your control can damage your house, leaving behind extensive and costly repairs. But instead of sitting around worrying and waiting for something that seem inevitable, there are things you can do to set yourself up to be prepared for these scenarios.

Here are five ways to prepare for any type of home damage or disaster.


1 – Get Home Insurance 

The purpose of homeowner’s insurance is to safeguard your home from the very disasters that could damage it. Every insurance company covers different items and has varying deductibles, but they should all cover hazards like:

  • Fire damage
  • Water damage
  • Wind damage
  • Vandalism

Some places require homeowner’s insurance, but even if they don’t, you can only benefit from having it. It’s an extra annual expense, but it’s worth easing your worries about potential damage.


2 – Have Contact Information for Repair/Restoration Services

Even when you prepare, things can still happen. Your goal should be to minimize the possibility of damage, but if anything occurs, you should know local companies to call.

Some states have more options for specific types of damage restoration than others. For example, fire damage repair Florida companies are less frequent than states like California, where forest fires are more frequent. Meanwhile, states in the Midwest might have more tornado-based repair services.

Do a little research and have some phone numbers, just in case! Read reviews on sites like Google and Yelp, and ask a neighbor if they’ve ever had to call a restoration service.


3 – Take Stock of What You Own

If anything should happen, you will want to know the value of what you own if you decide to file an insurance claim. If you lose items, having a “database” of sorts can help you out immensely and save you a lot of time and money in the future.

Take photographs of rooms and do your best to estimate the value of each item. Keep prized possessions in one safe container, in case you need to save these items from a disaster quickly.

It’s better to prepare for the worst than do nothing at all. Some insurance companies even have online tools to help you do this.


4 – Know Your Area

Every state is more likely to face certain events than others. Florida is hurricane-prone, California sees wildfires often, the Midwest has tornadoes, etc.

If you know what you’re most likely to face, then you will have a better idea of how best to prepare.

Whether that means boarding up your windows, trimming tree branches, or installing dual pane tempered glass, these are ways to better equip your home to handle inclement weather and disasters.


5 – Have Plans in Place

You can do many things to prepare your home for the worst, but you should also prioritize your personal safety. Have non-perishable food stocked up and a bag ready to go in case you need to leave. If you hear a storm is coming your way, consider making snack bags that you can take with you to a shelter if necessary.


Conclusion

Things happen, and your home could suffer hard from damage despite your best efforts. However, it’s always better to set yourself up for success as opposed to doing nothing at all:

  • Research your area and find out what storms are most common
  • Invest in homeowner’s insurance and, if necessary, pay for extra coverage for earthquakes, wind, flooding, etc.
  • Have restoration companies saved in your contacts so you’re ready to call right away
  • Take weather warnings seriously and stock up on supplies like snack bags and non-perishable foods
  • Make sure you have an exit plan in place and your whole family is aware of what to do in the event of a storm


Top 5 Causes of Roof Damage

Top 5 Causes of Roof Damage


When it comes to protecting the structure of your house, proactive roof inspections and maintenance should be high on your priority list. Nobody likes having to place drip buckets around the house every time it rains. This isn’t just extremely annoying, but it also indicates a larger issue that’s threatening the investment you and your family have made in your home.

Your roof will spend its entire working life outdoors, where it’s subject to a variety of weather conditions, pests, and the damage they can create as well as plain ol’ aging. There are no invincible roof shingles, although some seem to be pretty close. Sooner or later, you will have to make some repairs and replacements if you want your roof to keep doing the job it was designed to do. No matter if your roof is two years old or twenty, it helps to know the main causes of damage.

Aging Shingles

One of the most common reasons why you may be having trouble with your roof is that it’s simply past its prime. After years of exposure to the elements, your shingles will begin to lose their protective granules, which leads to further decay. They become entry points for water.

Check your roof regularly for curling and clawing shingles. This is a sign of an aging roof and damage from heat. The shingles will become rigid, can easily break, and they’re susceptible to wind uplift. Buckling shingles, which look like waved distortions running vertically up the roof slope, can also be easily torn off by the wind and are vulnerable to ice damage. The most common causes of buckling shingles are roof age and improperly installed underlayment, which brings us to our next point.

Poor Installation

Many homeowners feel like they can take care of their roof repairs by themselves. They think it’s not that complicated, and they’re perfectly capable of climbing up there and hammering down some missing shingles or patching up a small leak.

One of the most common mistakes with DIY repairs is failing to properly fasten the shingles, which makes them more likely to fly off the roof even when the wind isn’t that strong. Another frequent one is not securing the gutters correctly, which causes them to sag so they can longer provide adequate drainage.

It’s very important to have professional roofers do a full inspection because you might be missing issues that will cause significant damage further down the line.

The Flashing Has Cracked

Flashing refers to the thin pieces of metal placed under the shingles and on the joints of the roof to keep water from seeping in. The flashing can be concealed or exposed. Exposed flashing looks like long runs of sheet metal, while concealed flashing will have a rubberized coating. To seal the flashing together, roofers will usually use tar, which can corrode with time causing cracks.

To fix cracked flashing, they will lift any shingles out of the way, pry up the nails that secure it, and remove that segment. After this, they will replace it with a new segment following the pattern of the previous one, fasten it with nails and apply roofing sealant to the nails heads.

Extreme Weather Conditions

Sun exposure, high humidity, heavy rain, snow, and ice can gradually damage your roof. Let’s take thunderstorms as a first example since they can happen almost anywhere. The wind and rain from a thunderstorm will have a one-two punch effect on your roof. The wind will damage and lift the shingles, letting the rain go through. The best defense, in this case, is to keep up with roof maintenance and to check for any damage after every storm.

In the winter months, we also have to deal with snow and ice. Make sure you clean your gutters of any leaves or twigs at the end of autumn, so the snow has somewhere to go and doesn’t just sit on your roof. Otherwise, it will start to melt, and water will seep under the shingles and leak into the house. You also want to watch out for ice dams that can weigh thousands of pounds and can damage or collapse your roof. Moreover, ice dams can slide down the roof and crash into anything below it, such as your car.

If you live in a coastal area, you may have to deal with hurricanes that can cause a lot of destruction to your roof. The strong wind can rip off the shingles, and the rainwater will make your home more vulnerable to leaks, mold, or rot.

Pests

Most roofs are designed to handle years of wear and tear, but it’s often these small pests that make their way inside, which cause the most damage. Especially during the winter months, they will look for shelter in warm places, so they’ll find or create weak spots in your roof.

Ants and termites can go pretty much anywhere they want. Termites will target moldy areas or rotting wood and start developing their colonies while they are slowly weakening the structure of your roof. Carpenter ants, much like termites, will damage the wood structure while fire ants are known to chew through your insulation and electrical wiring.

Critters like mice and rats will squeeze through any crevices that will allow them to get into your attic, and they’ll chew through the substances that hold the roof together, chew through the wood, through your plumbing and electrical wires. Those adorable little squirrels are excellent climbers and leapers with very strong claws and teeth that they’ll use to make holes through your shingles and then have their way with your vent pipes and cables.

We can’t finish this list without mentioning those pesky birds. Birds can cause extensive damage to virtually any type of roof. They have very acidic dropping that will deteriorate roofing materials, especially if they’re sealed with tar. In fact, the life expectancy of your roof can be cut in half just from these bird droppings.

And if that wasn’t enough, our feathered friends like to build their nests in gutters and drains, which clogs the drainage system causing water to seep under the roof and into the walls.


5 Essential Things to Do When Moving into a New Home

5 Essential Things to Do When Moving into a New Home


Have you recently bought a house and you’re thinking about the millions of things you have to do? Your list is probably blowing up, and you don’t even know where to start. So, what are the first things that you need to do whenever you move into a new house?

Depending on what project it is, there might be more or fewer things to do. We’re not going to talk about repairing any damages to your house; it’s more like those things that everybody should do whenever they buy a new home. Packing and unpacking is not the only major thing to do, getting connected with your new home, learning how it works, and prioritizing what tasks need to be done first is another essential role of a homeowner.

You have a lot on happening already, so you’ll probably need help with organizing everything. To make things easier, here are a few ideas you might use when moving into a new home. Of course, moving requires a lot of effort to be done, but if you take your time and relax, soon enough, you’ll be sitting back and celebrate your new home.

1.      Do a Walk Around the House

What better time is it to do a walk-through of your new home than when it’s empty? So, make sure that you check if it needs any repairs, everything that you paid for does not miss, and that everything works right. Check the fixtures, the lights, the outlets, etc. Before unpacking everything and unloading the truck, set up a plan. Take a look into the living room, the kitchen area, and the bedrooms. Decide how you’ll want your furniture to be placed and make sure that you don’t overcrowd. An open space area gives your home a whole different aspect, and you’ll have more room for yourself.

Also, make sure that there aren’t any problems against the sale contract. If the previous owner decided to sell the house, including the kitchen furniture, and you were surprised not to find it there, call your real estate agent and see what could be done. Other issues that are not covered in the contract will be 100% your responsibility.

2.      Call for a Moving Company

When moving into a new home, the whole moving process might get stressful along the way. With all the furniture and personal things that need transport, you already feel overwhelmed. Have you considered yet scheduling the move? Calling for a moving company will handle every detail of your relocation, including packing, unpacking, planning, and storage.

Would you like to have someone to take care of the process from the beginning until the end? An experienced moving company will carefully plan and perform transports of any size. Be prepared to go when movers arrive, and don’t forget to place the small boxes in your car. You can carry in your vehicle things like kitchen furnishings, bedroom sheets, plants, etc. Planning your move by calling a moving company will help you set everything up according to the plan.

3.      Apply a Fresh Coat of Paint

To most people, it is reasonable that it’s essential to paint your home after you bought it. Although painting can be so messy, and you often need a lot of space to do it, you have to determine what you’re painting. If it’s just the walls, the trims, or even the ceiling, it is so much easier to do it without furniture in. You don’t have to be as careful; you can be as messy as you want to. So, do it right away, pretty much as soon as you get the keys in your hand.

Painting can also be such a pain for most people. Some do enjoy it, but when it comes to painting the entire house, at some point, everyone is like “I am sick of it, I don’t want to deal with it anymore.” So, do it right away, you’ll be so much happier when everything is done and the big part of moving, such as painting, is out of the way.

And on top of that, fresh paint can transform the entire house. After finishing the painting, everything looks so fresh and clean. Of course, you get to choose the color that you most like, the goal is to add a fresh coat of paint. Also, if the house that you moved in has a little bit of an odd smell, or maybe the old owners were smokers, fresh paint also helps with that.

4.      Clean the House

Start cleaning the entire house, and that includes the floor, windows, kitchen, bathroom, the bedrooms, and so on. Depending on how big your home is, it won’t be done in two hours; it can take a couple of days to clean the entire place. If you’re “lucky,” and the old owners didn’t clean the house for whatever reason, it’s essential to do it. Think about that strangers were living in that house, is their dirt, you don’t want to live in it. Get a sponge and clean the entire house, especially if you suffer from allergies.

Even if the sellers cleaned the house before, you don’t know how well they cleaned it. Even if it looks clean, unfortunately, bacteria can’t be seen, so just be on the safe side and clean everything before you settle in. Also, even if the sellers cleaned the entire house, now it’s twice as clean, so you can sleep much better knowing that you live in a clean and healthy environment.

5.      Set Up Candles and Air Fresheners

Put up some air fresheners or scented candles. If you just moved into a new house that has been owned by other people and the house still smells weird, use candles with your favorite scent to make it feel like home. The house will take some time to start carrying your smell, but in the meantime, use scented candles and air fresheners to get to the point.

So, these are some of the essential things you need to do when moving into a new home. Hopefully, it will help in any way and don’t forget, the sooner you’ll take care of the important stuff, it will start to feel like home.


How to revamp your backyard

2662428584_45604d474b_o


Your backyard should be an oasis for you.  It’s your private green pasture that you can mold as you see fit, without changing the curb appeal of the front of your home.  Unfortunately, this freedom leaves people frozen in indecision with what to do with it.  This need is reasonable, all that most people need is a push in the right direction.

Here are some tips to give your yard the life and beauty you’ll want everyone to see.

First, Plantlife

The state of your greenery is paramount to your backyard.  You need to ensure that you’re building up from a good base so that you don’t have to try and put in flower beds around furniture.

Consider the flow of your yard

Mow all of your grass to start, make sure you weed and rake if there are stray leaves.  From there, decide what portions of your yard will go mostly unused.  The best places for flower beds are close to the home, no more than three feet out.  With a more substantial yard, you could get more creative, heavily consider what space you have to work.

Go for flowers that are local to your area, and avoid any plant life that might cause allergy issues for anyone in the home.

Shade

If you live in a warmer climate, you understand the need for shade.  In summer, standing in the shadow could mean it feels ten to fifteen degrees cooler.  This effect is due to a lack of solar radiation that you would usually feel in full sunlight.

Look at what kind of shaded structure would work best for you.  Smaller yards may need a sun umbrella or two, but with larger yards, you can put in a structure like a gazebo or build out a structure with a permanent roof.

Furniture

Again, this option has to do with how much space you have.  Define areas with lawn furniture.  You can even put in a patio for lounging, and layer it so that a lower section is for grilling and enjoying drinks.

Go for a furniture style that compliments the rest of your home, while also keeping budget in mind.  It’s easy to spend a lot when it comes to these, so keep an eye out for a Home Depot coupon code or other things that can help you save some cash.

Water Features

Putting in water features can be the most exciting part.  It can be anything, from a coy pond to a Jacuzzi: but keep a budget and a vision in mind.

Moving water is for the best if you’re in a humid area since it’ll stop mosquitoes from breeding, and consider what kind of enjoyment you’d like to get out of it.  If you want to swim, and you have space, plot out a pool!  If pool upkeep is a nightmare for you, consider putting in a waterfall fountain, or something else that fits your style.


The most important thing about a backyard is that it matches your style.  So take your time, think deeply about that, and you’ll have no trouble creating a backyard perfect for you!