The Average Cost of a Bathroom Remodeling Project

Homeowners who undertake remodeling projects are typically altering either their kitchens or their bathrooms. As one of the most frequently occupied rooms in the house, bathrooms see a lot of wear and tear in a short amount of time. Toilets begin to leak, tiles loosen around bathtubs and showers, and mold forms in the flooring grout. Even with cost-reducing quick fixes over the years, these issues pile up until nothing will resolve them except a complete bathroom makeover.
iStock_000007365049_ExtraSmall
The difficulty with bathroom remodeling projects is that the room is one of the most complex and compact spaces in the entire house. With all that water in one small room, there are many opportunities to make costly choices and mistakes. The best way to keep the costs of a bathroom remodeling project in check is to start the process with a set budget and to make design choices based on needs that fit within those specifications.

How much does a bathroom remodel cost?
The average cost for a bathroom remodel varies greatly depending on the type of bathroom. Master bathrooms are generally more expensive, averaging approximately $16,000 nationwide, while non-master full bathrooms average closer to $11,000. This difference in cost is based largely on the upgrades added in a master bathroom.

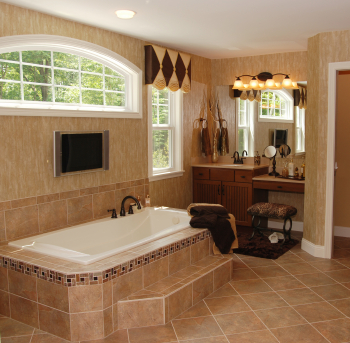
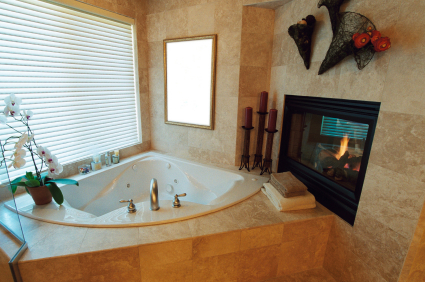
Because a master bathroom is still considered a luxury, building or remodeling these spaces is generally more costly. Homeowners working on their master suites are more apt to include more expensive accessories that are frequently nonessential. For example, master bathrooms often feature larger-than-normal soaker tubs or separate spaces for bathtubs and showers. These features are not essential to the functionality of the bathroom space, but they are luxuries that many homeowners wish to include in their master suites. These types of add-ons will greatly increase the cost of a bathroom remodeling project.
iStock_000001183268_ExtraSmall

Another variant in determining the average cost of a bathroom remodel is the location of the home. Homeowners across the nation spend varying amounts of money on very similar remodeling projects. Pacific coast homeowners tend to spend the greatest amount of money, averaging nearly $1,000 more per project than anyone else in the country. Residents of the Mid-Atlantic and New England states spend the second most on their remodels, while the South Atlantic states are third on the list. The least expensive remodeling projects seem to be located in the Mountain region where the average remodeling project is nearly $6,000 less than those on the Pacific coast.

Despite with these regional disparities in remodeling costs, even greater differences exist between urban and rural projects. Homeowners in major cities, such as New York and San Francisco, frequently spend more than $20,000 on non-master full bathroom remodels. Similar projects in smaller metropolitan areas, such as Oklahoma City and Dallas, average closer to $7,000. These regional and location differences are based on the availability of materials and more importantly on the cost of labor.

What factors most influence the cost of a bathroom remodel?
The largest single cost in a bathroom remodeling project is labor for the contractor and crew that will be handling the project. The cost of labor usually amounts to around one-third of the entire budget of the remodel. This fee is nearly non-negotiable unless the homeowner does some of the work himself to cut costs. Therefore, if the budget of the remodeling project needs to be trimmed, the savings most likely will need to come from some of the luxuries and not from the labor budget.

Another costly factor in bathroom remodeling projects is the plumbing itself. If the bathroom project is mainly cosmetic, this may not be a large factor in the remodeling, but many bathrooms are altered because of leaking faucets or bathtubs. Correcting leaks and replacing bad pipes can be very time-consuming for the construction crew and plumber which will drive up the labor costs in addition to the fees for the new pipes. This can be especially true if the leaking pipe is difficult to find or if the house is older and features non-compliant types of pipes. These hidden costs can become budget-busting very quickly.

Beyond the cost of labor and plumbing, the other major expenses in a bathroom remodeling project mainly involve cosmetic choices. While it is necessary to place a floor, walls, and ceiling in the bathroom, the types of materials and their costs can vary widely to fit within any remodeling budget. For example, although radiant (heated) flooring that will keep feet warm on cold mornings is exceptionally comfortable and luxurious, it is not a necessary feature for a bathroom remodeling project. Therefore, radiant flooring is an added expense that will drive up the cost of the project rather than keep it within budget.

What are some common luxury features used in bathroom remodeling projects?
In addition to radiant flooring, there are several common luxury features that can take any bathroom remodeling project to another luxurious level. Many interior bathrooms that do not have windows are being given natural light through the addition of skylights. These features can flood a room with natural light during the day while also giving a romantic view of the moon and stars during the night.

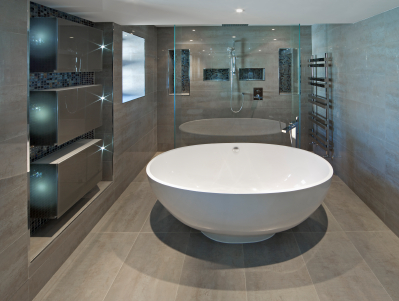
Deep soaking bathtubs and rain-inspired shower heads are luxurious additions to many master bathroom remodeling projects. These powerful yet calming additions to cleanliness help to create an at-home spa atmosphere for any bathroom. In addition, many tubs and showers are surrounded by elaborately designed bathroom tile designs with stain-resistant grout that withstand the threat of mold while looking stylish and modern.
iStock_000017754415_ExtraSmall

No matter the budget of a bathroom remodeling project, there are many options and variables to help keep the costs reasonable while creating a functional and attractive space. We hope you enjoyed this post on the average cost of bathroom remodeling projects!

DIY – How to Install Ceramic, Porcelain or Glass Tile Flooring

Ceramic, porcelain or glass tile floors are an upgrade over linoleum, vinyl and even carpet. Durable and attractive, they add value to your home. Purchasing the supplies and tiles is surprisingly affordable, but the price of installation can more than double the cost of the project. However, you can probably handle this project on your own to reduce the overall expense.

iStock_000015226125_ExtraSmall

Tools Needed
The right tools make any job easier. Make sure your tools are in good condition, and have everything assembled before you start the project.
• Razor knife for cutting cement board
• Cement board, drill and screws to stabilize a wood floor
• Grinder and floor leveler if you are working on a slab
• Tile cutter – An electric wet tile cutter will make the project go faster, but a manual cutter is more portable and affordable
• Tile snips – for taking off tiny pieces of tile
• Tile and spacers for grout lines
• Tape measure
• Masking tape
• Pencil and permanent maker
• Chalk line
• Mastic
• Grooved trowel
• Shop towels
• Grout
• Grout float
• Sealer
• Sponges

Remove Room Fixtures
Whether you are installing the tile in a foyer, bathroom or kitchen, there will be fixtures to remove. These include the baseboard, base cabinets, toilet and sink. You may decide to work around base cabinets in the kitchen, but take a look at the area around the dishwasher first. Make sure that you will still be able to remove the dishwasher and replace it after the cement board and tile add nearly an inch of height to the floor. It is more work to pull fixtures first, but your floor will look better and the tile installation will go faster.

Install Cement Board or Prepare Slab
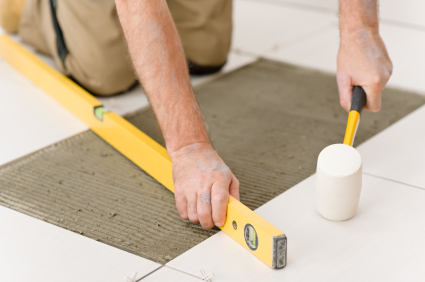
If you are working on a slab, start by making sure it is perfectly level and smooth. Use a three-foot level set on edge and slide it across the floor to pinpoint high and low spots. Grind down the high areas and use a filler to bring up the low spots. When you are installing tile on a wood floor, the concern is that the bounce and flex in the floor will cause the tiles to crack. Stabilize the floor by covering the entire surface with cement board. Use the largest pieces possible to minimize seams and eliminate any bounce in the floor.

Take measurements of the room and transfer them to graph paper. Decide how the cement boards will be installed to minimize seams. Cut the boards with a razor knife by scoring one side and then turning the board to cut the other. Lay the boards down at one time to be sure they fit nicely. Once the cuts are perfected and the boards are ready, put some construction adhesive on the back of the boards to help lock them to the floor. With the floors in place, secure them with special cement-board screws.

Mark the Center
Tiles are laid from the center of the floor to the perimeter. Measure exterior walls to find the center point. With a friend helping, snap a chalk line between the center points on opposing walls. If one wall is longer than the other, then measure in an equal distance from the common end wall. Repeat the process on the adjacent walls. The center point is where the lines intersect, and this is where you will start laying tiles.

Create the Grid
Using your tape measure and chalk line, create a grid on the floor using one-foot intervals. This will help you keep the tiles straight and perfect as you set them in place. The chalk will wear off as you work, so you may want to use the permanent marker to highlight at least a few of the lines.

Follow the Directions for Installation
Whether you are working with porcelain, glass, ceramic or natural stone tile, every tile will come with specific directions regarding what type of mastic you should use. It will also tell you what size notch the trowel should have. Follow these directions for proper installation and to avoid cracks later.

Dry Run
Lay as many whole tiles as you can in the room to see how it looks. This is your opportunity to make minor changes or alter the entire pattern. This step is vital to ensure that you are pleased with how the tile will look once the installation is compete.

Install the Whole Tiles
It’s important to spread the mastic in small sections at a time. Mastic hardens quickly, and spreading too much will lead to problems. Spread enough to comfortably put the first four tiles in place. Spread more once those tiles are in position. Place spacers along the long edges of the tiles so they are standing up. There should be two spacers on each side of the tile with one at the top and another at the bottom to ensure straight lines. Work with the whole tiles around the entire room. Once the solid tiles are in place, you are ready to start cutting the edge tiles.

Cutting Tiles
When it’s time to cut tiles, it’s important to remember the old adage about measuring twice and cutting once. Measure the space to be covered, and then transfer it to the tile. Double-check both measurements. Make sure your tile is marked so that the piece going in place will have the cut edge along the wall.

If you are working with an electric saw, you may want to use masking tape when cutting the tiles. Put the masking tape across the tile in the general area for the cut. Make your measurements and then mark the tape using the permanent marker. The mark will not wash off the tape when you run the wet saw, and the tile is less likely to crack or chip with the tape.

Grouting Tiles
Once the tiles are in place and have set according to manufacturer’s directions, you are ready to start grouting. Use the grout recommended by the manufacturer because some tiles require sanded grout and others, like marble, need unsanded grout. Pre-mixed grout is convenient for most homeowners, but professionals prefer to mix their own to achieve the perfect consistency. A good rule of thumb is that the grout should have the consistency of smooth peanut butter or mashed potatoes. It should be soft enough to work with and push into the joints, but firm enough to roll into a ball.

Spread the grout over the floors, and use the float to push it down into joints. If you are working with mosaic glass tiles, the grout will cover the entire surface. Floors with larger tiles should see the grout confined to the area right around seams to make cleaning the floor easier later. After the grout has been worked into the seams, allow it to set according to manufacturer’s directions. You will return later to clean the grout off the tiles with a damp rag.

You will take great pride in your tile floor, and your floor will look fantastic longer if you take the time to seal the tiles and the grout. Sealer protects the floor from stains and helps grout retain its beautiful color. It only takes a few minutes, and it will make the floor easier to maintain in the coming years. Its an investment in your time, labor and product.