7 Stylish Wood Floor Patterns for Your Home


Choosing a pattern for your wood floor is a crucial decision in a construction or renovation project. The wood flooring pattern shapes the floor’s appearance and impacts the flow of the room. Furniture placement also largely depends on the flooring pattern. Although the material used is similar, the right installation pattern will have a huge impact on the overall look.

With the variety of choices available in the market today, it is easy to feel overwhelmed. A good idea is to seek professional help from the professional wood flooring experts. When you do, let them know your needs and wants, or any ideas you might have to give them an idea of where to start.

Picking the right flooring patterns will transform your space and express your unique style. Check out these seven best ideas for wood flooring patterns:

1. Straight Pattern

The straight pattern is the most common wood flooring pattern. It has been around for decades. This simple yet clean and modern look flows beautifully through any home, and it will never go out of style. It’s executed by installing the floorboards parallel to each other along the width or length of a room.

This creates an illusion that a room is wider or longer than it is. A straight pattern enhances the look of wood and can be used to create contemporary, yet simple, designs. It is also the most cost-effective and easy to install. 

2. Diagonal Pattern

This type of wood flooring patterns is similar to the straight one with one notable difference: it runs from one corner to another instead of wall to wall. Executing this design requires a high level of experience and skill. The pattern adds a formal touch and luxury to a space while maintaining the traditional straight installation of hardwood floors.

The floorboards are installed parallel to each other and laid at an angle of 45° to the walls. A diagonal pattern maximizes the length of a room and makes space appear larger. It’s ideal for tiny spaces such as those in apartments and condos. If a room has a rather unusual shape, this pattern is the ideal option as it ensures the floor doesn’t look off in comparison to the structure of the walls. 

3. Random Pattern

A random pattern is quite similar to a straight pattern, the obvious difference is in the width of the boards in each row, which vary in size. One could be 5 inches, the other 7, and the next 4, but the pattern itself remains consistent. The design introduces movement and dimension to the eye and space in a room.

In older homes, the planks were cut to achieve different widths and utilize as much wood as possible. A random pattern gives you more customizing options and adds a rustic, energetic feel to a space. 

4. Basket-weave Pattern

One of the main benefits of using this pattern is that it fits in almost any space regardless of the room’s size. It is mainly made from maple and oak and laid diagonal or parallel to the walls of a room. Generally, lighter colours are preferred, but you can spice things up by using darker species, such as walnut, which acts as an accent to the pattern.

A basket-weave pattern can add dimension to any space with the woven appearance of planks fitting over and under other planks. This flooring pattern is intricate, but it adds depths of visual interest and texture. 

5. Brick Pattern

A brick pattern is supposed to resemble traditional brickwork. It is a simple design that can be used on the whole floor, or just a small area, which can then be surrounded by borders. The “bricks” are alternated vertically and horizontally to add interest and visual appeal. You can use this pattern to complement other complicated designs and add a rustic feel to the space. 

6. Herringbone Pattern

The herringbone flooring pattern is one of the latest trends in home design. It can be described as a diagonal, zigzag pattern that is found in many homes today. This pattern is used for hardwood floors, backsplash and tile. In a word, it is the new parquet and resembles a twilled fabric laid out in square sections or the traditional manner.

Herringbone wood pattern floors are common in distinguished European Chauteaus. It is commonly mistaken for chevron and French herringbone. The wood pieces are specifically cut at an angle of 90° on both ends. This angle-cut has a huge impact on the style when the floor is laid down.

The herringbone pattern also offers a variety of customizing options as you can choose the type of wood you want and whether to place the boards vertically or horizontally, or decide to have a border or not. 

7. Chevron Pattern

A chevron pattern shares many similarities with the herringbone pattern, but it has some notable differences. Both chevron and herringbone use equal-sized woodblocks arranged in a zigzag pattern. The difference is that in a chevron pattern, the woodblocks are cut at an angle to create a straight line where the end of each piece meets the other. This pattern was used to decorate Versailles and was preferred over the “traditional parquet de Versailles.”


Hiring Commercial Door & Installation Services

123
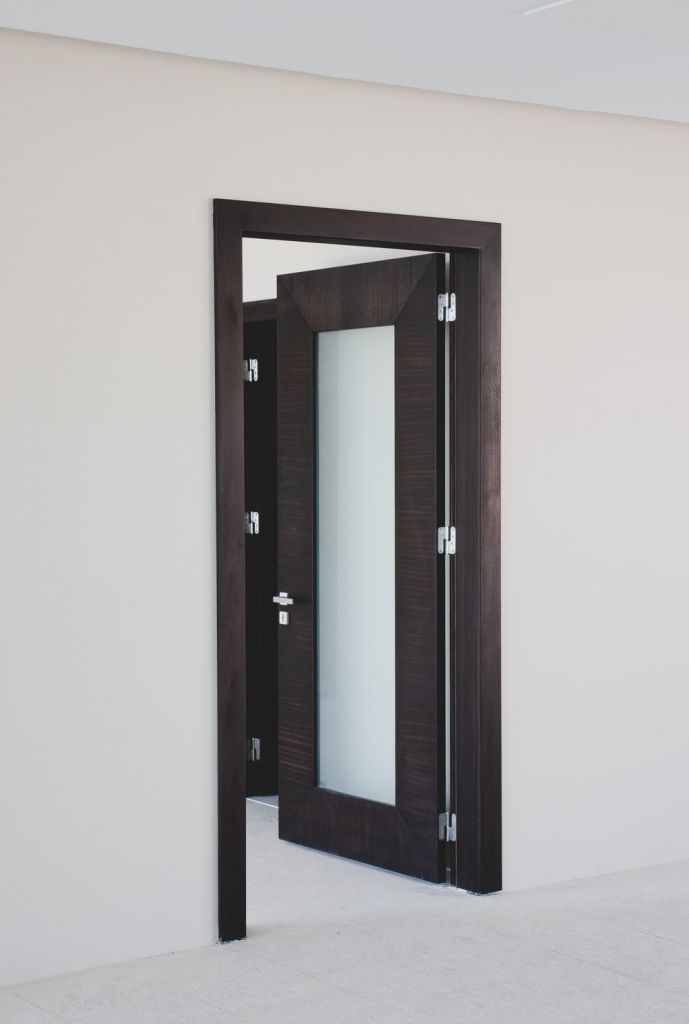
The perfect door can change your home’s entire style and look, not only to the interior but also to the exterior. Doors are extremely underrated when it comes to home design and many of us overlook the functionality of it as well as the visual aesthetic that it can add to a room.

There are loads of new styles, colors, and types available that home owners can invest in. Replacing old wooden doors with new models is not only beneficial to your home’s security but also to the overall property value.

Because it can be quite a complex installation process, one that requires handyman skills and techniques, you might want to consider hiring a professional to do the job for you. Especially if you are planning on renovating, replace a smaller door with a bigger one, or make space in a wall for a newer model.

Hiring the wrong company can result in a wonky installation where the unit isn’t evenly distributed, doesn’t provide optimum insulation, or is wrongly placed along the wall. Once it has been installed, there’s no going back. To help you find the perfect company for the job, here are a few things that you should consider before signing a contract.

MODEL OPTIONS AVAILABLE

Before you start shopping for doors, it’s best to consult a professional installation company to help you track down the perfect type and style for your home. You might only be looking at what the door looks like, but the fact of the matter is that a door needs to fulfill many other needs as well. If you aren’t aware of all these functions it needs to have, then it’s best to consult someone who knows.

Companies that only have one or two types of models available will always try to sell those to you for installation. Before booking an installation, request that they come to your home for a full-assessment. An expert company will have many different model options available for you to choose from.

Voice your home needs and assess whether they have something in their product range for you or whether they can order something. Perhaps you are looking for a specific wood, glass, or design. Maybe you want your door to add extra strength and security or allow natural lighting into the room. Regardless of your personal preferences, the more options the company has available the better.

QUALITY

If you are looking for quality Charlotte commercial doors then it’s important that you find a company that has quality options available. Quality usually comes down to what kind of materials are used in the creation and manufacturing of the model.

Evaluate every single part of the model by looking at the door handles, knobs, hinges, glass, iron, and other materials. You wouldn’t want to install an entire model only for it to deteriorate after the first rainstorm has hit. A door is our protection from the outside world, and just like windows and walls they should be durable and strong.

Consider how maintainable the unit also is by asking what maintenance measures you will have to take and how often. Some doors require an extra coating of certain protective layers in order for them to remain water and weather proof.

EXTRA SERVICES

It’s a great idea to find a company that is willing to provide extra maintenance and care services throughout the year. Especially if you are a very busy person who doesn’t have time to do maintenance around the home, it will be great to find a company that can provide after-installation services.

When you do experience some problems with the door a few weeks after installation, make sure that the company can provide one or two free check-ups and that they won’t charge a service fee for fixing a minor issue afterwards. Before you hire, read the company’s terms of service to avoid any disputes in the future.

124
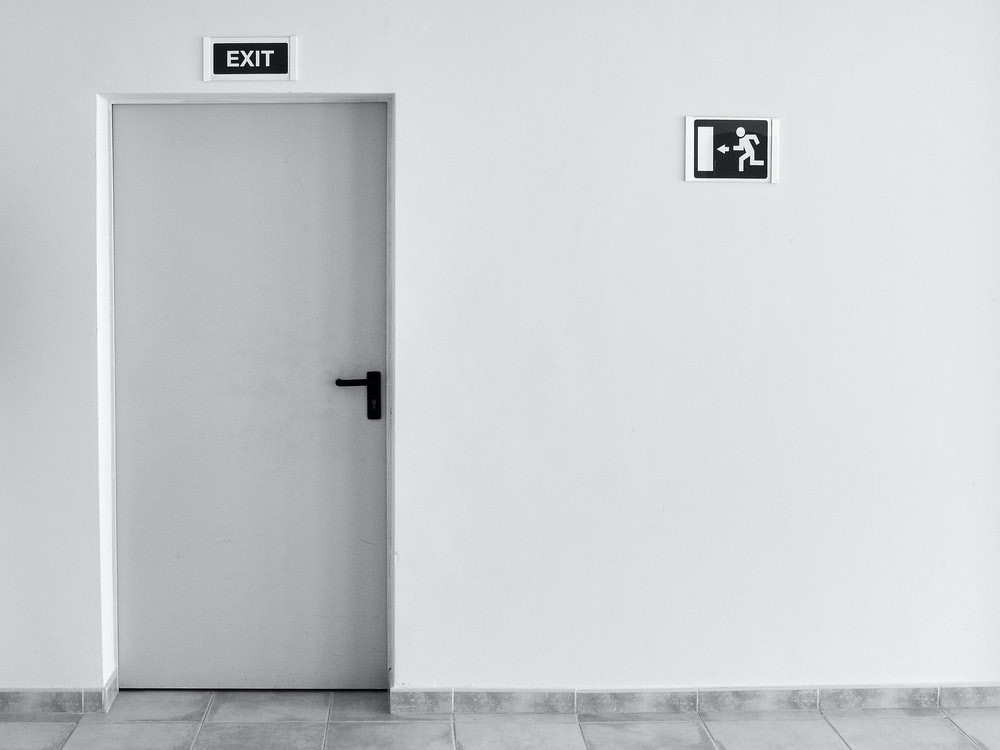
REVIEWS AND RECOMMENDATIONS

One of the best ways to find the perfect installation company is to check past reviews. When the majority of past reviews are positive, then you might have found a winner. With the internet becoming everyone’s number one source of information, many people aren’t scared to share their honest opinions about the services they’ve experienced. A quick google search will give you review results to research.

It’s important that the company’s client service is just as organized and friendly. In case there are any problems with the work delivered, you should feel comfortable enough to raise your concerns. You’ll be able to see online whether the company is able to resolve any bad reviews and complaints. This is also a great indication of the company’s professionalism and experience.

EXPERIENCE AND TRAINING

If you’ve ever attempted to install a door yourself, you’ll know that it requires a lot of skill, power tool handling, and an eye for detail. Many things can play a role in how to install the unit. Things like the wall’s material, the thickness of the wall, the door size, and the placement, all have an effect on how it should be installed.

It’s therefore important to hire a company that is experienced in installing doors in many different commercial properties in Charlotte. There’s a big difference between installing a double-sided front door and a smaller cabinet door.

COST AND PRICING

When your home’s safety is at stake, you shouldn’t compromise quality over price. But you shouldn’t pay for a service that is clearly overpriced. Request a clear quotation from the company that lists all installation services, labor costs, and the cost of the door itself.

Make sure that there aren’t any hidden costs or extra charges that might pop up once the installation process is under way. If you have a specific budget, ask that the company try to stick within that.

Hiring a Charlotte commercial door installation company will save you a lot of time and will ensure quality work.


What You Should Know About Wood Primer and How To Use It


Wood primer is a type of preparatory undercoat coating applied to wood, especially before applying paint to it. Wood primers are designed to increase the durability and longevity of a paint job and ensures improved adhesion of paints to a surface. It also protects the wood surfaces that you plan to paint over.

Primer is one of the important parts of the painting process. It also adds beauty and visual appeal to paint jobs by providing a polished, uniform, and smooth look to structures. Primer also ensures you use a lot less paint during the painting process.

When Should You Be Using Wood Primer?

This depends on the type of wood you plan to paint. If you are painting an unstained new wood, it is best to use a high-quality oil-based primer or a latex primer. If the wood is stained or painted, it is better to go for a stain-blocking primer. More weathered or old wood requires a high-quality oil-based or latex primer.

Why Does Wood Need A Primer?

Primers contain a blend of chemicals that dissolve onto the surface in order to hide any imperfections. Primers are also designed to ensure the wood receives the paint better in the way of improving and enhancing the existing surface. Primers have adhesive characteristics that ensure the paint absorbs and adheres well. A wood primer also assists with hiding small holes present in the wood and it helps to make knots and stains less visible. A primer will ensure that your paint looks better and lasts longer than it would without the primer.

Tips On How To Apply Primer To A Wood Surface

Before you get started, make sure to choose best wood primer which is well combined, and that you are using the correct technique to apply the primer. You can use either a spray, a roller, or a brush to apply a high-quality primer to your wooden surfaces. If you are looking for the easiest way to apply primer, choose one of the spray primers. With a spray primer, you will need to apply a number of coats to achieve good coverage. Brushing does take more effort and time, but the layers will be more even, consistent and thinner.

Every primer comes with its own set of instructions on how best to use and apply the product. However, here are the general steps on how to prepare and apply primer to a wooden surface:

– Clean the surface, ensuring there is no grease, dust, or grime on the wood.

– After thinning the primer properly, apply the product to the wood using a brush, roller, or spray.

– Allow the product to dry for at least 6 to 8 hours before you apply a polishing paste.

– Use a 180 sandpaper grit to sand over the putty. From here you can apply another primer coat.

Experts recommend using a fine-grit sandpaper to achieve an even surface between each coat.

From here your wood surface is now prepared and ready for a paint application.


Wood vs Vinyl Fencing: Which Option is the Best for Your House?


For better or for worse, your fencing will have a huge influence on how your place feels and looks. While for some, utility will be the most important factor, for others, they might prefer something that complements their house first. Factors such as climate and cost also have to be considered as well. This is why the question of which material should be used can be a tricky one. Let’s take a look at two of the most popular options, vinyl and wood, and the pros and cons of each to see which option would be the best for your needs.

sjkl389ej029s.png

Wood: The Pros

One of the best things about wood fences is the way they look. Some people just love the whole white picket fence aesthetic, and stained wood can give a rustic feel to any backyard. So, if your first goal is for it to look good, then wood is a sure bet. Wood is also one of these materials you can work with even if you’re not a professional, so it’s a good pick for those DIYers out there. Wood also gives you a wide array of colors and finishes based on the staining and the wood you pick.

Wood: The Cons

Wood fences demand a lot of maintenance. And they’re not the best suited for every climate. You have to work on them every year so they can keep their appearance, whether its repainting or treating them. They’re also vulnerable to things like insects, especially termites. And they have a tendency to warp as well, especially when they haven’t been properly treated.

Vinyl: The Pros

Vinyl is one of the most low maintenance materials you can use as far as fencing goes. And it comes in a wide variety of styles, textures, and shades as well. While you can install it yourself, it’s always better to work with professional fitters. Teams like Northland Fence will be able to set up your vinyl fence in as little as a day and all their vinyl fences come with a lifetime warranty on the material. Good luck finding that with wood.

Vinyl: The Cons

One of the issues with vinyl fencing is that it’s slightly more expensive upfront than wood. But you end up recuperating these costs with lower maintenance and higher durability. Another issue with vinyl is that repairs are a bit more complicated, but since it’s so durable, it doesn’t require repairs as much as wood.

The Verdict

At the end of the day, it’s all about your priorities and what you need in a fence. If you want something that will last a long time and require little to no maintenance, go for vinyl. If your main priority is the look and you don’t mind having to maintain it every year and replace it at the end of its lifespan, then wood might be the choice for you.

Conclusion

Whatever choice you pick, make sure that you consider how much time and money you can afford to spend on your fence. Also, consider if your climate or even the general look in your area would make either option more suitable.


3 Tips to Keep in Mind While Putting Up a Fence On Your Own


Installing a new fence can be a demanding DIY project if the area to be surrounded is large enough, but it isn’t the most difficult project that you can undertake either. That being said, mistakes are quite common and, therefore, in case you have any plans to set up a few fences on your own anytime soon, it’s worth it to glance over these three tips that even experienced DIY enthusiasts can find useful at times.

5577336463

Asking the All-Important Questions

Before you even start planning your fence installation project, it is of the utmost importance to ask yourself and your family a few questions first, and they should be along the lines of the following.

  • What is the primary objective behind the installation of the fence?
  • Is privacy more important to you or does security take precedence?
  • How much are you really willing to or can afford to spend on your fencing project?
  • What are the choices in material that you have?
  • How much maintenance will your new fencing require and how much will that cost you?

To illustrate why all these questions are so important, let’s get to the next tip.

Understand What Your New Fencing Will Bring With It

Steel fences last for decades. In fact, the steel fencing from Northland Fence comes with a warranty of two decades! It will remain unhindered by the weather conditions as neither the sun nor the frost will be able to even scratch your steel fencing for years. While the durability of steel also makes it an excellent material of choice when security is your priority, it will not provide you with any privacy at all. When privacy is more important, then go for vinyl fencing instead of steel. Northland Fence has consciously switched over from cedar wood to vinyl because the material lasts longer than wood and provides better security than wood as well. As far as the looks are concerned, vinyl fencing can be made to look exactly like cedar, so you won’t have to sacrifice on décor. Besides, to make wooden fences last, it does require a lot of maintenance.

Checking with the Local Zoning Laws

There are limitations, rules, and regulations, alongside must-have safety precautions that every household in a US state must adhere to while putting up any kind of fencing. For example, in order to put up any fences in Minnesota that are more than 30-inches in height, you will require a building permit that will only be granted on producing a satisfactory site plan. These laws change with the state in question, so do make sure you are thorough with your understanding of what you can and can’t do in your area.

Given the time, effort, and knowledge of fine details it requires, it is recommended that you leave any big fencing project to the professionals, as they deal with them regularly and are well aware of them. Nevertheless, if you want to do it all on your own, at least now you are a bit wiser than before!


DIY – How to Properly Treat and Maintain your Wood Deck

Old and new decks require a certain amount of maintenance to ensure they hold up to weather abuse, such as rain, snow and direct sunlight. While sun damage produces a dry, weathered look, constant foot traffic also ages a deck’s appearance over time. Rain, dew and sprinklers cause water damage that leads to mold, mildew and rot. Spilled drinks, food and old leaves stain the wood and alter its appearance. With proper treatment and regular maintenance, you can make sure your deck looks good no matter what you or the weather throws at it.

iStock_000006234131_ExtraSmall

Testing New Decks Before Applying Finish
Before you apply finish to your new deck, test it with a few water drops. If the wood absorbs the water within a few seconds, it’s ready for finish. If you’re unsure whether or not to apply finish, check the finish’s moisture content requirement, and use an electronic moisture meter to test the wood’s moisture level. Protect pressure-treated wood with finish as soon as it dries to prevent sun and water damage and to maintain the deck’s new appearance. While pressure-treated wood holds up well to rot and insect damage, it does deteriorate over time without a weather-resistant finish.

Caring for Your Deck
Before you apply any finish, remove furniture, plants and other items from the area. If you can’t move certain deck or ground plants, soak them with water for protection against chemical deck cleaners. After cleaning and sanding, apply the finish out of direct sunlight, as the steady heat may cause uneven application and streaking.

1. Clean the deck.
After you move the furniture and plants, prep the deck for cleaning. Sweep the entire surface, making sure to clean any debris that’s caught between the deck boards. Avoid using bleach alone to clean the deck since it only removes mold and mildew stains without treating the wood’s deep fibers. Apply a regular deck cleaner to the surface, and rinse it clean with a hose. Pressure-wash the deck if it still looks dirty after using the cleaner. Wait two or three days for the deck to dry completely.

2. Sand and repair the deck.
Once the deck dries, sand down any weathered, raised or splintered areas, making sure to sand away any leftover stains or burn marks that can show through the finish. If the faucet near the deck leaks or the sprinkler heads need relocating, make the necessary repairs and adjustments. Perform one final sweep of the deck before moving on to the last step.
3. Finish the deck.
With the cleaning and sanding out of the way, make sure you apply the finish on a cloudy day or when the deck is out of direct sunlight. Make sure the deck doesn’t feel hot to the touch, as a hot deck could lead to failure of the finish. If the surface temperature exceeds 75 degrees, wait until it cools. Afterward, apply the finish according to the manufacturer’s directions. Wait until it dries before placing your items back on the deck.

iStock_000020127587_ExtraSmall

Maintaining the New Finish
Depending on exposure levels, expect to refinish the deck every six months or so. Under normal conditions, the finish should hold up for a year or two if the deck was already in good condition. Some signs that it’s time to refinish your deck include:

The deck coloring turns gray.
The boards look weathered.
Stains set deep within the wood’s fibers.
Splinters and raised bumps form over the surface.

Even if you maintain your deck every day, you have to watch out for insect infestations, such as termites and carpenter bees. These insects burrow into the wood and leave piles of sawdust around the deck railings. Make sure to monitor for insects and take preventative measures to ensure your finished deck not only withstands the onslaught of sun and rain but also common wood-boring pests.

The Average Cost of a Having a New Wood Fence Installed

Most homeowners add a fence to their property for security reasons. However, the landscaping feature can also enhance a home’s exterior appearance. If you are a pet owner or a parent, then a fence will help you keep your loved ones safe and restricted to an area where they’ll be easy to find.

iStock_000020891929_ExtraSmall

About New Wood Fences

Wood fences are popular because of their aesthetic appeal. In some areas, a wood fence can even increase a home’s value. The cost of installing a wood fence will depend on the type of wood that you select, the size of your property and your residence’s terrain. You can hire a professional contractor to supply the fencing materials and installation crew, or you can buy the materials and complete a do-it-yourself installation. If you purchase the wood personally, then check the lumber for Forest Stewardship Council certification to make sure that the material originates from a properly managed forest site. Responsibly managed forests supply different types of wood including:

• Pine
• Cypress
• Redwood
• Cedar

Pine

Pine is a popular fence material as its composition makes it easy to use. Pine is less likely to swell, warp or shrink. You can expect to pay about $8 to $10 for each linear foot of a pine fence.

Redwood

Due to its natural makeup, redwood will resist rot and termites. The wood option is durable, and it accepts finishing substances easily. Keep in mind that redwood is pricier than other fence lumber types as it costs about $10 to $12 per linear foot.

Cypress

If you choose cypress, then you’ll be installing a visually appealing fence. The wood type is sturdy and aromatic. Cypress wood does feature knots, but they are usually small and compact. In addition, the fencing material features a natural preservation oil that increases its resistance to bugs and deterioration. Your cost for cypress will be around $7 to $10 a square foot.

Cedar

With cedar, you’ll receive a sweet smelling wood that is an appealing reddish color. It is also an easy material to use. The wood type resists decay, and most people find that their cedar fence lasts for many years. The cost of cedar is about $10 to $12 per linear foot.

About Labor Costs

Labor costs for the installation of a privacy wood fence will vary. However, you can expect to pay from $125 to $140 for about 4 hours of labor. When you receive a labor quote, it should include the cost of transporting the equipment and materials to and from your home as well as property preparation before the fence company begins the installation. The estimate will likely include cleanup and debris elimination costs along with setup and minimum hourly fees.

Possible Additional Fees

If you intend to hire a general contractor to organize and oversee the installation of your fence, then you will likely pay about 12 to 19 percent more for the extra service. You’ll also have sales tax on your fencing supplies and materials along with inspection and permit fees. Be sure to check with your area’s local building department regarding certification and construction regulations.

Wood Fence Cost Variations

The cost of adding a fence to your property will depend upon the type of property containment system that you decide to install. For instance, privacy fences are more dense and taller than traditional picket fences. Therefore, you’ll need more wood to complete the installation. Fence enhancements like caps, lattice and decorative gates also increase the cost of new wood fences.

Follow Up Care

Once your fence is installed, be sure to coat it with a weather sealer. Also, consider adding a protective treatment to prevent decay and repel bugs. Keep in mind that your fence will need regular maintenance that involves the reapplication of the substances that protect it. After your fence is installed, you may consider hiring a landscaping professional to finish the look of your home’s exterior spaces. An expert landscaper can also integrate your new fence into your yard’s current design.

Concluding Thoughts

Fencing companies make property containment systems in different types of wood. Therefore, you can select a material that will appeal to your budget, style and patience for maintenance tasks.

How Long Should Residential Home Windows Last?

Windows come in a variety of styles, designs and sizes. Years ago, the material used for window frames was limited to wood, but today, you can choose vinyl, aluminum and fiberglass windows. However, wood frames are still one of the most popular material options. Today’s window manufacturers also produce different types of glass to give you a more energy efficient product.

Vinyl Windows
Vinyl windows offer energy saving benefits. The material choice is also affordable. Window manufacturers make vinyl windows from PVC, and as a result, the product can vary in quality. Today’s vinyl is a durable product. Also, manufacturers have advanced the window style’s structural design and implemented construction changes, so if you select vinyl windows, then you will have a quality product that can last as long as 15 years depending on your climate. Keep in mind that vinyl windows have a tendency to warp and become unworkable if they are not installed properly. In addition, the material may fail more quickly in areas that experience high summer temperatures and low winter temperatures. The reason for the failure is that the substance expands in the heat while the cold weather causes it to contract. In addition, if you live in an area with extreme summer temperatures, then vinyl window frames in dark colors will likely have more problems than light-colored models.

dreamstime_xs_25915632

Wood Windows
Wood windows are a popular choice for many homeowners due to the material’s diversity. Furthermore, the option should last for 30 years or more depending on your climate and the type of maintenance that you complete on a regular basis. If you live in an old home with the original wood windows, then you can add weather stripping to increase their efficiency. By repairing your old windows, you are helping the environment since you are decreasing landfill waste and using fewer resources to maintain your home’s interior temperatures. Hardwood windows are expensive, but the material is durable. Also, maintenance is simple as the home feature only requires oil. Hardwood windows give you a diverse style because you can paint them or leave them in their natural state. If you choose to install softwood windows, then the material choice will be more affordable than hardwood. However, expect additional maintenance as you’ll need to paint the style or maintain them regularly.

Aluminum Windows
Aluminum is an appealing material choice because it is affordable and stronger than vinyl. Depending on your area’s climate, aluminum windows should last from 15 to 20 years. The material option is best for homes in mild climates due to the failures that frequently occur with the option in more extreme environments. For instance, aluminum windows may suffer from seal failures, glass condensation between the frames and operation issues as the material begins to corrode and break down. In addition, the energy efficiency ratings for aluminum are poor.

Climate Tips
When you begin shopping for new windows, be sure to assess your climate. For instance, wood typically provides the best insulation, but the material can rot. Therefore, it may not be the best choice for rainy or humid climates. Alternatively, when heat transfer and loss is an area issue, aluminum windows may not be the best material choice. However, aluminum is ideal for rainy and humid climates. The substance is also strong, and manufacturers can build aluminum windows to meet the strict building codes in coastal areas. For many homeowners, vinyl is a practical option. Also, the material choice is available in various colors, which lets you select windows that increase the visual appeal of your home. Once you begin considering new windows, assess each style’s U-value as the measurement estimates a window’s ability to withstand heat loss. The Solar Heat Gain Coefficient, or SHGC, is another measurement to consider because it calculates the amount of heat that can enter your home through a window.

Tips for Selecting the Best Windows
If your windows are beginning to age, then it may be time to replace or repair them. Keep in mind that windows are a longtime investment, so be sure to select the right material for your area. Also, evaluate the home feature’s glaze and insulation materials to acquire the best replacement results for your residence. When you upgrade your windows, you’ll decrease your utility bills and help the environment.

DIY – How to Refinish Kitchen Cabinets with Paint or Woodstain

Your kitchen: it’s where you start your day, prepare your family’s meals, and enjoy some quality conversation at dinner time. Even if you’re not exactly a culinary aficionado, the kitchen is one of the most important room’s in the house with its aesthetics depending heavily upon the appearance of cabinetry. Dark, dull, and dingy cabinets disrupt the room’s aura, making it an unpleasant space to spend your time.

iStock_000016335408_ExtraSmall

If you think the only way to rectify this plight is through a messy and costly renovation, you’re very much mistaken; cabinets can be quite easily refinished to achieve a like-new look without hiring a contractor. The best part? It’s something you can do yourself with some basic tools and a little patience.

Tools and Materials

-Phillips/flathead screwdriver
-Sandpaper (60, 120, 150, 220, 400 grit)
-Trisodium phosphate
-Paint stripper
-Metal scraper
-Primer
-Paint (color of choice)
-Stain/gel stain
-Polyurethane sealant
-Tape/drop cloths
-Various brushes (1″-4″), rags for wiping stain
-Wood grain tool

Note that not all methods of refinishing will require all tools listed above. In all situations, begin by removing all cabinet hardware and placing doors and drawers on a clean, dry work surface. Also, mask off and cover all areas that you wish to keep clean.

Let’s look at the first–most traditional method–of refinishing wood cabinets.

Complete Refinish
These following steps will explain how to completely refinish kitchen cabinets by stripping away all of the old finish and applying a new finish. If your cabinets are still in very good shape and showcasing that authentic wood grain is of chief importance, this is the way to go.

Begin by applying your paint stripper of choice and following the manufacturer’s instructions. Citristrip is a quality, environmentally-sound product, as it doesn’t contain harmful chemicals. After letting the product sit on the old finish (generally at least half to a full hour), begin scraping the old finish until it’s completely removed. Alternatively, you can (painstakingly) sand down the old finish with coarse grit sandpaper, although this can prove messy and extremely time consuming. Once complete, wash the surfaces with a trisodium phosphate (TSP) cleaner and allow to dry thoroughly.

Now it’s time to begin applying the stain. Using even brush strokes, uniformly apply the stain, wiping down the wood occasionally to remove any buildup. Once the stain is no longer tacky, you can remove burrs by gently sanding with 220 grit sandpaper. Repeat this process until the desired shade is achieved.

To complete the process, apply 2 coats of a polyurethane sealant and lightly wet sand with 400 grit sandpaper.

Painted Finish
Maybe you’re not a fan of the wood used in your cabinets or you simply desire a specific color that really sets off the decor in your kitchen; in any case, painting your cabinets is a simple and cost-effective way to breathe into them new life. Since paint will largely hide the wood grain, it isn’t necessary to strip the old finish, saving a considerable amount of time.

The main preparatory step in this method is washing down the existing surfaces with a TSP cleaner; not only does this remove waxes and oils, which inhibit adhesion of the new paint, but it slightly scuffs the surface, promoting adhesion.

Once dry, begin by applying primer to the surface. One coat should be adequate as it doesn’t need to completely conceal the old finish. Once dry, sand with 220 grit sandpaper before applying as many finish coats of paint as necessary to achieve the desired color. Finish by lightly sanding with 400 grit sandpaper.

Faux Wood Grain
Either your cabinets are in poor shape and/or you don’t want to completely strip the old finish; no matter the case, you still want the appearance of wood grain. Fortunately, this only takes a few more steps than painting your cabinets. Begin by following all steps included in the painting section; just be cognizant in your finish coat color choice. Pick a color that’s similar to the stain variety you desire.

Once the solid color has been dried and sanded, apply gel stain with a brush. Instead of wiping with a cloth, though, brush a wood grain tool across the surface to produce the appearance of wood grain. After this has dried, finish by applying a polyurethane sealant and wet sanding with 400 grit sandpaper.

Comparing Some of the Most Common Decking Materials; Pros, Cons and Average Price

A handful of our readers have been writing in asking about some previous decking posts we have on the site and some of the questions we are seeing are related to comparing pros, cons and average pricing of these materials. So, with the flow of questions, we figured we would try to provide some answers, via a post, of course! 🙂

iStock_000002566116_ExtraSmall

Composite Decking Pros / Cons / Cost
Composite decking materials are decking materials made of a composite of wood and a variety of other products. They began to come into popularity in the 1990s, after some of the major defects of the composite materials had been worked out. The idea of using composites was to be able to retain the appearance of wood, without some of its less desirable properties. Composite decking materials require much less maintenance than pressure treated wood. The big advantage over wood is that they do not have to be regularly refinished or stained every few years. Composites eventually will show some deterioration due to rot, because they are, in part, wood. Another problem which may plague composite materials is that they are subject to mildew and mold, which is a concern particularly in wet or damp climates. Generally composite materials run about $2.50 per linear foot, about 2 ½ times the cost of pressure treated lumber. In order to assess the advantages and disadvantages of composite decking, you need to be informed of your alternatives.

Pressure Treated (Pine) Decking Pros / Cons / Cost
According to an article by Popular Mechanics, about 75% of all new decks are still made of pressure treated wood. “Pressure treated” wood is wood which has had preservatives infused into it through a variety of processes, to make it more resistant to natural deterioration, and pest infestation, and to make it fire retardant. There are about 25-30 different preservatives commonly used, and a number of processes of treating wood, but your local lumberyard or home improvement center will have a selection of the treated woods most suitable to your particular environment. Pressure treated pine is the least expensive building material, costing roughly $1.00 per linear foot. To prevent deterioration, it should be power washed annually, and retreated with preservatives or stains every two to three years.

iStock_000020127587_ExtraSmall
Natural Wood/ Select Hardwoods Decking Pros / Cons / Cost
A second wood alternative would be to build a deck with natural wood. Pine, unless pressure treated, is too vulnerable to rot and infestation to make it a good alternative. Redwood and cedar, because they contain natural oils and tannins which make them more rot and pest resistant, also have a great appeal because of their natural beauty. Tropical hardwoods, such as cumaru, Philippine mahogany, red tauri, tigerwood ipe, and others are still another alternative. These woods are extremely durable and resistant to both rot and infestation, but they are so hard that it is almost impossible to drive a nail through them without drilling a hole in them first. They are also heavy and hard to work with. All natural woods will start to discolor to the characteristic “silver” of weathered wood if not treated with a stain. Redwood and Cedar, which are cheaper near where they are harvested, can run from $1.25 to $2.00 per linear foot, but can run more, depending upon the grade. Select hardwoods such as ipe can run as much as $4.00 to $5.00 per linear foot, and often must be special ordered.

Plastic or PVC Decking Pros / Cons / Cost
Plastic can now be made to look like wood, and is basically maintenance free. The new plastics are stain and scratch resistant, and won’t rot or mildew. Appearances tend to vary by manufacturer, so you would want to get all material from the same source. To date, plastic decking materials have tended to sag over time, as opposed to the other decking materials. Plastic decking material runs about $3.00 per linear foot. Some contractors also note that plastic can be difficult to work with, which may result in additional labor costs during installation.

Aluminum Decking Pros / Cons / Cost
Aluminum is the ultimate decking material if you are talking either durability or maintenance. Aluminum is impervious to rot, mildew, cracking, or warping. It will not catch on fire, and pest infestation is not a problem. It is lighter and stronger than most other materials and can be cut with regular carbide-tipped saws. The major drawback for aluminum decks is the cost. At roughly $9.00 per linear foot, it costs nine times as much as a pressure treated lumber deck.

Conclusion
Of the three lower cost alternatives, composite decking will probably continue to gain in popularity as technology produces even better composites. Pressure treated wood, although considerably less expensive initially, should be considered to be of roughly comparable cost, when maintenance and upkeep costs are factored in. If you are someone who will do your own maintenance, these costs can be reduced, but if you hire someone to wash and stain your deck at regular intervals, the maintenance costs of the pressure treated lumber will soon exceed that of the composite deck. Plastic, appears to have little advantage over composite until the problem of sagging is adequately addressed.

DIY – How to Install Laminate Flooring

The following DIY article on how to install laminate flooring was written by a contractor friend of ours. Follow the directions closely and you should have a beautiful new laminate floor in your home in no time!

iStock_000010457270_ExtraSmall

Installing laminate flooring begins with having, buying or renting the tools necessary for doing the complete job. Tools that you will need include a hand saw, utility knife, measuring tape, tapping block, miter saw, hammer, spacers, pry bar, and vapor barrier paper. If you have all of these tools / materials, the job will be easy and take no time at all. Laminate flooring is perfect for rooms with high traffic or low traffic. The laminate that is available today is durable and comes in different wood grains and colors. Some people choose to leave the old flooring down and install on top of the old. This is fine if the old flooring is the roll out plastic or vinyl style. Hard wood is often too expensive for some people and maintenance can be extensive. According to many, laminate wood floors look just as good when complete and are less expensive and easier to maintain. Solid wood floors may be difficult to install where laminate is easy for the homeowner to do as a DIY project.

Step One:
Use your measuring tape to measure the square footage of the room you are working. This will tell you how much laminate to purchase as well as vapor barrier paper. When measuring, make sure to remove any baseboards so you can measure edge to edge. Add in for closets and other small areas of the room.

Step Two:
When purchasing your laminate flooring, always add in 20-25% more in case of mistakes and areas you may have measured wrong. Sometimes laminate flooring may have a piece with a chip that you may not want to use. You may also want to purchase this extra in case of damage later that you want to replace or repair. Open the boxes and allow the flooring to sit for a couple of days to avoid buckling of the new laminate.

Step Three:
Remove all furniture, and baseboards from the room. Sweep the area and remove any dirt or trash that is on the floor. The crow bar may come in handy when removing molding from floors or up walls. Before you begin installing the flooring, make sure to go through the flooring to check for any pieces that may have damage.

Step Four:
Roll out vapor barrier on the section that you will be working on. The vapor barrier is plastic and foam. This should go on top of the sub floor. Use your utility knife to cut the paper. Smooth out all wrinkles in the barrier and pull up against the walls. Do not overlap foam because this may make the floor uneven.

Step Five:
Choose the wall that is most prominent. Begin laying the boards leaving 5/16th of an inch at the wall. This will allow for expanding and contracting of the floor during heat and cold. Applying a spacer between wood and floor will keep you consistent throughout the whole room. Begin with a groove side at the wall.

Step Six:
After the first board is set, apply one board after another by snapping the boards in place. Be careful not to press too hard or break the groove. A rubber mallet or you are tapping block and hammer will help push the pieces together tightly. Tap gently so that you do not break the edge of the board. Continue attaching boards together until you complete your first row. If the distance is too short to the wall, you may need to cut a board to fit. Leave the 5/16th for the spacer at the wall.

Step Seven:
Continue to add row after row by connecting tongue and groove. If you are looking for a scatter in the boards, begin by laying the next row at the wall you finished the first row. Continue this process until all boards are laying tightly and covering the whole floor. If any floor is angle cut, use the miter saw to cut the correct angle in the boards.

Step Eight:
After all of the boards are down, you can begin replacing all molding around the walls. Begin with one edge and work around the room. Make sure to get the correct pieces in the correct places before beginning to apply them. Remove spacers and add molding. Tack into place using tiny nails and hammer.

Step Nine:
Walk around the whole room and make sure all of the boards are together tightly. While inspecting boards for a snug fit, check to see if there are any chips or cracks in the boards. If there are cracks or spaces, you can repair these with colored caulk.

Step Ten:
Replace furniture and enjoy your new laminate flooring. Enjoy the pride that comes with knowing you did the installation yourself. Purchase a good broom to clean the floor.

There are different types of laminate flooring to choose. Some have wood grain like real hard wood floor; some have the stone or granite appearance. The laminate comes in a popular collection of colors and styles. They are very durable and easy to care for and clean. These floors do best in homes because they can take wear and tear more than original hard wood floors. Check out the many types of laminate online before making your final selection on the style you wish to put in your house. Laminate flooring has improved tremendously over the years.

The Average Cost of a New Fence with Installation

As the old adage goes, good fencing makes good neighbors.Now, there are other ways to deal with problematic neighbors – as this guide will tell you, but for those who are looking for a new fence for more organic, or aesthetic reasons, this post will help you sort out the costs that are associated with that.

Having an excellent fence installed can go a long way towards keeping your property secure and preventing issues with trespassing, misconduct and vandalism. Getting a new fence, however, can be a significant expense, one that includes the cost of the fence itself and the installation. That cost varies widely depending on the length and style of your fence, the materials you intend to use and your choice of installation professional.

One of the most popular materials used to construct fences is wood. Depending on the type and grade of wood used, wood fencing can range from very inexpensive to very expensive. All wood fences share some degree of vulnerability to the elements, certain pests and fire, although pressure treating and certain coatings can mitigate that vulnerability somewhat. Wood also requires some degree of maintenance to stay attractive and functional. Nevertheless, many homeowners opt for wooden fencing because of its classic appearance.

iStock_000020891929_ExtraSmall

Common grades of wood used in fencing include clear wood, which has almost no flaws or imperfections; premium or #1 grade, which contains only small imperfections such as knots; standard or #2 grade and utility grade. Higher-grade wood is more expensive, of course, but the lack of imperfections can be aesthetically pleasing. It is worth noting, however, that many homeowners actually prefer the rustic appearance of lower-grade wood. Furthermore, if the fence is going to be painted, the presence or absence of surface imperfections is somewhat moot.

Vinyl fencing is growing in popularity because it is durable and requires almost no maintenance. Because it is the same color all the way through, it requires no painting or staining, and it maintains its new appearance for quite some time. Vinyl is available in a wide range of heights and styles and has few finish imperfections. However, it can also be more expensive than wood or metal.

iStock_000017612445_ExtraSmall

Several metal fencing options are available, ranging from aluminum to wrought iron. Aluminum is a fairly inexpensive, lightweight and versatile material available in many colors, heights and styles. It can be attached to many different types of posts, including rock, and is excellent for decorative or boundary fencing. Perhaps the biggest advantage of aluminum fencing is that it is impervious to rust and tarnishing, which means maintenance is almost completely non-existant.

For those who can afford it, classic wrought iron fencing is an excellent option. Although it is a metal, wrought iron has an almost wood-like grain because of its low carbon content. The most common types of wrought iron fencing are the Essex fence, which has an ornate, noble appearance, and the somewhat simpler Concord fence. Either type of wrought iron fencing is fairly expensive to purchase and install, but fortunately it requires little maintenance once it is in place.

The cost of fencing also depends on the style of fencing to be used. Privacy fences, which are essentially solid barriers, tend to be relatively expensive because they require a great deal of material. Three-rail fencing is often somewhat cheaper, though it does not provide as much privacy. The classic picket fence tends to be even more expensive than privacy fencing.

Average Fence Costs and Variables
With all of these options available, the cost of fencing varies widely depending on the material, style and length of the fence. On average, having a fence constructed and installed out of basic materials costs about $13 per linear foot, of which about $8 is for the fencing itself and about $5 is for installation. Mid-range fencing averages around $16 per linear foot, including about $10 for materials and $6 for installation. High-end fencing can be $19 or more per linear foot, with about $12 per foot for materials and another $7 for the installation. The actual cost of fencing varies widely around those numbers, of course: Market forces govern the cost of materials, and installation costs tend to be higher in affluent and heavily populated areas.

Since installation represents a huge portion of the cost of new fencing, up to 50 percent in some areas, it is always good to look for ways to reduce that cost. For wood fencing, consider hiring a carpenter to do the installation instead of paying extra for a specialized fencing contractor. Just make sure that the carpenter has prior experience working with wooding fencing. Consider taking care of some of the extra costs by removing existing fencing yourself. If you have the time and hands-on aptitude to do it well, you can save thousands by installing your own wood fencing.

Kitchen Remodeling Ideas and Pictures

If you are coming up on a kitchen remodel or renovation and you are looking for some great designs and ideas to incorporate into your plans, have a look below. We have put together a collection of kitchen pictures that you can then use to share with your builder. Use the form on the right to get in touch with a local top rated kitchen remodeling company if you have yet to take that step. We hope you enjoy these great kitchen ideas!!

Here is a modern traditional kitchen. Notice the island which mixes white into a otherwise wood look.

iStock_000003687778_ExtraSmall

The long and narrow kitchen below uses a great deal of white colors to accentuate the natural light. The mix of stainless steel appliances and antique finished cabinets is more common in kitchen remodeling plans lately.

iStock_000019343636_ExtraSmall

The kitchen below also incorporates a great deal of white that blends with the stainless steel appliances. However, this kitchen is contemporary / modern because of the cabinets and lighting.

iStock_000006930189_ExtraSmall

This luxury kitchen below is designed to accentuate the vaulted ceiling. The built in wine space on the right includes a wine rack above and wine cooler below. Glass cabinetry and classic lighting and chairs give this kitchen a unique, sophisticated look.

iStock_000014686306_ExtraSmall

Below is a bright, modern country style kitchen that features contrasting colors and a stand out kitchen island.

iStock_000020649751_ExtraSmall

To contrast the kitchen above, this pic below shows a modern city style kitchen. This type of kitchen is great for a condo in city highrise. True stainless steel with dark cabinets and white oversized tile flooring, this kitchen is perfect for city-slickers.

iStock_000006784071_ExtraSmall

Many people these days are building their stovetops into their island. This usually comes with an exhaust fan directly above the cooking unit which can often be a centerpiece of the kitchen.

iStock_000016863827_ExtraSmall

Some kitchens feature a backsplash that is worth building around. In this case, the backsplash sets the look of the kitchen and gives is a country and comfortable feel.

iStock_000002578170_ExtraSmall

This kitchen is designed to accentuate the eccentric vaulted ceiling.

iStock_000006900176_ExtraSmall

This kitchen exudes a look and feel of a rustic cabin in the woods.

iStock_000019724860_ExtraSmall

Here is a modern version of the 1950’s kitchen. The use of light wood and the general color scheme give it the 1950’s style look while the modern sleek appliances and contemporary exhaust fan bring it in to the future.

iStock_000020336759_ExtraSmall

We hope you enjoyed our collection of kitchen pictures and ideas!

The Average Cost of New Replacement Windows for Your Home

Even before the economy took a nosedive, homeowners were looking for ways to save money. Home improvements can improve your property’s value while increasing energy efficiency. If you’re looking to replace some or all of your home’s windows, here’s what you can expect to pay. We have laid out the average cost of new home replacement windows.

New Home Windows Best Case Scenario
You will save a lot of money if your existing window frames are in good condition. If the frames are free of major defects, you can replace just the windows and save up to half of the cost of replacement windows.

Only a certified contractor or other window installer should remove the old window and inspect the frame for any damage. That same contractor will be able to repair a salvageable frame or remove a damaged one, but any additional work will end up costing you money. Most contractors work for about $100 an hour, and frame replacement can easily add another $200 to your total bill.
After you have the measurements, you have enough information to order the replacement windows. The window size is fixed unless you want to enlarge the opening. For load bearing walls, that process is both time consuming and expensive, and you should expect additional labor to cost another $200-$300.

Average Window Materials and Prices
The windows themselves come in a variety of materials. Vinyl is relatively inexpensive and easy to maintain, but it usually doesn’t come in too many colors. Unfortunately, most paints will quickly fade and crack on vinyl after a few years. However, paint manufacturers like Benjamin Moore have begun selling paint specifically designed for vinyl surfaces.

Energy Efficient Vinyl Windows Being Installed Other common materials include wood, aluminum, and fiberglass. Wood is an excellent insulator but is expensive compared to vinyl. It also holds up poorly in humid regions and can rot over time especially if rainwater is allowed to accumulate.

Aluminum is a lightweight metal that won’t corrode like iron. Many homeowners go with aluminum clad windows that encase the exterior surface in aluminum but leave the interior window wood for a beautiful appearance. Aluminum clad windows cost more but offer excellent weather resistance and insulation.

Fiberglass is a relatively new window material, and it offers a number of advantages over vinyl, wood, and aluminum. Like aluminum, it won’t corrode, rust, or rot. It can hold paint well, and it will insulate better than the other materials. Fiberglass contracts and expands with the temperature at roughly the same rate as glass, so it won’t leak as much air during the winter and summer months. By filling frame cavities with foam insulation, fiberglass windows offer the best insulation out of any type of window.

An average standard home window can cost as little as $300 for vinyl but 2-3 times as much for fiberglass. Wood and aluminum clad windows typically cost about $500-$700, and they offer a good compromise between cost and energy efficiency.

Triple-pane windows will also drive the cost up over double-pane windows, but they offer superior insulation. Insulating gas between the panes will also increase the overall cost but help save money on heating and cooling bills. Have a damaged frame? A new one will increase the cost by 50-100 percent including the additional labor required to tear out the old frame and install the new one.

Bottom Line
At a minimum, expect to pay on average at least $300 for materials and $100 for labor per window. If your home has 10 windows and you’re replacing all of them, the job will cost at least $4,000.

Once you add in extras like triple-pane windows or fiberglass frames, the material costs can increase up to about $1,000 for a standard window. That same 10 window home will cost about $11,000 instead.

Every frame that needs to be replaced will cost another $200-$700. With all of the bells and whistles for each window, you’re looking at anywhere from $1,000-$1,500 per window. Larger windows and additional work can add several thousand dollars more to the eventual cost.