If you are thinking of making some improvements in your bathroom, installing a pedestal sink may just be the right thing to do. Installing a pedestal sink may be considered a tough task. However, this can be performed without any need for a professional installer. Pedestal sinks are suspended on the wall through a wall bracket or directly secured to the wall and supported by the pedestal.
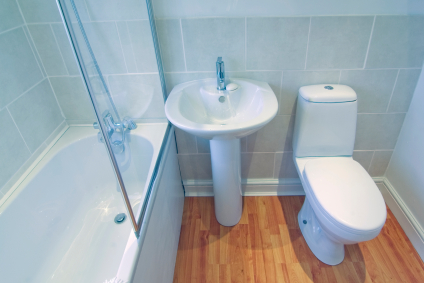
For the DIY folks out there, here are the steps on how you can install your own pedestal sink:
Installing the Sink
1. Before you begin, you have to prepare the necessary materials that you will need such as a measuring tape, hacksaw, electric drill, and an adjustable wrench. Other items needed include a pedestal sink that comes with a ratchet with sockets, slip nut fittings, a tailpiece, P-trap, a mounting bracket, wood screws, and a 2×10 scrap plywood.
2. The first step would involve mounting the sink on the wall. Before that though, make sure that the wall where you are going to install the sink is repaired and reinforced. There are some types of sink that will require a bracket to be installed first. However, there are types of sink that are to be mounted directly to the wall without using a bracket.
3. For sinks with brackets, it is important to place the bracket on the wall first. Then, use the bracket as the outline to mark the location where you will be mounting lag bolts. You have to find the correct location of the bracket. If you are unsure, you can check the manual provided by the manufacturer. In addition to this, make sure that the bracket is level.
4. After marking the walls, you can now start in drilling pilot holes on the layout marks. Just make sure that the holes are 1/8 inch smaller compared to the lag bolts supplied by the manufacturer. Lag bolts are type of large screws that come with a square or perhaps a hex head. After doing this, you can install the bracket together with the lag bolts.
5. Once the bracket is in place, you may now hang the sink on the wall bracket. Then, install the additional screws provided by the manufacturer to hold the sink in place on the bracket and the wall. However, if the sink does not have any mounting bracket, you may install the sink directly to the wall using fasteners which are provided by the manufacturer.
6. After doing this, test fit the pedestal and mark its location. Then, move it safely away from the area. This will be installed last.
Installing the P-Trap
Now that your sink is securely attached to the wall, the next thing that is needed to be done would be to install the P-trap. The P-trap attaches the sink to the drain. The U-shaped portion of this pipe serves as the trap which functions to retain enough water that prevents sewer gases from entering the pipe. The P-trap may be adjusted. This can also slide up as well as down on the pipe which leaves the sink drain. Moreover, the P-trap’s other end can slip in and out of the drain fitting on the wall.
1. Installing the P-trap will involve cutting a tailpiece which sticks out from the assembly when the trap would not align with the drain on the wall. First, you have to slide the short portion of the P-trap into the tailpiece which drops down from the drain of the sink. Then, move the P-trap up and down to bring into line the trap arm with the wall opening.
2. Utilize a hacksaw to cut and make the tailpiece shorter in size when the P-trap cannot be positioned higher up the tailpiece and when the trap arm is located below the wall drain fitting. You may need to purchase a longer tailpiece if the P-trap is positioned above the drain fitting and attached to the end part of the tailpiece.
3. Take the lower portion of the P-trap apart and then put in the trap arm into the drain fitting on the wall as far as it can go. After this, pull the trap arm out of the fitting on the wall and align this with the top portion of the U-shaped end of the trap. However, if the trap arm would come out completely from the wall before you can even attached it to the trap then you will need to purchase a much longer trap arm. On the other hand, if the trap arm is already inside the wall drain and this extends beyond the U-shaped portion of the trap, then you will need to cut it shorter using the hacksaw.
4. Insert the arm back into the drain on the wall, and align it with the trap and thread on the slip nut. However, you should not tighten it yet. When the trap parts are already joined together, you may now tighten the slip nuts located on the wall drain fittings as well as on the tail piece.
Attaching the Riser Tubes to the Faucet
After successfully installing the P-trap, the next thing to do would be to install the riser tubes on the tailpiece of the faucet. You can make use of the compression nuts that are included with the faucet. The riser tubes attach the stop valves and the faucet. You have to snug up the nuts using your hand. In addition to this, loop or bend the riser tubes so they will easily fit between the valves and the wall fitting before tightening them using a wrench.
Finishing It Up With the Pedestal
After everything is set up, make sure to test for leaks. When everything is fine, you may now install the pedestal. You simply need to position the pedestal properly under the sink following the outline made earlier. Secure the pedestal using a wood screw on the floor. Make sure that you do not over tighten it as this may crack the base of the pedestal.
Tags: bathroom, faucet, pedestal sink

