
DIY
DIY – How to Install a Pedestal Sink in Your Bathroom
If you are thinking of making some improvements in your bathroom, installing a pedestal sink may just be the right thing to do. Installing a pedestal sink may be considered a tough task. However, this can be performed without any need for a professional installer. Pedestal sinks are suspended on the wall through a wall bracket or directly secured to the wall and supported by the pedestal.
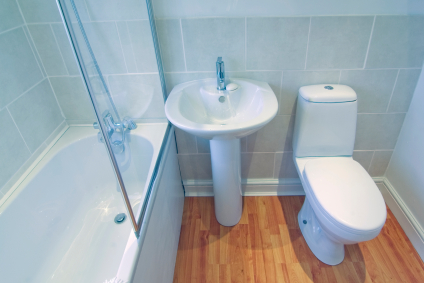
For the DIY folks out there, here are the steps on how you can install your own pedestal sink:
Installing the Sink
1. Before you begin, you have to prepare the necessary materials that you will need such as a measuring tape, hacksaw, electric drill, and an adjustable wrench. Other items needed include a pedestal sink that comes with a ratchet with sockets, slip nut fittings, a tailpiece, P-trap, a mounting bracket, wood screws, and a 2×10 scrap plywood.
2. The first step would involve mounting the sink on the wall. Before that though, make sure that the wall where you are going to install the sink is repaired and reinforced. There are some types of sink that will require a bracket to be installed first. However, there are types of sink that are to be mounted directly to the wall without using a bracket.
3. For sinks with brackets, it is important to place the bracket on the wall first. Then, use the bracket as the outline to mark the location where you will be mounting lag bolts. You have to find the correct location of the bracket. If you are unsure, you can check the manual provided by the manufacturer. In addition to this, make sure that the bracket is level.
4. After marking the walls, you can now start in drilling pilot holes on the layout marks. Just make sure that the holes are 1/8 inch smaller compared to the lag bolts supplied by the manufacturer. Lag bolts are type of large screws that come with a square or perhaps a hex head. After doing this, you can install the bracket together with the lag bolts.
5. Once the bracket is in place, you may now hang the sink on the wall bracket. Then, install the additional screws provided by the manufacturer to hold the sink in place on the bracket and the wall. However, if the sink does not have any mounting bracket, you may install the sink directly to the wall using fasteners which are provided by the manufacturer.
6. After doing this, test fit the pedestal and mark its location. Then, move it safely away from the area. This will be installed last.
Installing the P-Trap
Now that your sink is securely attached to the wall, the next thing that is needed to be done would be to install the P-trap. The P-trap attaches the sink to the drain. The U-shaped portion of this pipe serves as the trap which functions to retain enough water that prevents sewer gases from entering the pipe. The P-trap may be adjusted. This can also slide up as well as down on the pipe which leaves the sink drain. Moreover, the P-trap’s other end can slip in and out of the drain fitting on the wall.
1. Installing the P-trap will involve cutting a tailpiece which sticks out from the assembly when the trap would not align with the drain on the wall. First, you have to slide the short portion of the P-trap into the tailpiece which drops down from the drain of the sink. Then, move the P-trap up and down to bring into line the trap arm with the wall opening.
2. Utilize a hacksaw to cut and make the tailpiece shorter in size when the P-trap cannot be positioned higher up the tailpiece and when the trap arm is located below the wall drain fitting. You may need to purchase a longer tailpiece if the P-trap is positioned above the drain fitting and attached to the end part of the tailpiece.
3. Take the lower portion of the P-trap apart and then put in the trap arm into the drain fitting on the wall as far as it can go. After this, pull the trap arm out of the fitting on the wall and align this with the top portion of the U-shaped end of the trap. However, if the trap arm would come out completely from the wall before you can even attached it to the trap then you will need to purchase a much longer trap arm. On the other hand, if the trap arm is already inside the wall drain and this extends beyond the U-shaped portion of the trap, then you will need to cut it shorter using the hacksaw.
4. Insert the arm back into the drain on the wall, and align it with the trap and thread on the slip nut. However, you should not tighten it yet. When the trap parts are already joined together, you may now tighten the slip nuts located on the wall drain fittings as well as on the tail piece.
Attaching the Riser Tubes to the Faucet
After successfully installing the P-trap, the next thing to do would be to install the riser tubes on the tailpiece of the faucet. You can make use of the compression nuts that are included with the faucet. The riser tubes attach the stop valves and the faucet. You have to snug up the nuts using your hand. In addition to this, loop or bend the riser tubes so they will easily fit between the valves and the wall fitting before tightening them using a wrench.
Finishing It Up With the Pedestal
After everything is set up, make sure to test for leaks. When everything is fine, you may now install the pedestal. You simply need to position the pedestal properly under the sink following the outline made earlier. Secure the pedestal using a wood screw on the floor. Make sure that you do not over tighten it as this may crack the base of the pedestal.
Tags: bathroom, faucet, pedestal sink










DIY – How to Refinish Hardwood Flooring
Hardwood floors are both beautiful and durable, and a floor that’s been properly maintained will last a long time. Unfortunately, hardwood floors do sometimes take a beating from regular use. Scratches, scuff marks, dents and rough patches are all signs of a floor that needs to be refinished. Whether your own floor has suffered from wear and tear or you’ve moved into a new home whose floors need a little TLC, it’s very simple to refinish a hardwood floor. Refinishing will smooth out the scratches and dents on the wood’s surface and help keep the floor looking like new.
Materials Needed:
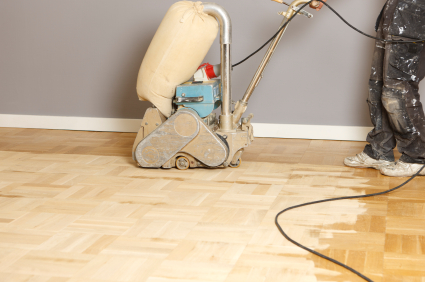
— Buffer or sanding machine to sand down the surface of the floor (the picture above contains a sander like the one you will need)
— 180-grit sandpaper for hand-sanding the corners
— Vacuum to suck up dust
— Polyurethane finish
— Brush and roller to apply the finish
Instructions:
1.) The first step is to clean the floor thoroughly. You’ll want to be sure to remove any dirt or stains. This will also provide you with ample opportunity to examine the floor for deep blemishes or other flaws that a surface buffing would not address. After sweeping the floor, spray it with a mixture of one part vinegar to 10 parts water, then mop it up with a terrycloth mop.
2.) Once the floor is clean, you will begin sanding. You’ll need to hand-sand the corners of the room as well as any nooks or crannies that the buffer won’t fit into. Use a 180-grit sandpaper and sand with the grain until the floor appears dull and white dust appears. Be sure to wear a mask while sanding or using the buffer to avoid inhaling particles.
3.) After the edges of the room are sanded by hand, you can complete the job with a buffer. These can be rented from a home repair store. You’ll want to use the maroon-colored buffing pad. Move the buffer from side to side across the floor, going with the direction of the grain, and overlapping each sideways movement before moving on to the next area.
4.) As you buff the floor, the finish will appear as a fine white powder on the floor. This makes it easy to see where you’ve already used the buffer and which areas need to be completed. Stop every five to 10 minutes to vacuum dust off of the buffer pad for maximum efficiency. See the picture above of the sanding machine, this is the contrast look that a completely sanded floor will give you.
5.) After the room has been completely buffed, allow the dust to settle for 10 to 15 minutes. Once you return, fit a felt-bottomed attachment to your vacuum and vacuum up the dust on the floor. Move first in the direction of the wood slats, then across them to remove any dust that settled in the cracks. After that, you can run a microfiber cloth over the floor, moving with the grain, to help roughen the surface and encourage the finish to adhere properly.
6.) Once you’ve prepared the floor, it’s time to apply the finish. You will want to wear a respirator to ensure proper ventilation. Begin by applying four inches of varnish to the floor along the wall on the edge of the room furthest from the door. After completing a section, pour out additional varnish and apply it with a roller to that area. This will prevent the varnish from drying at the edge and creating an obvious seam.
7.) Work across the room, first applying varnish to the corners by hand, then to the rest of the floor with the roller. You will want to keep a wet edge at all times. Do not apply more varnish than you can roll out in 10 minutes. When you’ve finished, you should be at the door. Exit the room and allow it to dry for three hours.
8.) Once the room has air-dried for three hours, repeat steps six and seven to apply a second coat. Again, be careful to maintain a wet edge at all times to allow the varnish to blend seamlessly. Wait for approximately one week before replacing furniture in the room.
For best results, you will want to refinish your hardwood floor every two years. You may need to do it more often in rooms with a lot of traffic or floors that sustain a lot of wear. If your floor has any deep gouges that go into the surface of the wood itself, you may wish to seek professional assistance before attempting to refinish it yourself. Otherwise, refinishing your own hardwood floor is a simple task that will keep your floor looking like new.
Tags: damaged flooring, hardwood, refinish, sanding, staining
DIY- How to Repair a Broken or Missing Roof Shingle
Shingles cover the roofing substructure to help sloping roofs shed rain, snow, ice and hail while channeling water away so that standing pools of water will not weaken structural integrity or allow water to seep under shingles and leak from ceilings or down interior walls. Replacing an entire roof offers dangerous risks and exhausting work, but homeowners can replace damaged or missing shingles easily. Check roofs for leaks each fall and spring, replacing any shingles that have become cracked, curled-up, broken or missing in action from severe weather or high winds.
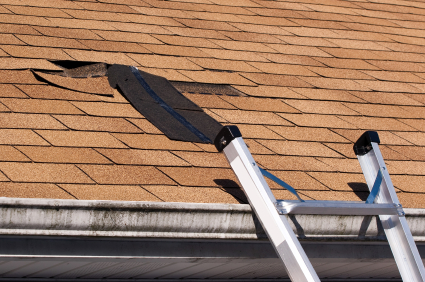
Tools and Materials Needed to Replace Shingles
The right tools help to make roofing repair jobs go smoothly. The first requirement is a sturdy extension ladder, which handy homeowners should never leave unattended while making repairs. A complete list of tools and materials includes the following shingle-laying essentials:
- Extension ladder
- Claw hammer
- Shingle ripper or hacksaw for wood shingles
- Chisel
- Pry bar
- Roofing nails
- Roofing cement
- Utility knife
- Replacement shingles
Shingles come in asphalt, wood, fiberglass, metal and ceramic materials, so determine the type and size of shingles to match roof composition.
Step-by-Step Guide to Shingle Replacement
Replacing one shingle requires loosening the damaged shingle and the shingles on the two rows immediately above it. Use a long knife to cut through cement in the middle of the shingle. The following steps will help homeowners make effective and safe shingle repairs:
- In addition to the cement, properly installed shingles have eight nails—four in the middle and four on the top. Use a pry bar to lift the damaged shingle carefully to loosen nails without damaging the surrounding shingles. Remove the nails.
- Repeat the process on the next level, and then remove pry up the damaged shingle to remove the top nails.
- Remove shingle, and if necessary, use it as a guide to size the replacement, which might need cutting to fit.
- Slide the new shingle into place with a coating of cement in the middle and a dab at each corner, which helps to hold it place.
- Attach four nails at the top and middle of the shingle to affix it permanently. Hammer nails gently in the replacement and surrounding shingles to stabilize the repair.
- Cover the tops of the nails with roofing cement to make the repair watertight. The shingles might need weights overnight to keep them flat.
Roof Shingle Repair Tips
Never risk safety for speed or convenience. If the weather threatens rain, snow, bitter cold or high winds, delay the repair project. Excess heat can also prove problematic if replacing several shingles because roof surfaces heat to extreme temperatures and working on the roof exposes workers to direct sunlight, so take temperatures into consideration and work in the mornings or evenings when it’s hot.
Position the ladder roughly one-fourth of the roof’s height away from the house to create a safe and secure angle for support. The top of the ladder should extend several feet above the roof line. Get someone to watch the ladder when ascending or descending to prevent mishaps. Other tips include the following advice:
- Make repairs only when roofs are completely dry. Slippery roofs cause falls.
- Rubber-soled or antislip shoes help to limit risks. Stay aware of any overhead power lines, roofing structures and other navigation obstacles.
- If unable to find matching shingles, nonmatching shingles will work, especially aluminum or copper.
- Always use safety ropes and secure ladders with proper anchoring techniques.
- Using a utility knife to round the back corners of replacement shingles makes it easier to slide them in place.
- Improper installations and defective flashings around chimneys account for over 90 percent of all roof leaks, so inspect flashings when checking for damaged shingles.
- Multiple leaks, significant damage or installing ceramic tiles might need the expertise of professional roofers. If repairs fail to control leaking ceilings, then hire a licensed roofer.
When to Replace Roofs
Roofs with severe damage need professional attention because several complications develop. Housing codes allow stacking up to three layers of shingles, but after reaching the limit, homeowners must remove old shingles, which presents the challenges of removing old tiles and disposing of them. Laying an entire roof involves flashing problems, waterproofing, dealing with uneven surfaces, following overlapping patterns to channel water off the roof and getting the necessary building permits.
Homeowners and landlords might want to consider replacing roofs with more than 20-percent damage to protect their property from the devastating effects of leaks. Timely repairs help to limit deterioration and reduce the need for costly repairs and replacements. Following safety guidelines and planning repair jobs could save lots of headaches, and getting a friend to help offers protection from many kinds of emergencies that might occur.
Tags: repair, roof replacement, roofing, roofing materials, shingles
DIY – How to Fix a Leaking Faucet
In addition to being aggravating in general, leaking faucets make water bills go through the roof. With that in mind, it’s smart to take care of the problem right away. There are many places where a faucet can leak, and a leak at the handle can be especially perplexing. Despite turning the handle as far as possible, a small, steady trickle of water may drip out into the sink. When the faucet is on, the leak may turn into a small stream that gets onto counters and causes a mess. The good news is that repairing a faucet that’s leaking at its handle is fairly simple. Just follow the directions below.
What You’ll Need
Until you take apart the handle, you won’t be able to tell what is specifically causing the leak. Fortunately, it’s probably just one of two possible things: A damaged handle cartridge or a corroded, cracked O-ring. Neither part is especially expensive, so you might as well replace them both while you’re at it. The local big-box home improvement store is sure to have both pieces, and you can probably find them at smaller hardware stores as well.
In addition to buying O-rings and a handle cartridge, you will need the following tools:
- Wire brush
- Mini screwdriver
- Allen wrench set
- Flathead screwdriver
- Sharp knife
- Wrench
- Non-toxic, heatproof plumber’s grease
- Calcium solvent

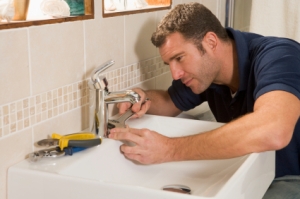
1) Turn Off the Water
Any time you work on a sink, the first step is to turn off the water. The last thing you need is to be sprayed in the face after pulling off the handle.
- Look beneath the sink. There should be two valves located at the back or side of the cabinet.
- Turn each valve all the way to the left. You may have to use a wrench. Don’t use excessive force because it could damage the valve and force you to run out and buy a new one.
- Close or cover the drain to keep screws and other hardware from dropping in and getting lost.
2) Remove the Handle
The only way to repair a leaking faucet handle is by removing it. Follow these steps to do so.
- Take a minute to examine the handle and faucet. The specific steps that you’ll need to take will depend on how it is designed.
- If you have an older faucet, you should be able to simply twist off the handle or handles. Turn the handle as you would when turning it on. When it reaches what seems to be the farthest point, apply a little extra pressure and keep turning. It should push past that point. From there, keep turning it until it twists off completely.
- To remove the handle on a newer faucet, look for the brand logo near its base. You should be able to pry it off with a flathead screwdriver. Once it’s removed, you will see a tiny hole. Insert the Allen wrench or mini screwdriver into the hole and twist it to the left. At this point, you should be able to remove the handle.
3) Fix the Handle
Now that you’ve removed the handle, you can really get down to business. Keep in mind that the following steps are simply a guide. The assembly of your faucet and handle may differ slightly. You might want to snap photos as you work so that you can put it all together again easily.
- If you have a newer faucet, you will see a shroud. Twist it to the left to remove it.
- You should now see a small adapter that’s secured by a screw. Using a wrench to hold the assembly in place, remove the screw. The adapter should pull off with ease.
- Remove the small plastic cover that you’ll see after removing the adapter.
- There will be another, larger plastic cover. To remove it, twist it to the left with a wrench.
- To remove the small clip, just pry it off with a flathead screwdriver.
- Using the wrench, pull up on the stem of the faucet. This will allow you to access the spacer, which you should remove. At this point, you should be able to pull the stem off all the way.
- Use a wire brush and calcium solvent to remove any buildup. If it’s not removed, it could keep causing problems in the future.
- Remove the O-ring or O-rings and replace them with the new ones.
- Put in the new handle cartridge.
4) Rebuild the Faucet Handle
To rebuild the faucet handle, just follow the same steps you did before but do them in reverse. This is where the photos you took earlier will come in handy. Take your time while rebuilding the handle. Securely fasten all of the hardware and wipe everything down to ensure that it is dry and free of debris.
5) Test the Faucet
After everything is in place, turn the water back on by turning the valves beneath the sink. Look closely for signs of a leak. Turn the handle or handles and check to see if water leaks from them when the water is on. If not, you are good to go.
Tags: faucet, fix, leaking faucet, repair
DIY – How to Install a Tile Kitchen Backsplash
A new backsplash in your kitchen can do wonders for the room. Not only will it improve the appearance of your kitchen, but it will also serve to protect your walls and make cleanups easier.
Although you may need professional skills to install a wood, granite or stainless steel backsplash, ceramic or glass tile is relatively easy for even an inexperienced do-it-yourselfer to install.
You will need the following supplies:
· Tape measure
· Tile
· Tile adhesive or mastic
· Tile nippers
· Tile cutter or scriber
· Tile spacers, unless you use self-spacing tile
· Notched trowel
· Grout, either powdered or premixed
· Grout float
· Sponges
· Level
· Pencil
· Grout sealer
· Silicone
1. Get Ready for the Project
Measure the area you want to cover with tile. Multiply the length times the width of the space to determine the number of square feet involved in the project. Check the label on the box to find out how many square feet each box of tile will cover. Purchase 15 percent more tile than your calculations indicate you need to ensure that you have enough to repair mistakes or damage that may occur later. Keep the leftover tile after completing the job, and if possible, store a few pieces where they will have exposure to light similar to that in your kitchen. In that way, you can make a repair several years later if needed, and the repair will match the tile already on your wall. Protect your countertop with a layer of heavy cardboard before beginning your project.
2. Prepare the Surface
If there are electrical switches or outlets in the area, turn off their circuit breakers and remove the switch plates and outlet covers. Remove wallpaper from papered areas, scrape flaking or cracked paint and gently sand glossy paint on painted areas. Scrub and rinse the area thoroughly and let it dry completely.
3. Mark Guidelines
Mark the approximate center of your backsplash area with a pencil. Make a vertical line a few inches to the left or right of the center, from the top to the bottom of the area you will cover. Use a level to ensure that you make the line exactly vertical and straight.
4. Apply Mastic or Adhesive
Spread the tile mastic or adhesive on the wall with a notched trowel held at a 45-degree angle. Cover areas just large enough for about four tiles at a time.
5. Set the Tile
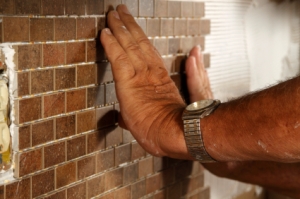
Leave a 1/8-inch gap between your countertop and the bottom of the tile, and set your first tile on the vertical line you made. Twist each tile slightly as you set it, pressing it firmly into place. Unless your tile has self-spacers to ensure uniformity of spacing between tiles, place tile spacers snugly alongside the set tiles. Set the spacers by standing them on end to make then easier to remove before grouting the area. Continue setting tile out from the beginning point, spreading more mastic or adhesive on small areas as you go. Clean the tile surface often to remove any adhesive while it is still wet.

6. Cut the Tile
Cut the tile to fit around corners and electrical outlets with a tile scriber, cutter or nippers.
A handheld scriber scores the tile so you can snap it on the edge of a straight surface to break the tile evenly. However, it can be difficult to make even breaks without damaging the tile unless you have had practice using the tool.
A tabletop tile cutter holds the tile firmly as you pull a cutter along a guide.
Use nippers to cut odd shapes by slowly and carefully nipping small bites out of the tile until you get the desired shape.
After cutting the tile, smooth cut edges with 60-grit sandpaper or a rubbing stone.
7. Let the Adhesive Dry
Allow plenty of time for the backsplash to dry according to the package instructions.
8. Apply Grouting
If you used spacers when setting the tile, remove them before applying the grout. Wear rubber gloves to work with grout because it is caustic. Refer to the manufacturer’s instructions to mix the grout unless you have the premixed variety. Hold a float at a 45-degree angle to spread grout on the tiled surface, working the grout into every space. You will get the best coverage by working diagonally to the grout lines. As you work, keep the surface of the tile as clean as possible.
9. Clean the Backsplash
Use a damp sponge to wipe the surface, and use your fingertip in a glove to clean the grout lines as soon as the grout feels firm. Waiting too long will make it difficult to remove the grout from the tile surface. Wipe the area again with a damp sponge. After the tile dries and appears hazy, use a clean cotton T-shirt or other soft rag to buff the tile vigorously.
10. Seal the Grout
Apply grout sealer from an aerosol can according to the directions on the can. The sealer will protect the color as well as prevent moisture from getting into the grout.
11. Fill Gaps
After the entire area is dry, run a generous bead of mildew-resistant silicone caulk all along the perimeter of the tiled area, smoothing it with your wet fingertip as you go. Remember to fill in the gap between your countertop and the bottom row of tiles.
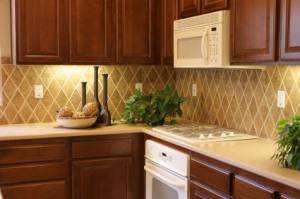
When complete, your new tile backsplash should look something like this:

Tags: backsplash, ceramic tile, kitchen, tile