How Long a Roof Replacement Should Take to be Completed

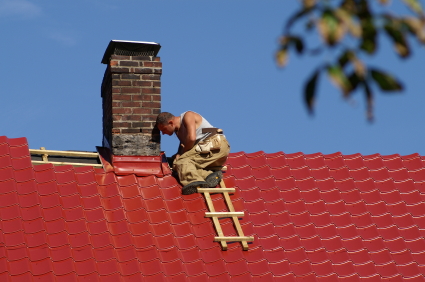
A strong roof on a home is one of the most critical elements of keeping the structure in good condition, and when problems occur, it’s vital to obtain the assistance of a professional roofer before any further damage to the home can happen. Home owners can go for years without fixing things like a broken cabinet or a faulty door inside their home, but a roof is far too essential to leave unattended.
iStock_000014182373XSmall

Different roofing jobs will have various timelines associated with them as far as how long the overall project might take. There are many circumstances that might impact the average time required to complete a roof replacement project.

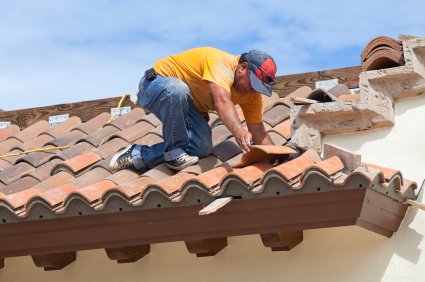
Narrowing down the completion timeframe for a roof replacement will usually encompass a few different projects related to the overall project length and the actual time that the roofing company might spend on the roof making changes. A roof can actually be installed in many cases in just a few days on an average sized home that is not too architecturally complex, yet the overall process might take as long as a few months from start to finish.

From the time at which a problem is found until the roof is finally finished, a lot of things need to happen. Those projects include:

1. Inspection by the roofer and/or insurance company
2. Estimate of timeframe and cost from roofing company
3. Approval and funding from home insurance company
4. Acquisition of materials and scheduling
5. Roof repair and/or installation
6. Final paperwork for the insurance company

As long as there are no serious problems during the process, complete repair and replacement of a roof on a standard home would require a project length of a few months. The actual work on the house would be much shorter, however, and could be less than a week.

Additional elements that could lengthen the average time of completion could include:

1. The time of year

Roofing jobs should be scheduled during patterns of good weather although some roofing emergencies might require that a crew does some work during the rainy season or when it’s highly likely to snow.

It is possible to complete a roof replacement job in the dead of winter when there’s snow all over the ground, but the time table for the project is usually a few weeks longer than if it is accomplished in the summer.

2. Materials acquired for the new roof

Common materials for a new or replacement roof may include slate, composite or metal shingles, and the decision to utilize one of these roofing types will usually depend on how much a home owner wants to spend and how long they want the new roof to last. Other popular roofing materials may include clay, plastic, classic wood or simple asphalt.

Roofing materials like an asphalt roll might be installed quickly, but they will only last about a decade before needing replacement. Slate or Spanish tiles, on the other hand, may last over a century but will require longer installation time.

It’s also essential to consider that sometimes a roofing material is out of stock and may be back ordered. This could push back or extend the timeline of the project by a few weeks.

3. Size and complexity of the home or project area

It’s not a surprise to find out that a large home that has five thousand square feet inside it would probably have a much longer timeframe for roof replacement than a home that was just a thousand square feet.

As far as the shape of the house is concerned, sometimes the roof of a home will have nothing more than a single peak rising to the center without any depressed areas where the roof rises and falls. These types of roofs will usually offer the shortest timeline for completion. More complex architectural designs for the roof may require additional materials used to maintain the structural integrity of the building materials and work around impediments like chimneys.

4. Hidden problems and damage

It’s often possible to diagnose a problem in a roof by having it inspected by a roofing professional, but sometimes there is damage that isn’t immediately obvious or which doesn’t become apparent until the repair process has begun. In such circumstances, days or even weeks may be added to the project time frame.

Sometimes when a home owner has decided to have their roof replaced due to general aging and has not had to deal with an emergency, issues of wear and tear could enter into the project. Replacement of certain interior elements of the home could become necessary and would require additional construction personnel and time be added to the timeframe.

The Average Cost of a Bathroom Remodeling Project

Homeowners who undertake remodeling projects are typically altering either their kitchens or their bathrooms. As one of the most frequently occupied rooms in the house, bathrooms see a lot of wear and tear in a short amount of time. Toilets begin to leak, tiles loosen around bathtubs and showers, and mold forms in the flooring grout. Even with cost-reducing quick fixes over the years, these issues pile up until nothing will resolve them except a complete bathroom makeover.

iStock_000007365049_ExtraSmall
The difficulty with bathroom remodeling projects is that the room is one of the most complex and compact spaces in the entire house. With all that water in one small room, there are many opportunities to make costly choices and mistakes. The best way to keep the costs of a bathroom remodeling project in check is to start the process with a set budget and to make design choices based on needs that fit within those specifications.

How much does a bathroom remodel cost?
The average cost for a bathroom remodel varies greatly depending on the type of bathroom. Master bathrooms are generally more expensive, averaging approximately $16,000 nationwide, while non-master full bathrooms average closer to $11,000. This difference in cost is based largely on the upgrades added in a master bathroom.

Because a master bathroom is still considered a luxury, building or remodeling these spaces is generally more costly. Homeowners working on their master suites are more apt to include more expensive accessories that are frequently nonessential. For example, master bathrooms often feature larger-than-normal soaker tubs or separate spaces for bathtubs and showers. These features are not essential to the functionality of the bathroom space, but they are luxuries that many homeowners wish to include in their master suites. These types of add-ons will greatly increase the cost of a bathroom remodeling project.

iStock_000001183268_ExtraSmall

Another variant in determining the average cost of a bathroom remodel is the location of the home. Homeowners across the nation spend varying amounts of money on very similar remodeling projects. Pacific coast homeowners tend to spend the greatest amount of money, averaging nearly $1,000 more per project than anyone else in the country. Residents of the Mid-Atlantic and New England states spend the second most on their remodels, while the South Atlantic states are third on the list. The least expensive remodeling projects seem to be located in the Mountain region where the average remodeling project is nearly $6,000 less than those on the Pacific coast.

Despite with these regional disparities in remodeling costs, even greater differences exist between urban and rural projects. Homeowners in major cities, such as New York and San Francisco, frequently spend more than $20,000 on non-master full bathroom remodels. Similar projects in smaller metropolitan areas, such as Oklahoma City and Dallas, average closer to $7,000. These regional and location differences are based on the availability of materials and more importantly on the cost of labor.

What factors most influence the cost of a bathroom remodel?
The largest single cost in a bathroom remodeling project is labor for the contractor and crew that will be handling the project. The cost of labor usually amounts to around one-third of the entire budget of the remodel. This fee is nearly non-negotiable unless the homeowner does some of the work himself to cut costs. Therefore, if the budget of the remodeling project needs to be trimmed, the savings most likely will need to come from some of the luxuries and not from the labor budget.

Another costly factor in bathroom remodeling projects is the plumbing itself. If the bathroom project is mainly cosmetic, this may not be a large factor in the remodeling, but many bathrooms are altered because of leaking faucets or bathtubs. Correcting leaks and replacing bad pipes can be very time-consuming for the construction crew and plumber which will drive up the labor costs in addition to the fees for the new pipes. This can be especially true if the leaking pipe is difficult to find or if the house is older and features non-compliant types of pipes. These hidden costs can become budget-busting very quickly.

Beyond the cost of labor and plumbing, the other major expenses in a bathroom remodeling project mainly involve cosmetic choices. While it is necessary to place a floor, walls, and ceiling in the bathroom, the types of materials and their costs can vary widely to fit within any remodeling budget. For example, although radiant (heated) flooring that will keep feet warm on cold mornings is exceptionally comfortable and luxurious, it is not a necessary feature for a bathroom remodeling project. Therefore, radiant flooring is an added expense that will drive up the cost of the project rather than keep it within budget.

What are some common luxury features used in bathroom remodeling projects?
In addition to radiant flooring, there are several common luxury features that can take any bathroom remodeling project to another luxurious level. Many interior bathrooms that do not have windows are being given natural light through the addition of skylights. These features can flood a room with natural light during the day while also giving a romantic view of the moon and stars during the night.

Deep soaking bathtubs and rain-inspired shower heads are luxurious additions to many master bathroom remodeling projects. These powerful yet calming additions to cleanliness help to create an at-home spa atmosphere for any bathroom. In addition, many tubs and showers are surrounded by elaborately designed bathroom tile designs with stain-resistant grout that withstand the threat of mold while looking stylish and modern.

iStock_000017754415_ExtraSmall

No matter the budget of a bathroom remodeling project, there are many options and variables to help keep the costs reasonable while creating a functional and attractive space. We hope you enjoyed this post on the average cost of bathroom remodeling projects!

Comparing Some of the Most Common Decking Materials; Pros, Cons and Average Price

A handful of our readers have been writing in asking about some previous decking posts we have on the site and some of the questions we are seeing are related to comparing pros, cons and average pricing of these materials. So, with the flow of questions, we figured we would try to provide some answers, via a post, of course! 🙂

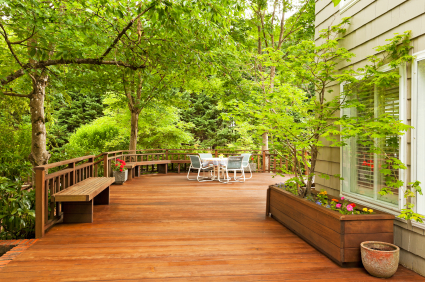
iStock_000002566116_ExtraSmall

Composite Decking Pros / Cons / Cost
Composite decking materials are decking materials made of a composite of wood and a variety of other products. They began to come into popularity in the 1990s, after some of the major defects of the composite materials had been worked out. The idea of using composites was to be able to retain the appearance of wood, without some of its less desirable properties. Composite decking materials require much less maintenance than pressure treated wood. The big advantage over wood is that they do not have to be regularly refinished or stained every few years. Composites eventually will show some deterioration due to rot, because they are, in part, wood. Another problem which may plague composite materials is that they are subject to mildew and mold, which is a concern particularly in wet or damp climates. Generally composite materials run about $2.50 per linear foot, about 2 ½ times the cost of pressure treated lumber. In order to assess the advantages and disadvantages of composite decking, you need to be informed of your alternatives.

Pressure Treated (Pine) Decking Pros / Cons / Cost
According to an article by Popular Mechanics, about 75% of all new decks are still made of pressure treated wood. “Pressure treated” wood is wood which has had preservatives infused into it through a variety of processes, to make it more resistant to natural deterioration, and pest infestation, and to make it fire retardant. There are about 25-30 different preservatives commonly used, and a number of processes of treating wood, but your local lumberyard or home improvement center will have a selection of the treated woods most suitable to your particular environment. Pressure treated pine is the least expensive building material, costing roughly $1.00 per linear foot. To prevent deterioration, it should be power washed annually, and retreated with preservatives or stains every two to three years.

iStock_000020127587_ExtraSmall
Natural Wood/ Select Hardwoods Decking Pros / Cons / Cost
A second wood alternative would be to build a deck with natural wood. Pine, unless pressure treated, is too vulnerable to rot and infestation to make it a good alternative. Redwood and cedar, because they contain natural oils and tannins which make them more rot and pest resistant, also have a great appeal because of their natural beauty. Tropical hardwoods, such as cumaru, Philippine mahogany, red tauri, tigerwood ipe, and others are still another alternative. These woods are extremely durable and resistant to both rot and infestation, but they are so hard that it is almost impossible to drive a nail through them without drilling a hole in them first. They are also heavy and hard to work with. All natural woods will start to discolor to the characteristic “silver” of weathered wood if not treated with a stain. Redwood and Cedar, which are cheaper near where they are harvested, can run from $1.25 to $2.00 per linear foot, but can run more, depending upon the grade. Select hardwoods such as ipe can run as much as $4.00 to $5.00 per linear foot, and often must be special ordered.

Plastic or PVC Decking Pros / Cons / Cost
Plastic can now be made to look like wood, and is basically maintenance free. The new plastics are stain and scratch resistant, and won’t rot or mildew. Appearances tend to vary by manufacturer, so you would want to get all material from the same source. To date, plastic decking materials have tended to sag over time, as opposed to the other decking materials. Plastic decking material runs about $3.00 per linear foot. Some contractors also note that plastic can be difficult to work with, which may result in additional labor costs during installation.

Aluminum Decking Pros / Cons / Cost
Aluminum is the ultimate decking material if you are talking either durability or maintenance. Aluminum is impervious to rot, mildew, cracking, or warping. It will not catch on fire, and pest infestation is not a problem. It is lighter and stronger than most other materials and can be cut with regular carbide-tipped saws. The major drawback for aluminum decks is the cost. At roughly $9.00 per linear foot, it costs nine times as much as a pressure treated lumber deck.

Conclusion
Of the three lower cost alternatives, composite decking will probably continue to gain in popularity as technology produces even better composites. Pressure treated wood, although considerably less expensive initially, should be considered to be of roughly comparable cost, when maintenance and upkeep costs are factored in. If you are someone who will do your own maintenance, these costs can be reduced, but if you hire someone to wash and stain your deck at regular intervals, the maintenance costs of the pressure treated lumber will soon exceed that of the composite deck. Plastic, appears to have little advantage over composite until the problem of sagging is adequately addressed.

The Average Cost of an Exterior House Painting Project

Changing the color and curb appeal of your home’s exterior can be done by applying a new coat of paint. New paint for your home can be applied by a professional or as a do-it-yourself (DIY) project. The cost to paint the exterior of your home is based on factors that include the cost of labor and the tools that are required. In this post we will more closely take a look at the average cost of doing this project on your own.

The Average Cost of Hiring Professionals

Professional house painters are a good option for homeowners who lack the skill or the time that is necessary to paint the exterior of their home. The average cost of hiring a professional exterior house painter is in the range of $3,000 to $8,000 or more based on the size of the home and other factors. That average price typically includes the coverage of tools, supplies etc. no fuss, no worries and typically an excellent finished project, if you hire professional painting contractors, obviously. If you skimp on this, your home may end up looking quite a bit worse than what you had hoped for, because the quality of the finished product is usually in the preparation.

Do-It-Yourself Project – The Average Cost

Painting the exterior of your home by yourself “can” save you money on the cost of labor. However, you will need to have the time available to complete the project and a handful of tools and other helpful items (see scaffolding below, that’s the tough one).

If done on your own, paint will typically cost between $25 and $50 per gallon. Primer will be needed for the project and will cost between $10 and $15 or more per gallon. The average size home in the USA requires between 6-12 gallons of each. If you decide that hiring a painter to paint your home is too expensive, then the project can be done by yourself. Paints with primer already included in them can be purchased, but are on the higher side of that cost per gallon previously mentioned. On average, a homeowner can do the exterior paint project on their own for around $1,000, after all supplies are purchased / rented.

Matching paint colors can be an issue for homeowners. There are products out there available to assist with matching current colors up with new colors (see here).

Renting / Borrowing Tools

Many tools that you need to paint the exterior of your home can be found or rented from a home improvement store in your area.  Look to see if the tools you need are available from friends, family members, or neighbors. Lets review some of the necessities:

Pressure Washer

One special tool you will need is a pressure washer. This tool can typically be rented at a cost of $50 to $70 for each day of use. You can also purchase a decent pressure washer for under $300. The pressure washer will easily remove dirt and grime from existing siding. This step is essential for a professional finish. Keep in mind that a pressure washer can be used in the future for things like deck, patio, siding, brick resurfacing and more. If you are DIY buff, a pressure washer is a healthy investment.

Paint Sprayer

The use of a paint sprayer will make the painting process go much faster. You will also keep your arms and hands from aching by not using a paint brush or roller. A decent paint sprayer costs about $70 each day. If you are renting the paint sprayer, be sure to have already pressure washed the exterior prior to renting and you either want to complete the trim work painting (or taping / coverage of non-painted areas) prior to or after the paint sprayer is rented.

Scaffolding

The use of scaffolding is a great way to ensure you can easily reach high areas. You may want to rent a scaffolding system if your home is more than one story, as a ladder may not meet your needs. The rental of a scaffolding unit is typically based on its size and can be between $15 to $50 per day. For most homes, a base scaffolding set will do the trick.

Heat Gun

A heat gun will run between $40 and $75 or more depending on the model being purchased and it is not needed in most cases. On most homes, old layers of paint can be removed cleanly with a pressure washer and scraper. A heat gun is needed in situations where multiple layers of older paint exists on the surface. As paint is layered, varying heights on the paint surface (from older, lasting paint) can cause an uneven look, which can define a homes age too much. As sun hits uneven paint, it will show slight shadows which really show the blemishes of the exterior. A heat gun may be necessary if you are truly looking to add a pure, even professional and new looking paint job to you house.

Paint Scraper

A paint scraper can be used in combination with a heat gun to remove old paint. This tool can be found for a price range of $8 to $25 at a home improvement store. In almost all scenarios, this will be a necessary tool and it is likely that you will use a paint scraper multiple times in the future. So it is never really a bad investment.

Putty Knife

Old caulk and paint that cannot be easily removed with a scraper will require a putty knife. This tool is inexpensive and can be found starting at about $5. You can also use this tool in combination with a heat gun.

Sander

Sanding the exterior of your home is needed to remove old paint and allow new paint to stick properly. There are a variety of types of sanders available pretty much anywhere. The best choice for exterior sanding is a pole sander. This tool will require sheets of sandpaper that cost between $3 and $10 per package. Areas that are hard to reach as well as corner / edge spots of the house will require sanding by hand. The purchase of a pole sander will cost about $15.

Metal Brush

Areas you cannot thoroughly cover with a sander or sandpaper will require a metal brush. The bristles of the brush are wire and used to loosen paint that is thick or hard to remove. A metal brush can be purchased at a hardware store for around $10.

Painting Tape

Areas that do not require paint typically need to be covered with either tape, or a combination of tape and plastic (for larger areas of course). The average house exterior may require as much as a $25 worth of tape and usually varying sizes should be purchased. 3/4 of an inch to 1 and 1/2 inch tape varieties should be on hand. In fact, if you spend a healthy amount of time properly applying tape and plastic covering to non-painted areas, you can usually save a substantial amount of time on the overall project, because it will allow you more liberal use of the paint sprayer (hint – this makes for an easier job).

The Primary Benefits of Custom Built Home Windows

Are you considering custom built home windows versus pre-built standard windows for your upcoming replacement? Here are some things you should consider.

iStock_000014744375_Small

You are unique, an individual, why not allow yourself the opportunity to design your own custom windows which will reflect who you are and provide you with a significant cost savings. Custom windows have really kept up with all the advancements in technology and offer you the opportunities to really customize your windows in various ways, from functional options such as control noise or for security, to more decorative options such as patterned glass, divided lite patterns, and intricate shapes, to various degrees of tinting and glazing.

When you choose custom built home windows over pre-built or stock home windows you will experience a higher quality window, built by a craftsman who specializes in the manufacturing of these windows. The windows can be custom made to your design and most importantly, to the exact specifications of the needs in your home thereby reducing drafts and loss of heat and increasing your homes overall energy efficiency. You’ll be pleasantly surprised at the cost savings when the utility bill comes and you’ve continued to maintain the level of comfort you desire all year long. In fact, replacing single-pane glass windows with ENERGY STAR® qualified custom built products can save you $125 to $450 on energy costs annually.

You will also be doing the environment a favor by using less resources to meet your same heating and cooling needs. When you choose custom windows, the windows will be carefully made to the exact needs of your climate to ensure efficiency. This also gives you a unique opportunity to change the size or shape of your entire room for example by adding differing sizes of windows, or one big bow window.

You can never undervalue the importance of personalized service and installation. It’s best to work with the custom window builder allowing them to measure and install the window, as they will ensure its proper fit and efficiency. You don’t want to take a chance on wasting all the money you would have been saving, by skimping on the installation resulting in improper fits and drafts. Also, you don’t want to compromise the windows warranty by not having it properly installed by the professionals.
With custom built windows, you avoid the pitfalls of stock windows which always require some patching and filling, and likely even some trimming to get the windows to just ‘fit’. You also avoid having to purchase additional seals, insulation, caulking, dealing with gaps, and drafts, and additional costs of additional visits to remedy the problems. Relieve yourself of these additional complications and headaches and have the custom built window professionals complete the job.

Statistics have been reporting that most homeowners save up to 40% annually on their energy expenses after replacing their homes windows. Now is the best time to decide on custom built windows. The cost savings and customization options are well worth the initial costs for custom windows and you may also qualify for certain tax rebates for home improvements. Make the choice to enhance your home’s value and aesthetics as well as investing in future cost savings.

Home Improvement Contractor License Requirements

To work as a home improvement contractor in any state, a contractor must usually apply for home improvement licensure. States put the licensure process into place as a consumer protection to prevent the scamming of customers by people falsely claiming to be home improvement contractors. Licensing also prevents te performance of low-quality work that could endanger the customer or the structure.

In addition to state licensure, some towns, cities and counties require home improvement contractors working within a municipality to acquire a municipal home improvement contractor license. Projects of a certain value may have less stringent requirements than projects that are high-value. For example, in Tennessee, some contractors acquire home improvement licenses for projects under $25,000. For projects over $25,000, the home improvement business would obtain a contractor license.

Who needs a license?

A home improvement contractor is a business entity that makes or sells home improvements. Sole proprietorships, partnerships, corporations and limited liability companies will all need state licenses. Home improvements include altering, painting, restoring, repairing, renovating, demolishing, modernizing or moving a structure or the property upon which the structure sits. Additional examples of work requiring licensure may include:

  • Performing landscaping tasks like laying sod or planting shrubs, flowers and trees
  • Installing swimming pools or pouring driveways
  • Performing environmental remediation including asbestos, mold or lead removal
  • Working as a subcontractor for a home improvement store
  • Being an employee of a licensed home improvement contractor who also does odd jobs “on the side”
  • Contractors licensed in one state who decide to perform work in a different state

People who are exempt from holding licenses may include:

  • Someone who is working on improvements to a family home
  • A person working on an improvement for a building owned by a charity or non-profit corporation
  • A retailer of home improvement products who does not perform or pay a contractor for installations
  • Contractors who work exclusively on commercial properties
  • Architects, engineers, surveyors, electricians, plumbers and other professionals who already have separate state licensing even though they work on home improvement projects

What type of business do I have to own?

States will have different requirements for submitting proof of the type of business that you own, and the requirements will be spelled out in the licensure application. If your company is a sole proprietorship or partnership, then you will need a document such as a trade name certificate. Corporations will need certificates of incorporation, and LLCs and LLPs will need certificates of formation. If you use multiple names for your home improvement contracting, then you will also need to submit copies of any alternate name certificates that you possess.

What about bonding and liability insurance?

Most states require contractors to have commercial general liability insurance before they will allow them to apply for licensure. While amounts may differ by state, a good rule of thumb is to secure a policy that pays $500,000 per incident. Contractors will need to prove both that they’ve secured and that they maintain the policy in their names. Proof usually consists of an active policy number, the date the policy was issued, the effective date of the policy and the signature of the policy owner.

Additionally, some states require bonding to show that a business is financially secure. Some examples of proof of financial security include surety bonds, cash bonds, property bonds or irrevocable letters of credit.

How does the application process work?

Typically, a home improvement contractor applies for licensure by completing an application, submitting required paperwork and paying an application fee. Businesses must submit a physical address instead of a post office box address, and they must also check currently licensed home improvement contractors to make sure that the name of their business is distinctly different from an existing licensed business or contractor name.

How much do I have to disclose?

Each state will have its own requirements regarding home improvement contractors who have a previous criminal record. Some states will not restrict licensure, while others may not allow a convict who is on probation to hold a license. Home improvement workers with criminal records may have to work as employees of another company until they finish probation or otherwise meet the criteria for working as an independent contractor.

Additionally, states may also ask questions on the application regarding past judgments against the business. If the application requires complaint records, information about convictions, revocations or unlicensed activities, then the contractor must provide an thorough account of past actions.

What happens when I’m licensed?

Most states require license numbers to be displayed on all advertisements or marketing materials related to home improvement projects. Also, some states may require the use of specific forms and procedures for down payments, written estimates, dates of the project and cancellation policies. When a home improvement contracting business is sold, always check state requirements to register the new owner’s name in a timely manner.

While this article will give a general idea of the licensure process and associated requirements, it is not intended to substitute for checking the laws regarding licensure in your state. Always check into your individual state and municipal licensure requirements before beginning work as a self-identified home improvement contractor.

The Average Cost of HVAC Replacement

Interior temperature and air quality are important elements of a healthy and comfortable home, so repeated problems with an aging or malfunctioning HVAC system should be addressed. If the equipment needs frequent repairs, it may be less expensive in the long run to install a new unit. The life expectancy of an HVAC system varies by type and operating conditions. A heat pump or air conditioner that receives regular maintenance can be expected to last for at least 10 years; a boiler or furnace may reach 15 years of age or more before failing.

iStock_000008938718XSmall

Average Cost of HVAC Unit Replacement

The cost of HVAC units varies greatly; pricing depends on a number of factors such as the size and type of system and the energy efficiency rating. In addition to the equipment itself, buyers must also consider the cost of installation and any required modifications to the building like additional ductwork. Replacing an existing system costs less than a new installation if there is already functional ductwork in place. Here are the most common types of HVAC equipment types and their average costs.

    • Heat Pump, Electric or Gas Split HVAC System

Split systems consist of both indoor and outdoor components. The outdoor unit is an air conditioner to provide cooling; the indoor unit is a furnace to produce heat. Split systems usually cost between $2,000 and $11,000; the average cost is $6,625. Costs will vary based on the type of units included.

    • Central Air Conditioner Unit

A central HVAC unit may cost as little as $1,000 or as much as $4,000 for a large unit; the average cost is $2,600.

    • Ductless Split System

This system is an option for homes without existing ductwork. Costs for a ductless system range from $2,000 to $7,000; the average cost is $4,500.

    • Gas Furnace

A standalone gas furnace typically costs between $1,000 and $5,000; the average cost is $2,400.

    • Gas or Oil Boiler

Regular efficiency boilers range in price from $2,500 to $4,000 with an average cost of $3,250. High-efficiency models cost between $5,000 and $9,000 with an average cost of $7,000.

    • Air Handler or AHU

Most air handlers cost between $1,000 and $3,500; the average price is $1,700.

    • Commercial HVAC Units

Commercial HVAC systems are much larger, and pricing will depend on the square footage of the building and other factors. Most commercial systems will cost more than $15,000.

Installation Costs

The cost of installation is highly variable and depends on the type of system, the choice of contractor and the complexity of the required work. Installation charges for a typical home range from $3,000 to $6,000 with an average cost of about $4,700. Additional ductwork or repairs can increase the installation fees by several thousand dollars.

In conclusion, the average homeowner can expect to pay between $5,000 and $11,000 for a completely installed HVAC system.

Variables Affecting HVAC Replacement Cost

    • Size or Capacity of Unit

HVAC Capacity is measured in BTUs and tons. These refer to a unit’s heating and cooling abilities. The square footage of the home, the local climate and other variables determine what size HVAC unit is required. More powerful units are more expensive, but installing a unit that does not have a high enough capacity can cause early equipment failure and increased energy costs.

    • Efficiency Rating

Energy efficiency is another important variable that affects cost. Air conditioners are assigned a seasonal energy efficiency rating (SEER). Alternative measurements for heat pump efficiency include the average fuel utilization efficiency (AFUE) and the heating seasonal performance factor (HSPF). Higher ratings denote more efficient systems, and these generally cost more. However, they save homeowners money in the long run by using less energy.

    • Choice of Retailer

Each HVAC equipment retailer will have specific equipment and installation charges. Discounts and special offers may be available; it is advisable to check several different retailers to find the best prices.

    • Brand and Quality

Major national brands may be more expensive than lesser-known ones. Before purchasing, buyers should thoroughly research brand names, models and available features to get the best quality system for their money.

    • Optional System Features

Programmable thermostats, air purifiers, humidity control features and UV lamps are optional features that will increase cost.

    • New or Used Equipment

Used or refurbished equipment may be available at a discounted price.

    • Entire vs. Partial Replacement

Some complex systems may only need individual components or units replaced; this decreases the cost of equipment and labor.

    • Location and Climate

Colder regions require more powerful systems to maintain desirable temperatures in winter. Units with higher BTU ranges are best for cold climates while systems in the lower BTU ranges are more appropriate for warmer areas.

Replacement Tips

Whether replacing an old HVAC system or purchasing a new one, homeowners should obtain careful measurements of the entire house and record any technical information about existing HVAC equipment. With the required information in hand, professional HVAC retailers and installers can help buyers find the system that best meets their needs at a reasonable price.

iStock_000011009506XSmall

Tips and Ideas when Remodeling Your Basement into a Man Cave

Basements have many purposes: they can function as family entertainment rooms, spare bedrooms, and even separate apartments. However, one of the most time-tested uses for a basement is the coveted man cave, a safe haven for men away from the rest of the home décor. Hidden away underneath the main living space of the rest of the house, the basement offers the perfect location for a man’s sanctuary. These are a few tips to successfully transform a basement into a fully functional man cave.

iStock_000003164773_ExtraSmall

Install insulation
While insulation is always a good idea in a basement to regulate the temperature and keep the room energy efficient, the insulation in a man cave is doubly important. Many activities in the man cave, such as watching sporting events and playing games, can become very loud. This may disturb the other people living in the home. Consider adding insulation to the ceiling in addition to the walls in order to reduce the amount of sound traveling upstairs to the other residents of the house. Foam insulation is the best type to use in a basement man cave because it will repel moisture and mold while it traps air leaks.

Use durable materials during construction
When building any basement room, it is necessary to use inorganic materials to help discourage mold from forming in the lower level. However, using other indestructible and easily-cleaned materials can also improve a man cave. Try using durable plastic floor tiles in the basement. They look very much like ceramic tile or solid wood planks, but the plastic does not warp or crack, and it never needs to be refinished. Additionally, the plastic is very easy to mop or vacuum clean when snacks and drinks are spilled.

Create a flexible floor plan
The perfect man cave needs a lot of space for activities, and it needs to take into account that those activities may evolve over time. While it may be necessary for a bench press station to be near the recliner now, that recliner may move to the other side of the room in a few months to make room for a new pool table. When more space is open, more options are available to add new activities, such as a dart board, pinball machine, or professional card table. An open floor plan also allows plenty of room for friends to participate in these activities.

Install electrical outlets
Many man cave activities require electrical power. From electric guitars to video games and flat-screen televisions, the basement cave offers many different possibilities for manly fun. It may also be necessary to have enough outlets to engage in several of these activities at one time, especially if there are friends in the man cave. Consider also adding a small dorm-size refrigerator to the basement man cave to keep beverages and snacks nearby and cold. With all of these options, be sure to have more than enough electrical outlets available. Make sure that there are enough circuits in the main service panel to handle all the new outlets too.

Plan the lighting
Depending on the type of ceiling in the man cave, the best type of lighting is to use overhead lights in the ceiling panels. This illumination works best in a suspended ceiling. When planning the lighting system in the basement, take into account any windows that will allow light to shine into the room, and then add accent lighting with lamps and wall-mounted lighting fixtures to increase the brightness of the basement. There should be enough light in the basement to make all activities visible. Consider using multiple switches throughout the room, and try adding dimmer switches to some of the lights. This will allow control of each area to get the best level of lighting for the activity. For example, dimming the lights over the television area will create the best lighting for watching a movie, while brighter lights will be necessary over the pool table.

Provide storage
Man caves without storage and clean-up supplies can very quickly turn into the messy frat house that no one wants to visit. Include a small closet for storing cleaning supplies and storage bins that can help keep the man cave tidy and usable. Have a place to store snacks and beverages, as well as a location to dispose of any trash left over from these refreshments. Keep decks of cards, poker chips, and other gaming accessories stored in an organized location. There is no need to make a big deal about keeping the man cave clean, but have the proper storage containers in place to maintain some sense of order.

Splurge on a basement bathroom
Adding a bathroom to the basement can be a very expensive endeavor, but this feature allows everyone to stay secluded in the man cave for longer periods of time. The bathroom does not need to be large or overly accessorized, but creating a self-contained room with a toilet and sink makes it convenient for anyone spending a prolonged time in the basement without disturbing anyone in the rest of the house. A basement bathroom makes the man cave an island of its own without any interaction with the upstairs world.

The Average Lifespan of the Most Commonly Used Roofing Materials

Before replacing a roof, it pays to do plenty of research. Like most people, you probably want a roof that will last for decades. It’s also nice to have one that requires little to no maintenance. Several materials are popularly used on roofs in the United States. Some of them are a lot more durable than others. Exceptionally durable materials tend to be more expensive, but cost is not always a reflection of quality because some materials work better under certain circumstances than others. What works for a home in a hot, dry climate may not work for a home in a cold, wet one.

iStock_000003149966_ExtraSmall

Factors that Affect the Longevity of a Roof
The material out of which a roof is made has the biggest impact on its longevity. However, other factors come into play as well. Exposure to the sun plays a strong role, and the slope of the roof has a major effect as well. The type of maintenance that a roof receives affects its longevity too. Even when a roof is made out of virtually maintenance-free materials, occasional work is necessary to ensure that it lasts as long as possible.

Popular Roofing Materials and Their Average Lifespans
You shouldn’t base your decision solely on the lifespan of a given roofing material, but this information can help you make the most informed selection possible.

  • Asphalt Shingles – Without a doubt, asphalt shingles are the most popular roofing materials in the United States. On average, this roofing material lasts anywhere from 15 to 30 years. The reason for the wide range involves climate. In colder climates, asphalt shingles may last 25 years or longer; in warmer, more humid climate, they may only last 12 to 14 years. These shingles have petroleum bases that dry out over time, so they definitely don’t last forever.
  • Composite – Composite shingles, or composition shingles, are popular for a variety of reasons. Some of them are primarily made out of asphalt, but there are fiberglass-based options as well. Many composite shingles also include recycled materials, so they can be eco-friendly options. While they require very little maintenance and are quite adaptable, they don’t have great lifespans. On average, you can expect a roof made out of composite shingles to last about 20 years. If you live in an area that regularly experiences high winds, composite shingles are not a good option.
  • Metal – Metal roofs have experienced a surge in popularity in recent years. In addition to having extremely long lifespans, these roofs dramatically enhance the energy efficiency of homes. Standing-seam metal roofs, which are the most popular, can last 75 to 100 years. Metal roofs are resistant to fire, insects and rot. Very little maintenance is needed, but it should still be performed. Metal roofs should be inspected periodically, and they should be scraped and repainted with rust-resistant paint when needed. As long as this basic maintenance is performed, a roof like this should serve you well for a long time to come.
  • Tile – Most people are drawn to tile roofs for their beauty. Tile is most commonly used on homes that have Spanish or Italian architecture. In addition to looking great, tile roofs can last a really long time. Some have lifespans of up to 100 years. Unfortunately, tiles are often installed on mortar bed systems, which makes them susceptible to slippage. In that case, this type of roof may only last about 10 years. Therefore, exceptional installation is critical. Because tiles are often made out of terra cotta and other dense materials, they tend to be heavy. Extra support is often needed. Tiles are also fragile, which presents a problem when performing maintenance on a roof.
  • Slate – For a natural, stunning look, it’s tough to beat slate. Very fine slivers of stone are used to create these roofs, which have lifespans of 45 to 75 years when they are properly maintained. Like tile, slate can be very fragile, and it can require extra support due to its weight. The thickness and density of slate tiles affect their longevity. Slate roofs generally require very little maintenance. However, the main thing that affects their longevity is failure of fasteners and nails. These components should be inspected regularly and replaced promptly at the first sign of weakness.
  • Wood – Estimating the lifespan of a wood roof isn’t easy because so many factors affect its durability. The slope of the roof, the amount of sun exposure it receives and the quality of the maintenance that’s performed all have an impact. Furthermore, the width, thickness and cut of the wood affect its longevity as well. When properly treated, installed and maintained, the average wood roof should last 15 to 30 years. Out of all of the available options, cedar is the best choice.
  • Fiberglass – Homeowners love the versatility and style of fiberglass roofs. This option is sold in panels and sheets, which makes it easy to achieve the perfect look and protection. The fiberglass that’s used is glazed to make it exceptionally waterproof. Fiberglass is also naturally shatterproof, so it’s a strong, durable choice. The best fiberglass roofs are designed to be resistant to rot, mildew and rust. At the high end of the scale, a fiberglass roof should last around 30 years. As with other roofing materials, maintenance and design have major impacts on the lifespan of this type of roof.
  • Concrete – People are often surprised to learn that concrete can be used as a roofing material. A concrete roof doesn’t involve heavy slabs of material. Today’s best options use fiber-reinforced cement to achieve optimal style and durability. When mixed with cellulose, concrete can be crafted to look like wood shakes. Concrete roofs can also be used to replicate tiles and other popular roofing materials. Depending on the design of the roof and its underlying materials, concrete shingles or panels can last up to 50 years. This type of roofing material is virtually maintenance-free, and it’s resistant to rot, insects and fire.
  • Rubber – Although it’s infrequently used, rubber is a viable roofing material in many situations. Most people turn to it for its eco-friendliness, but it has other benefits too. A rubber roof offers exceptional energy efficiency. Shingled rubber roofs are available, but whole-roof designs, which are custom-created at the factory, are much better options. These rubber roofs are seamless, so they are exceptionally leak-proof and can last up to 40 years. Rubber roofs are also flexible and lightweight, and they are available in a variety of colors and designs.

Before considering any roofing materials in earnest, give some thought to the climate where you house is located. Is it usually wet or dry? Is it usually sunny or cloudy? Would you describe it as a warm climate or a cold one? These factors will all help you zero in on the ideal roofing material. From there, weigh the pros and cons of the top options, and remember that cost doesn’t necessarily reflect quality. Regardless of the material that’s used, first-rate installation is vital. To ensure that your roof lasts as long as possible, make sure that it is inspected and serviced regularly.

Bathroom Remodeling and Design Ideas and Pictures

As we love to do here at HomeOwnerIdeas.com we created this post for the homeowners who love to visualize design and remodeling ideas. Below you will find a wide variety of modern, contemporary, luxury, vintage etc. bathroom pictures that you can feel free to share with your remodeling contractor to get ideas for your new bathroom redesign. Enjoy!

The traditional modern bathroom these days often looks like the picture below. To best utilize space a glass shower is attached to a sunken bath tub. This bathroom also utilizes natural light. Tile, granite and wood cabinets tie the luxury feel together here.

iStock_000001676454_ExtraSmall

In this next modern bathroom design the homeowners wanted to incorporate more color in to the actual design, which is often most easy to do through the use of small glass or ceramic tiles.

iStock_000018000389_ExtraSmall

The luxury bathroom below uses every ounce of available natural light but also incorporates uniquely designed stainless steel raised plumbing features, custom window coverings, granite countertops, wood cabinetry and medium tile flooring.

iStock_000007953677_ExtraSmall

The next bathroom picture shows a design to make a smaller space look much larger. Carefully placed recessed lighting echoes off of the full tile walls in this bathroom while mixing in the natural light giving the bathroom an illusion of being much larger than it actually is.

iStock_000019504171_ExtraSmall

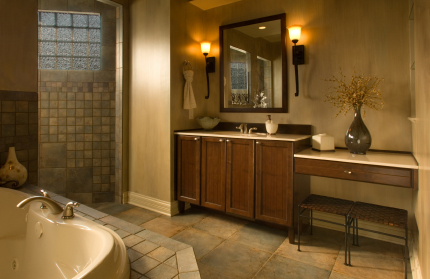
The following bathroom has a classic “natural look”. Large and small stone faced tile, natural wood cabinets and earthy colors complete the look for this bathroom.

iStock_000001129531_ExtraSmall1

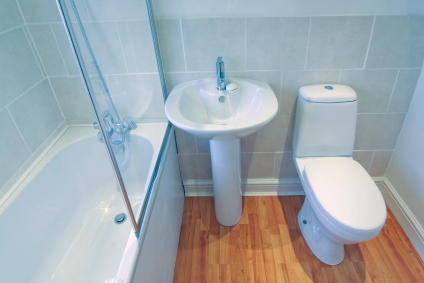
Sometimes in cases like city condos or row houses, a homeowner only has a small space to work with. In this very small bathroom below you see a small bathroom still transformed into a luxury setting. Large tile can give the appearance of a larger space and a pedestal sink is always the best bet. The modern, narrow toilet also allows for greater floor space.

iStock_000003204725_ExtraSmall

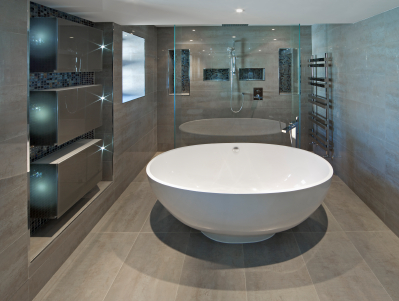
This ultra-modern, super-contemporary bathroom has really been designed to “wow”. The large oval bathtub is a rare but stunning focal point while just past the tub is a walk-in shower with a single glass wall. To complete the contemporary look, the remodel included extra-large, over-sized tile on the floors and walls.

iStock_000017754415_ExtraSmall

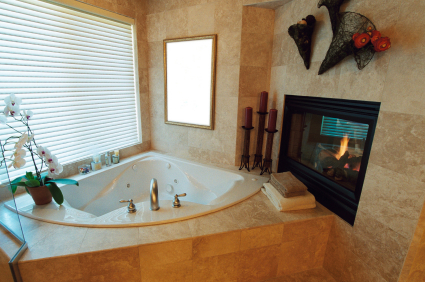
Becoming more common these days is the tranquility of adding a fireplace to your bathroom. Nothing accentuates the peacefulness of a jacuzzi tub like a gas fireplace.

iStock_000001183268_ExtraSmall

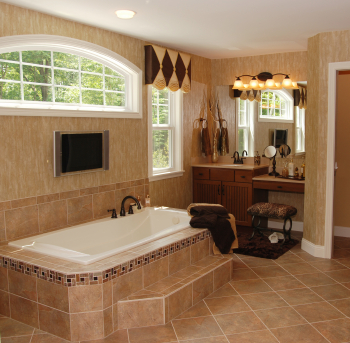
Lately, many bathrooms include flat screen televisions. This country style bathroom seems to truly be a place to spend time.

iStock_000007365049_ExtraSmall

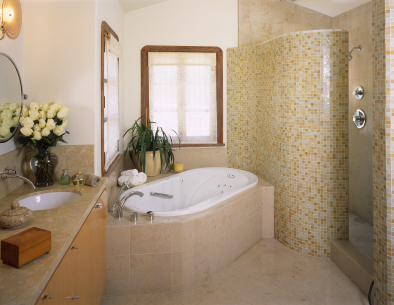
The bathroom picture below is quite a unique and artistic idea indeed. Natural but bright coloring and a wide open design with cabin shower mixed together with large tiles, small tiles, stone tiles and glass tiles.

iStock_000006903957_ExtraSmall

This bathroom features a sink that stems from the wall, small tile design and a large walk-in shower.

iStock_000002508627_ExtraSmall

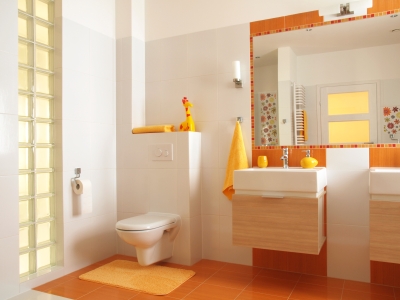
This next picture gives the homeowners looking for contemporary children’s bathroom ideas plenty to think about. A citrus color designed is tied together by the orange tile.

iStock_000019856108_ExtraSmall

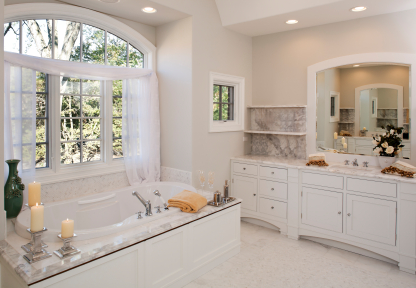
Finally we finish with an ultra-luxurious white toned bathroom. This space features custom cabinets, lots of marble and large jacuzzi tub. Mix in the large window and the small window and this bathroom will truly wake you up in the morning.

iStock_000015175813_ExtraSmall

We hope you enjoyed our collection of bathroom design and remodeling pictures and ideas. If you are looking for a contractor for your renovation project, use the form on the upper right hand corner of this page. Best of luck with your new bathroom!

The Average Cost of a Home Interior Paint Job

Painting a room is a quick and cost-efficient way to give any home a fresh, updated look. However, the job can be complicated for large houses or oddly shaped rooms. If you want to revive the appearance of your home with a new paint job, you may benefit from hiring a professional. There are various factors that determine how much a professional will charge for any interior paint job.

iStock_000001555992_ExtraSmall

When comparing the fees of painters, it’s important to understand what is covered. In most cases, the paint and other supplies are included in the estimate. You may be able to request certain supplies, such as better quality paint rollers, but you will have to pay more. Some professional painters also allow the customer to choose the paint brand. This will affect your overall cost as well.

One of the main considerations when calculating costs is the size of the room being painted. Many painters charge per square foot. You may find a professional who charges a flat hourly rate, but most will present you with a bid that is equal to their base fee. If you have an exceptionally large room to be painted, or if the room has high ceilings, you may be charged on the higher end of the scale.

The cost of a paint gallon varies depending on the quality of the product. Expect to pay between $10 and $50 per gallon. A professional paint job typically includes two coats of paint for each area. If you select a less expensive brand, it may be thinner and will need an additional coat. The painter may need to use a primer as well. Primers are also often necessary for covering stains or any existing paint that is exceptionally dark.

Before you obtain any estimates for your interior paint job, you will need to know the square footage of the rooms being painted. This will give you a rough idea of what to expect. The cost per square foot can range from $1.25 to $2.75. On average, you will pay between $200 and $400 per room. Some professionals offer discounts on additional rooms, so it pays to have several jobs handled by one person.

Experienced painters will perform prep work prior to painting any room. This will affect your overall cost. You can do the preparations yourself, but a professional will likely do a more thorough job. Preparations include moving or covering furniture, taping any molding and removing small objects from the work area. For an average size room, you will generally pay $200 to $400 more for prep work.

Seasoned professionals typically supply the drop cloths, tape, brushes, rollers and other materials. They will include the prices for these items in their estimates. However, if you are expected to pay for the supplies separately, it can add up to $50 on your total costs. When getting any estimates, be sure to ask the painter to clearly break down every fee so that you know what you’re paying for.

Where you live may affect the price of the interior paint project as well. The cost of living in each area determines what many professionals charge. Living in a larger city may mean higher costs. In addition to location, the extra labor required will affect final fees. High ceilings, wainscoting, baseboards, crown molding and other detail work may require an additional fee. The price can go as high as $200 per room.

You may be able to get certain discounts to lower your out-of-pocket expenses. If you hire a painter during the winter or late fall, you may see significant savings. Some painters also offer a price reduction if you agree to have your project completed in between other jobs. You may also save money by hiring a novice who charges by the hour and allows you to purchase all the materials. Hourly rates range from $25 to $50.

Before hiring anyone, get several estimates and request references. You may also inquire about seeing the painter’s work. Ask what types of paint and brushes will be used as well. If you are not satisfied with the quality of the paint, speak up. Cheaper paints usually don’t last as long as high quality products, which means you may need to repaint sooner than expected. To further protect your wallet, ensure that the painter is licensed and insured in your state.

The Average Cost of a New Fence with Installation

As the old adage goes, good fencing makes good neighbors.Now, there are other ways to deal with problematic neighbors – as this guide will tell you, but for those who are looking for a new fence for more organic, or aesthetic reasons, this post will help you sort out the costs that are associated with that.

Having an excellent fence installed can go a long way towards keeping your property secure and preventing issues with trespassing, misconduct and vandalism. Getting a new fence, however, can be a significant expense, one that includes the cost of the fence itself and the installation. That cost varies widely depending on the length and style of your fence, the materials you intend to use and your choice of installation professional.

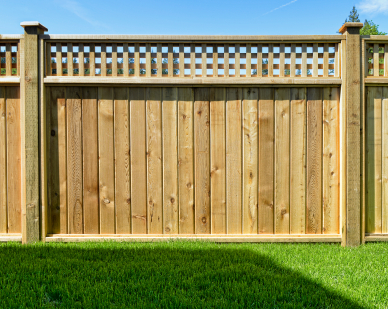
One of the most popular materials used to construct fences is wood. Depending on the type and grade of wood used, wood fencing can range from very inexpensive to very expensive. All wood fences share some degree of vulnerability to the elements, certain pests and fire, although pressure treating and certain coatings can mitigate that vulnerability somewhat. Wood also requires some degree of maintenance to stay attractive and functional. Nevertheless, many homeowners opt for wooden fencing because of its classic appearance.

iStock_000020891929_ExtraSmall

Common grades of wood used in fencing include clear wood, which has almost no flaws or imperfections; premium or #1 grade, which contains only small imperfections such as knots; standard or #2 grade and utility grade. Higher-grade wood is more expensive, of course, but the lack of imperfections can be aesthetically pleasing. It is worth noting, however, that many homeowners actually prefer the rustic appearance of lower-grade wood. Furthermore, if the fence is going to be painted, the presence or absence of surface imperfections is somewhat moot.

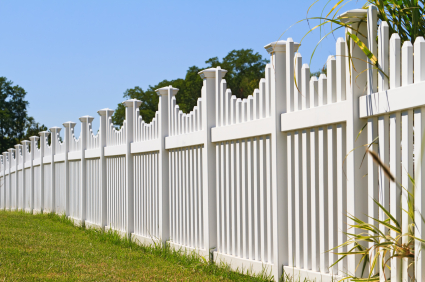
Vinyl fencing is growing in popularity because it is durable and requires almost no maintenance. Because it is the same color all the way through, it requires no painting or staining, and it maintains its new appearance for quite some time. Vinyl is available in a wide range of heights and styles and has few finish imperfections. However, it can also be more expensive than wood or metal.

iStock_000017612445_ExtraSmall

Several metal fencing options are available, ranging from aluminum to wrought iron. Aluminum is a fairly inexpensive, lightweight and versatile material available in many colors, heights and styles. It can be attached to many different types of posts, including rock, and is excellent for decorative or boundary fencing. Perhaps the biggest advantage of aluminum fencing is that it is impervious to rust and tarnishing, which means maintenance is almost completely non-existant.

For those who can afford it, classic wrought iron fencing is an excellent option. Although it is a metal, wrought iron has an almost wood-like grain because of its low carbon content. The most common types of wrought iron fencing are the Essex fence, which has an ornate, noble appearance, and the somewhat simpler Concord fence. Either type of wrought iron fencing is fairly expensive to purchase and install, but fortunately it requires little maintenance once it is in place.

The cost of fencing also depends on the style of fencing to be used. Privacy fences, which are essentially solid barriers, tend to be relatively expensive because they require a great deal of material. Three-rail fencing is often somewhat cheaper, though it does not provide as much privacy. The classic picket fence tends to be even more expensive than privacy fencing.

Average Fence Costs and Variables
With all of these options available, the cost of fencing varies widely depending on the material, style and length of the fence. On average, having a fence constructed and installed out of basic materials costs about $13 per linear foot, of which about $8 is for the fencing itself and about $5 is for installation. Mid-range fencing averages around $16 per linear foot, including about $10 for materials and $6 for installation. High-end fencing can be $19 or more per linear foot, with about $12 per foot for materials and another $7 for the installation. The actual cost of fencing varies widely around those numbers, of course: Market forces govern the cost of materials, and installation costs tend to be higher in affluent and heavily populated areas.

Since installation represents a huge portion of the cost of new fencing, up to 50 percent in some areas, it is always good to look for ways to reduce that cost. For wood fencing, consider hiring a carpenter to do the installation instead of paying extra for a specialized fencing contractor. Just make sure that the carpenter has prior experience working with wooding fencing. Consider taking care of some of the extra costs by removing existing fencing yourself. If you have the time and hands-on aptitude to do it well, you can save thousands by installing your own wood fencing.

The Average Cost of New Gutter Replacement

Good gutters play a significant role in the maintenance of any home because they direct water from rainfall away from the house. Without properly functioning gutters, your home’s walls or foundations may be at risk, and fixing that water damage can be extremely expensive. Many gutter issues can be repaired, of course, but to deal with really extensive damage you may find it more cost-effective to replace your gutters entirely. The cost of doing so depends primarily on the materials and the length required.

iStock_000015063085_ExtraSmall
The least expensive of all gutters are made from vinyl materials. Good vinyl gutters consist of PVC plastic, which is durable, resistant to denting and corrosion and easy to install. Furthermore, plastic is the same color from top to bottom, which means scratches and dings won’t stand out as they do on metal. The danger of vinyl comes from very cheap versions of the material, which are thin, brittle and highly susceptible to extreme cold. Taking materials and labor into account, vinyl gutters tend to cost between three and six dollars per linear foot, although the better quality materials tend to be in the upper portion of that range.

The mid-range material option is steel, which is perhaps the most durable of all metal gutter materials. Steel gutters have twice the tensile strength of aluminum and stand up much better under the weight of falling objects and other physical stress, making them particularly good choices in climates that get heavy snow or strong winds. Steel also has low rates of thermal movement and is less vulnerable to deforming. However, steel is heavy, which means the installers must cut the gutters into smaller sections that are easier to lift. Many homeowners also think steel gutters are less aesthetically pleasing than other types. Cheaper galvanized steel gutters tend to cost between four and eight dollars per linear foot; stainless steel is substantially more expensive at 15 to 20 dollars.

Another popular gutter material is aluminum, a lightweight and corrosion-resistant metal that is easy to cut and therefore easy to install. Professionally installed aluminum gutters are thick enough to be fairly durable, but the material still has several drawbacks. Aluminum deforms easily under the weight of falling objects or ladders and tends to expand and contract when exposed to extreme temperatures. Over time, the gutters can even pull away from the roof, letting water leak down the sides of the house. The cost of buying and installing new aluminum gutters tends to run from 10 to 15 dollars per linear foot.

Known in the industry as exotic materials, copper and zinc are gaining popularity among homeowners for aesthetic reasons. Blue-gray zinc gutters are generally considered attractive and blend well with zinc or slate roofing. However, they are somewhat vulnerable to thermal expansion and contraction and are difficult to solder, which can drive up the cost of installation and future repairs. Zinc tends to cost between 12 and 17 dollars per linear foot, depending on the market. However, seamless zinc is quite rare and can be much more expensive.

At the very top of the price range are copper gutters, which are impressively durable and never need to be painted. Depending on the climate, copper gutters tend to appear either green or brown, which can have a huge impact on a home’s aesthetic appeal and thus its resale price. The cost is high, however, as copper is an expensive metal that requires specialty installation to make sure nothing is wasted. Getting new copper gutters usually costs between 25 and 30 dollars per linear foot.

Actual Average Gutter Replacement Costs
The overall cost of new gutter replacement, then, depends on both the materials used and the overall linear footage to be replaced. Most homes need between 120 and 250 feet of gutters, depending on their size and the humber of stories. As such, replacement can cost as little as $500 for vinyl gutters on smaller homes and as much as $7500 or more for copper gutters on larger homes. There are relatively few additional costs, although removing the existing gutters can cost several hundred dollars for large homes.

When is comes to choosing new gutters for replacement, the cost of materials and installation is one of the biggest things to consider. Although weather, climate and other local factors play a role, generally the best policy is to pick the most durable material you can currently afford. Getting gutters that are resistant to damage may cost you more now, but avoiding future repairs will allow you to recoup that cost over time.

iStock_000011945858_ExtraSmall

Kitchen Remodeling Ideas and Pictures

If you are coming up on a kitchen remodel or renovation and you are looking for some great designs and ideas to incorporate into your plans, have a look below. We have put together a collection of kitchen pictures that you can then use to share with your builder. Use the form on the right to get in touch with a local top rated kitchen remodeling company if you have yet to take that step. We hope you enjoy these great kitchen ideas!!

Here is a modern traditional kitchen. Notice the island which mixes white into a otherwise wood look.

iStock_000003687778_ExtraSmall

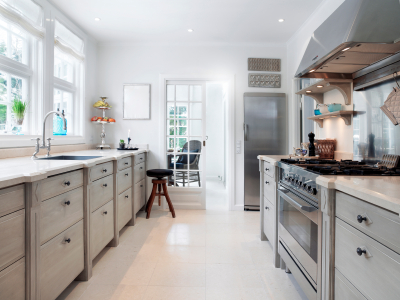
The long and narrow kitchen below uses a great deal of white colors to accentuate the natural light. The mix of stainless steel appliances and antique finished cabinets is more common in kitchen remodeling plans lately.

iStock_000019343636_ExtraSmall

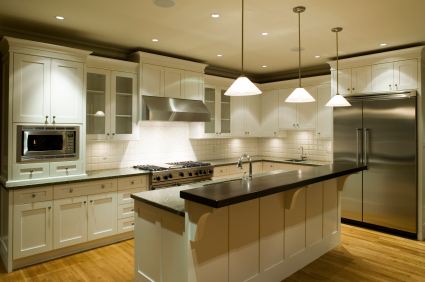
The kitchen below also incorporates a great deal of white that blends with the stainless steel appliances. However, this kitchen is contemporary / modern because of the cabinets and lighting.

iStock_000006930189_ExtraSmall

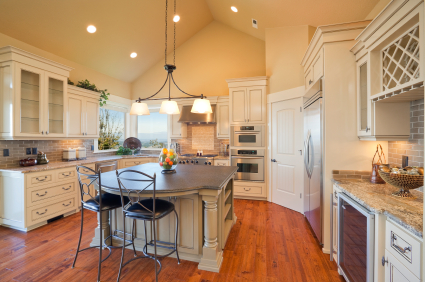
This luxury kitchen below is designed to accentuate the vaulted ceiling. The built in wine space on the right includes a wine rack above and wine cooler below. Glass cabinetry and classic lighting and chairs give this kitchen a unique, sophisticated look.

iStock_000014686306_ExtraSmall

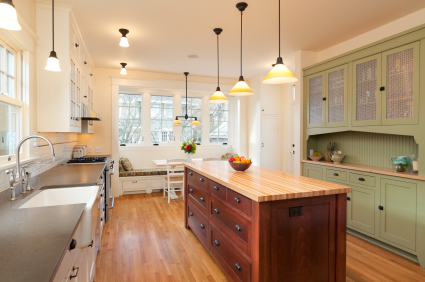
Below is a bright, modern country style kitchen that features contrasting colors and a stand out kitchen island.

iStock_000020649751_ExtraSmall

To contrast the kitchen above, this pic below shows a modern city style kitchen. This type of kitchen is great for a condo in city highrise. True stainless steel with dark cabinets and white oversized tile flooring, this kitchen is perfect for city-slickers.

iStock_000006784071_ExtraSmall

Many people these days are building their stovetops into their island. This usually comes with an exhaust fan directly above the cooking unit which can often be a centerpiece of the kitchen.

iStock_000016863827_ExtraSmall

Some kitchens feature a backsplash that is worth building around. In this case, the backsplash sets the look of the kitchen and gives is a country and comfortable feel.

iStock_000002578170_ExtraSmall

This kitchen is designed to accentuate the eccentric vaulted ceiling.

iStock_000006900176_ExtraSmall

This kitchen exudes a look and feel of a rustic cabin in the woods.

iStock_000019724860_ExtraSmall

Here is a modern version of the 1950’s kitchen. The use of light wood and the general color scheme give it the 1950’s style look while the modern sleek appliances and contemporary exhaust fan bring it in to the future.

iStock_000020336759_ExtraSmall

We hope you enjoyed our collection of kitchen pictures and ideas!

The Pros and Cons of Terracotta Roofing Tiles for Your Home

Terracotta or fired clay tile has been used as a roofing material for thousands of years. Tiles were used in the Bronze Age in ancient Greece as early as 2500 B.C., in ancient Middle Eastern civilizations and in China in the Neolithic period approximately 10,000 years ago. Terracotta tile was commonly used as a roofing material by the ancient Greeks and Romans.

iStock_000022304029_ExtraSmall
Tiles have been used as roofing on buildings in Europe from Roman times to the present. In some European cities like London, fired clay tiles were required because of their fireproof qualities. Early use of clay roof tiles in the United States has been documented at Jamestown and the settlement of Roanoke Island in 1585. Terracotta tiles were used on Spanish missions throughout Florida and the western states. Terracotta tiles are associated with specific architectural styles like Spanish Mission and Italianate Villa, but complement almost any building style.

Benefits of Terracotta Roof Tiles

Terracotta clay roof tiles are attractive, impermeable and durable. Terracotta is a natural material, made from clay that is fired at a high temperature until it vitrifies or fuses. Vitrification creates a hard, waterproof surface that withstands rain, snow, cycles of freezing and thawing and wears well in coastal areas with salt air. They are fireproof, last up to 100 years or more and are almost maintenance-free. Because they are made from clay, terracotta tiles are easy to recycle and do not harm the environment.

Clay roof tiles are traditionally red, which is a moderately reflective color. Light-colored roofs, also called cool roofs, have higher reflectance and emissivity than dark-colored roofs. More than 90 percent of the roofs in the United States are of dark-colored materials which are low-reflectance and can reach temperatures of 150 to 190 degrees F. Cool roofs stay cooler, sometimes as much as 70 degrees cooler than a dark-colored roof, resulting in lower energy costs and more comfortable building interiors.

With the interest in saving energy and using more environmentally sustainable building techniques, manufacturers have developed fired clay tiles that achieve higher reflectivity and emissivity indices. These tiles, available in many colors including the traditional red-orange terracotta, achieve cool roof values. Several manufacturers produce clay tiles that meet Energy Star specifications.

Clay tiles are made in three grades according to American Society for Testing and Materials (ASTM) specifications. Grade 1 tiles withstand severe freeze-thaw conditions and are not porous. They can be used anywhere in the United States. Grade 2 tiles withstand moderate freeze-thaw cycles and are less water-resistant. Grade 3 tiles are more permeable and may flake in freeze-thaw cycles. Grade 3 tiles are recommended for areas with mild climates like Florida and southern California.

ASTM sets values for transverse breaking strength for tiles of different profiles or curvatures. These values correlate with the ability of a tile to withstand stresses including severe weather, hail and handling and installation.

Some manufacturers apply glaze to tiles which adds color and additional surface protection. Glazed tiles are often untreated on the underside which reduces weight, expense in manufacture and allows the tile to breathe and expel moisture from the untreated surface. Many manufacturers provide guarantees against color fading for a specified number of years.

Terracotta tiles are available in several shapes that give a unique look to the roof architecture. There are several interlocking systems that ensure that the tiles protect the roof and remain in place. Each system has a required amount of overlap that connects tiles on either side, above and below to prevent moisture from seeping between the tiles.

Mission clay tiles, also called Barrel tiles and S-curved tiles, have a highly rounded curve which gives the traditional look to Spanish style buildings. Flat clay tiles, also called English Shingle or Closed Shingle, are used on several styles of buildings. Flat pan tiles with curved cover tiles were used on classic Doric order buildings like those in the Acropolis at Athens.

Disadvantages of Terracotta Roof Tiles

Installation of clay tiles requires experienced, trained contractors. Clay tiles are more difficult to install than other types of roof materials and must be properly installed to withstand rain, severe weather and cycles of freezing and thawing. Manufacturers recommend horizontal and vertical overlap values to ensure that water does not penetrate between the tiles. Tiles must be properly anchored to flashings and eaves to protect underlying roof material.

If clay roof tiles leak, the underlying roof structure can be damaged. Leaks can travel beyond the source of the breakage or gap, so when replacing tiles or repairing leaks it is important to examine adjacent areas.

Terracotta tiles are breakable. Once installed, tiles should be walked on with care. If roof access is required, tiles should be removed or boards placed across a span of tiles to distribute weight. The most common reason for breakage is from falling tree limbs.

Clay tile is not recommended for low-pitch roofs. Clay roof tiles can be heavy, so must have good roof and wall support. Some manufacturers offer light-weight clay tiles that weigh less than 600 pounds per square in compliance with many building code requirements for reroofing.

Costs can increase depending on the distance tiles are shipped from the manufacturing source to the consumer.

The Most Common Types of Roofing Materials in the Pacific Northwest and Why

Since a roof serves to keep out the elements and protect the house below, the choice of roofing materials varies heavily from region to region across North America. In the Pacific Northwest, homeowners need to deal with heavy rainfall and very high humidity levels, so every roof needs to be water-resistant. Choosing the right materials is extremely important because water damage can cost tens or even hundreds of thousands of dollars to repair. Conversely, a roof that drains well and resists water damage can stay in place for a long time before needing replacement.

Probably the most common roofing material used in the Pacific Northwest today is asphalt. Custom-designed asphalt shingles can closely imitate the appearance of wood, ceramic, slate or metal shingles at a significantly lower cost, and the material is naturally durable and resistant to water and heat. Still, because asphalt is a porous material, these shingles are somewhat susceptible to mold or algae growth and require a degree of maintenance. Furthermore, many home buyers prefer the natural appearance of wooden shingles, so opting for asphalt can reduce the sale value of the home. Generally speaking, an asphalt roof will last about 20 to 30 years.

Thanks to their widespread availability in the region and relatively low cost, cedar and redwood are two of the most popular roofing materials among Northwestern homeowners. Both of these woods are generally considered to be fairly attractive and, if properly maintained, can last up to 50 years before needing replacement. Furthermore, redwood or cedar shingles tend to add to the value of the house. However, a roof made from cedar or redwood is inherently vulnerable to rot, algae or moss. Water-resistant treatment can reduce these risks, but homeowners who opt for one of these materials should still expect to pay for frequent maintenance. Thus, the benefits of a classic, natural-looking roof must be weighed against the cost and effort required to keep the roof maintained.

Metal shingles, most commonly steel, offer excellent water resistance and typically require less maintenance than other roofing materials, making them ideal for hands-off Northwestern homeowners. Most metal roofing products come in a “standing seam” style that consists of a series of interlocking panels. Like asphalt shingles, metal shingles can be custom-designed to mimic other materials such as cedar, redwood or slate. They tend to be more expensive than asphalt, but can last up to 50 years if properly installed and maintained.

Many recently constructed homes in the Pacific Northwest use roofing tiles made from clay or concrete. Vitrified clay tiles, which are almost glass-like thanks to a special hardening process, are available in a variety of colors and styles. Because they are almost impervious to water damage, clay tiles can last 100 years or more before needing replacement, but they are heavy and quite expensive. Concrete tiles are cheaper than clay, but retain the same weight disadvantage and do not last quite as long. Despite their disadvantages, tile products have become increasingly popular in the rainy Northwest over the last quarter-century.

Clay Roofing Tiles

Regardless of material, every home in the Pacific Northwest needs a roof designed to deal with the heavy rain. As a rule, flat sections of roofing are not desirable because they allow water to pool and cause mold, mildew or other damage. Most homes use V-shaped gable roofing or four-sided hipped roofing to allow water to run off easily.

Whether they opt for asphalt, wood, metal, tile or another roofing material, homeowners in the Pacific Northwest need to be conscious of the weather in their region and the hazard posed by the heavy rainfall. Every roof needs to be designed with water resistance in mind and frequently inspected and cleaned to prevent water damage. Each material comes with advantages and disadvantages in terms of weight, cost, durability and maintenance. By taking all of these factors into account, Northwestern homeowners can select the right roofing materials to meet their homes’ individual needs.

The Average Cost of New Replacement Windows for Your Home

Even before the economy took a nosedive, homeowners were looking for ways to save money. Home improvements can improve your property’s value while increasing energy efficiency. If you’re looking to replace some or all of your home’s windows, here’s what you can expect to pay. We have laid out the average cost of new home replacement windows.

New Home Windows Best Case Scenario
You will save a lot of money if your existing window frames are in good condition. If the frames are free of major defects, you can replace just the windows and save up to half of the cost of replacement windows.

Only a certified contractor or other window installer should remove the old window and inspect the frame for any damage. That same contractor will be able to repair a salvageable frame or remove a damaged one, but any additional work will end up costing you money. Most contractors work for about $100 an hour, and frame replacement can easily add another $200 to your total bill.
After you have the measurements, you have enough information to order the replacement windows. The window size is fixed unless you want to enlarge the opening. For load bearing walls, that process is both time consuming and expensive, and you should expect additional labor to cost another $200-$300.

Average Window Materials and Prices
The windows themselves come in a variety of materials. Vinyl is relatively inexpensive and easy to maintain, but it usually doesn’t come in too many colors. Unfortunately, most paints will quickly fade and crack on vinyl after a few years. However, paint manufacturers like Benjamin Moore have begun selling paint specifically designed for vinyl surfaces.

Energy Efficient Vinyl Windows Being Installed Other common materials include wood, aluminum, and fiberglass. Wood is an excellent insulator but is expensive compared to vinyl. It also holds up poorly in humid regions and can rot over time especially if rainwater is allowed to accumulate.

Aluminum is a lightweight metal that won’t corrode like iron. Many homeowners go with aluminum clad windows that encase the exterior surface in aluminum but leave the interior window wood for a beautiful appearance. Aluminum clad windows cost more but offer excellent weather resistance and insulation.

Fiberglass is a relatively new window material, and it offers a number of advantages over vinyl, wood, and aluminum. Like aluminum, it won’t corrode, rust, or rot. It can hold paint well, and it will insulate better than the other materials. Fiberglass contracts and expands with the temperature at roughly the same rate as glass, so it won’t leak as much air during the winter and summer months. By filling frame cavities with foam insulation, fiberglass windows offer the best insulation out of any type of window.

An average standard home window can cost as little as $300 for vinyl but 2-3 times as much for fiberglass. Wood and aluminum clad windows typically cost about $500-$700, and they offer a good compromise between cost and energy efficiency.

Triple-pane windows will also drive the cost up over double-pane windows, but they offer superior insulation. Insulating gas between the panes will also increase the overall cost but help save money on heating and cooling bills. Have a damaged frame? A new one will increase the cost by 50-100 percent including the additional labor required to tear out the old frame and install the new one.

Bottom Line
At a minimum, expect to pay on average at least $300 for materials and $100 for labor per window. If your home has 10 windows and you’re replacing all of them, the job will cost at least $4,000.

Once you add in extras like triple-pane windows or fiberglass frames, the material costs can increase up to about $1,000 for a standard window. That same 10 window home will cost about $11,000 instead.

Every frame that needs to be replaced will cost another $200-$700. With all of the bells and whistles for each window, you’re looking at anywhere from $1,000-$1,500 per window. Larger windows and additional work can add several thousand dollars more to the eventual cost.